Onboarding new practices and locations
Enable Synchronizer setup for customers either by automations within your app or manually through the developer portal.
Overview
Creating or Finding an Institution (Developer steps)
- Option 1: Use automated processes and the API to enable Synchronizer setup.
- Option 2: Use the developer portal to manually enable Synchronizer setup.
Setting up the Synchronizer (Practice steps)
For Practices new to Synchronizer
- Practices with server-based (on-prem) EHRs
- Practices with cloud-based EHRs
- Practices with EHRs which aren't supported for self-serve setup
Authorizing new Developers (Practice steps)
For Practices that already use Synchronizer
Creating or Finding an Institution (Developer Steps)
Before the practice can set up the Synchronizer, you'll need to create an Institution for them.
Option 1: Use automated processes and the API to enable Synchronizer setup.
This is the fastest and easiest way for you to onboard customers. In order to use automated processes to smooth the way for practices to set up the Synchronizer, set up the following processes in your app.
1. Program your app to exchange practice details for a Synchronizer set up link.
You can program your app to set up an Institution within NexHealth using the details provided to you by your customer, and receive back a Synchronizer set up link for your customer. You can do this through the onboardings endpoint. If you (the developer) have access to this data (name, zip-code, website, office manager/IT admin's email) we recommend passing it in via the API, because it creates less steps/work for the practice user. However, you don't need to collect these details in your app. If the you don't pass us this info, we'll just ask the practice to provide it to us.
2. Automatically send the Synchronizer set up link to your customer.
Program your app to automatically email the setup link to the practice or embed the link in your app. Then, the practice will take it from there!
Option 2: Use the developer portal to manually enable Synchronizer setup.
This method will work, but is more time-intensive for each onboarding.
1. Enter the Developer portal and select Institutions.
2. Select Create institution
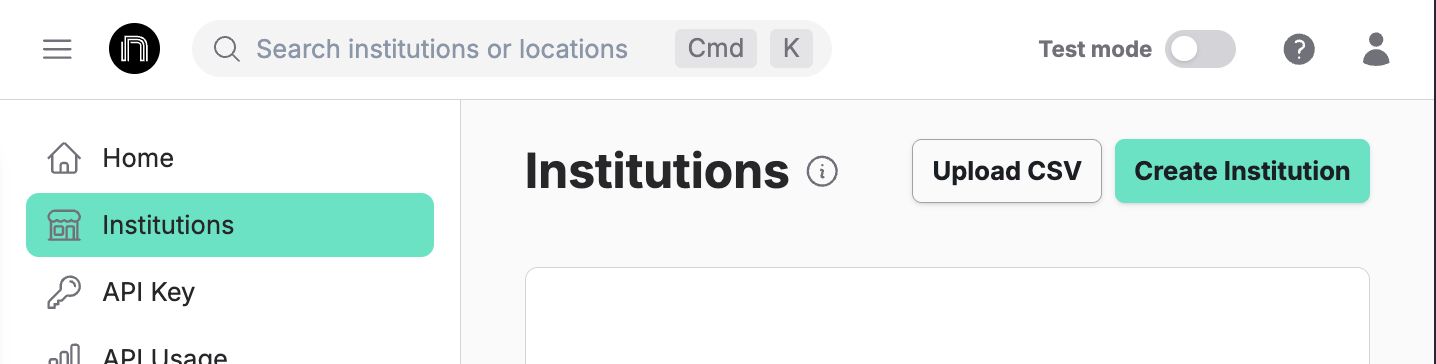
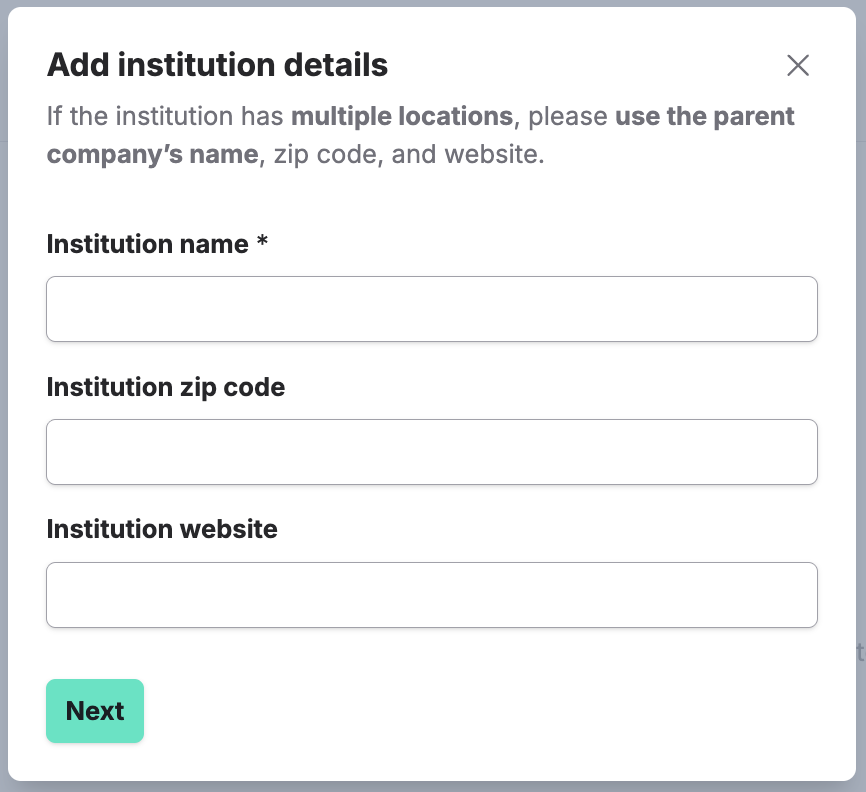
3. Add the company's name, and click Next.
Optionally, you can also add the company's zip code and website (if you do not enter them, the practice will have the opportunity to enter these details when they follow the setup link).
4. Click Copy to copy the setup link provided.
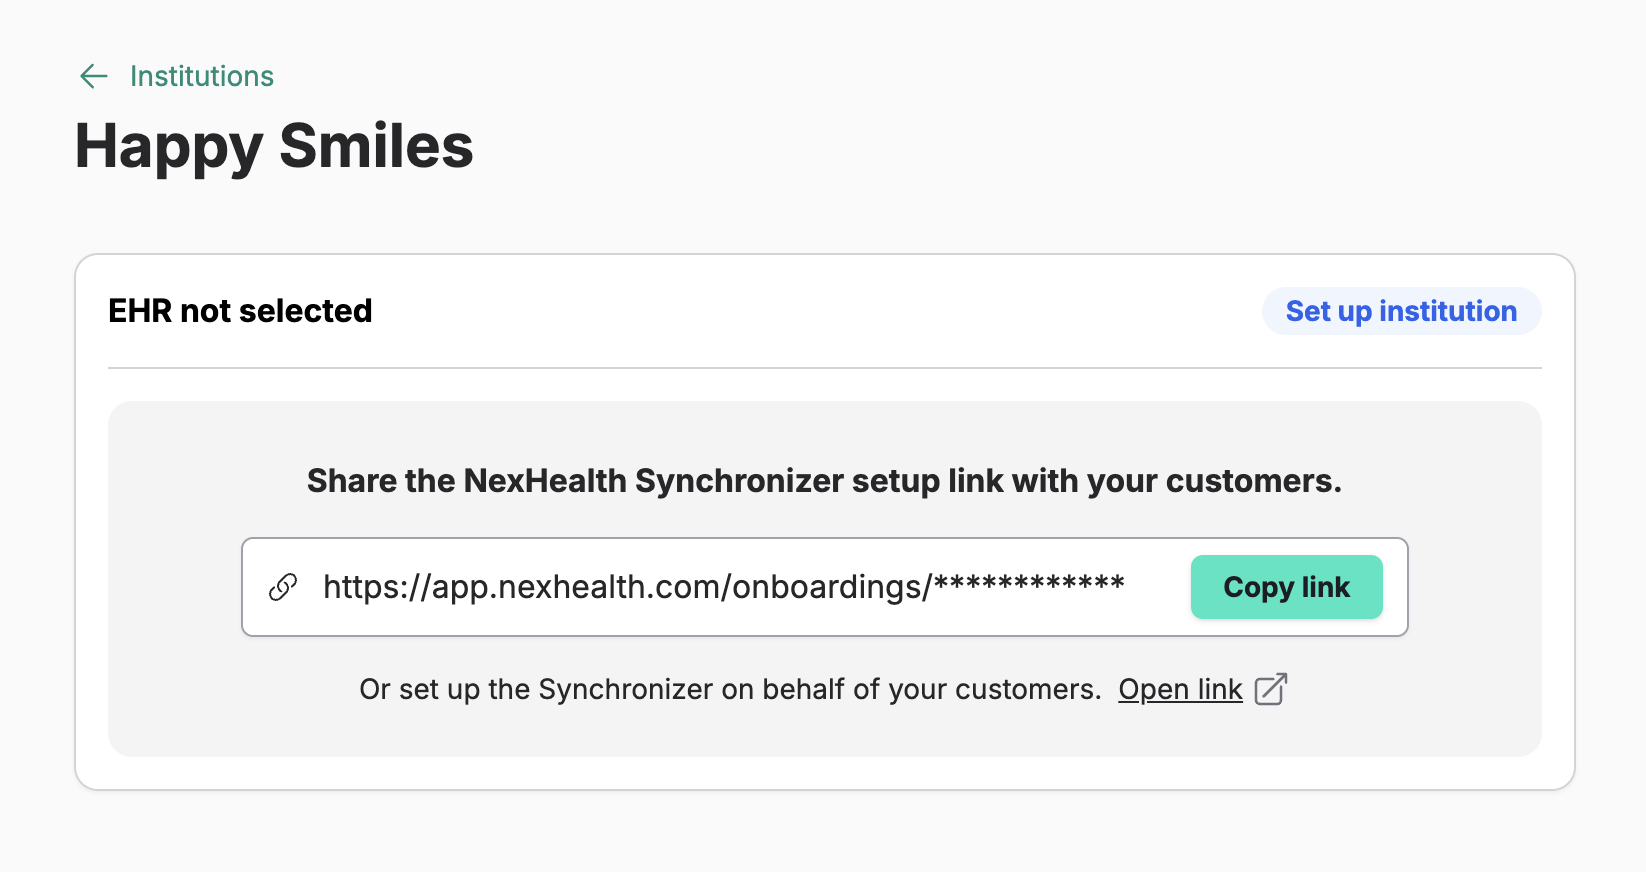
5. Send the setup link to your customer.
Instruct the customer to click the link and follow the instructions.
(Optionally, you can click the link yourself and go through some of the setup process yourself.)
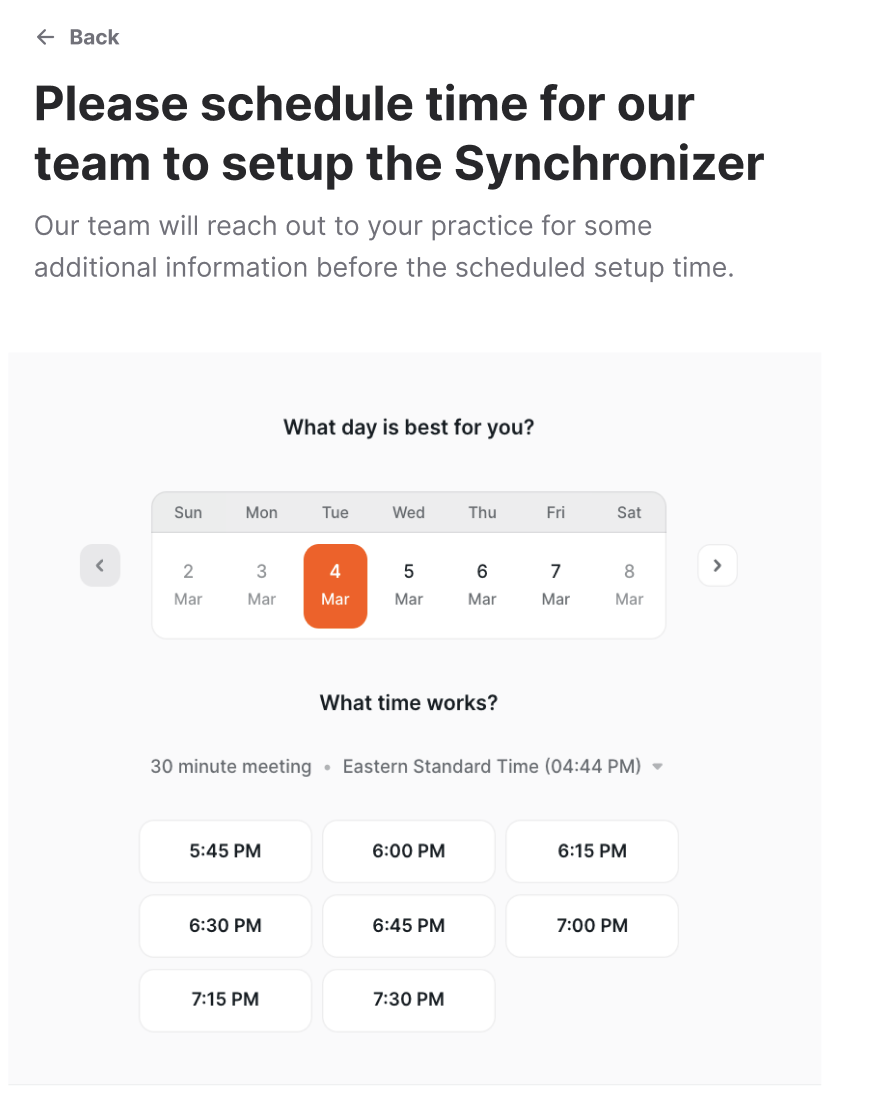
Setting up the Synchronizer (Practice steps)
When the practice receives the setup link from you, they will…
- click the link, then click Get started.
- fill out their company name, zip code, and website (if you haven't filled them already), then click Save and Continue.
- select their health record system (EHR), then click Save and continue.
Then, they'll continue the setup differently based on whether they have a server-based EHR, a cloud-based EHR, or an EHR without self-serve setup.
Practices with server-based (on-prem) EHRs
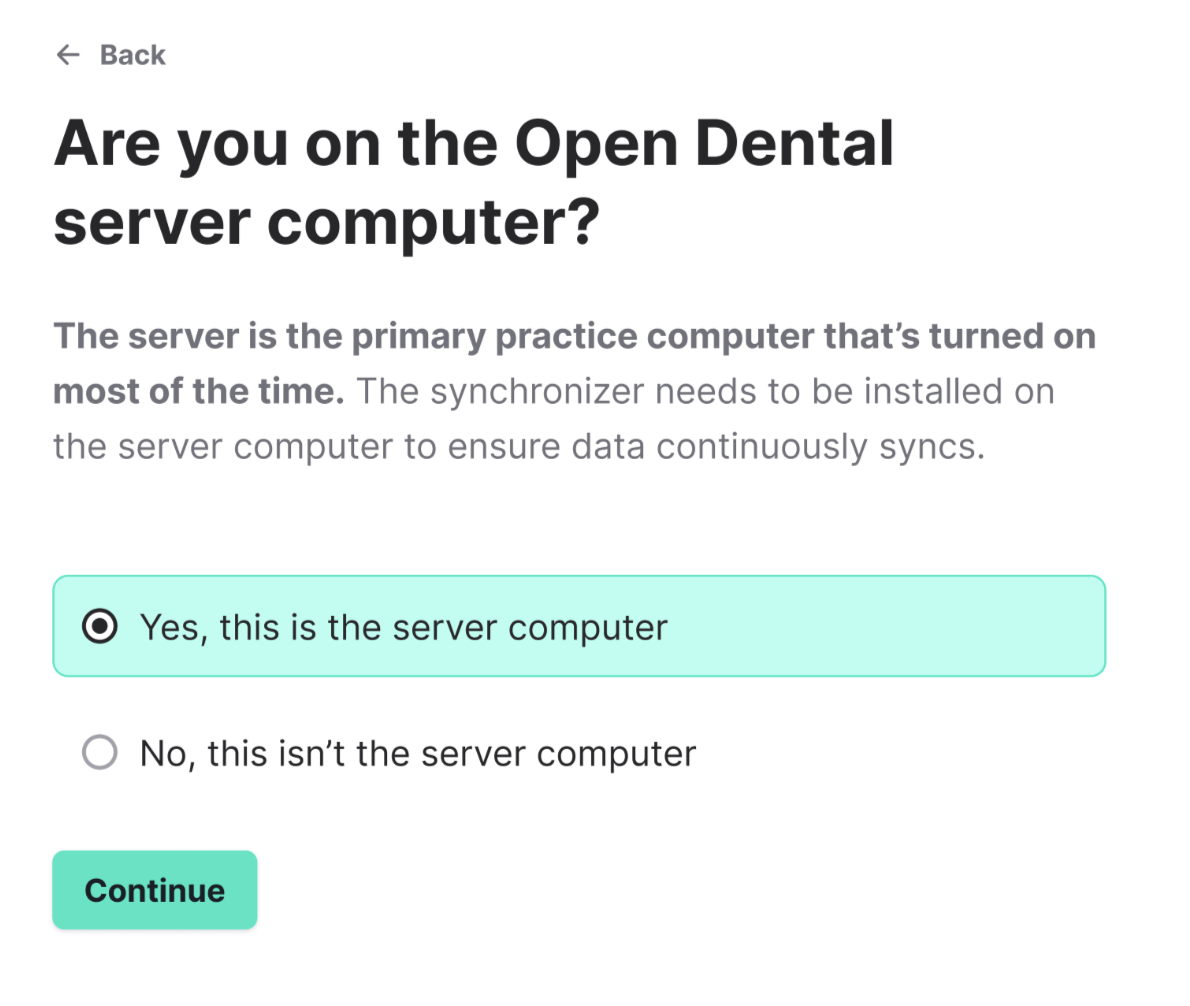
1. The setup will ask if you're on the office's primary (server) computer.
- If they click "yes," they'll continue to the next step.
- If they click "no," they'll see a screen asking them to share the link with their IT manager or open the link on their server computer.
2. The practice will click Download.
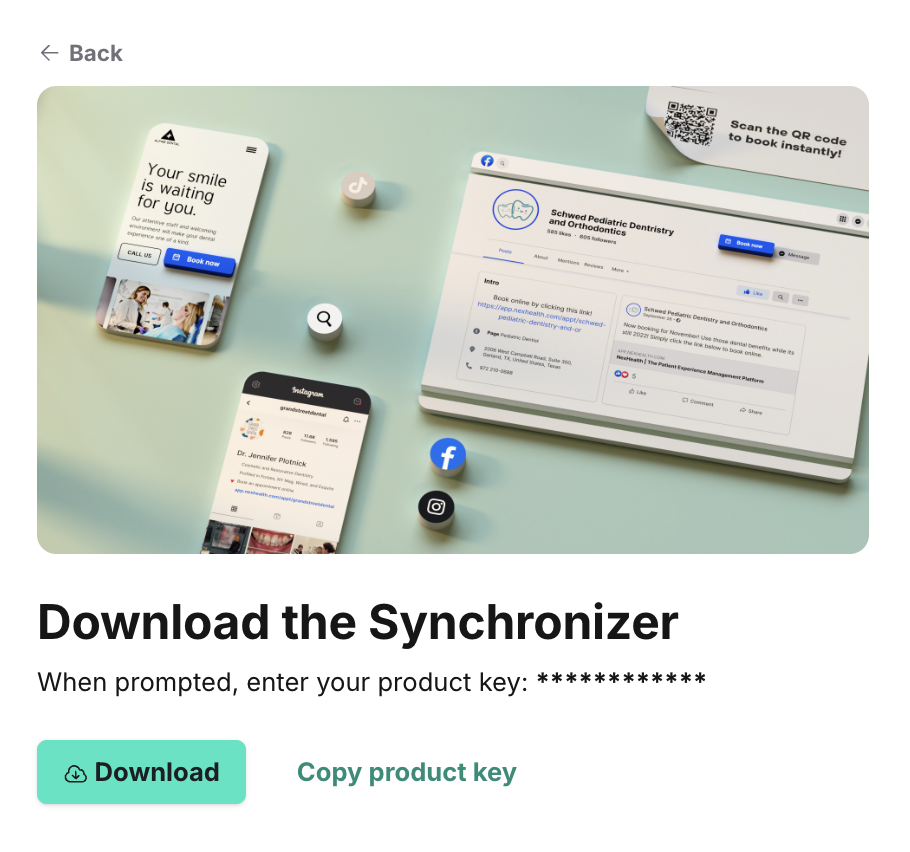
3. The practice will then run the .exe file.
They will enter their product key when prompted. This may take 10-30 minutes to complete.
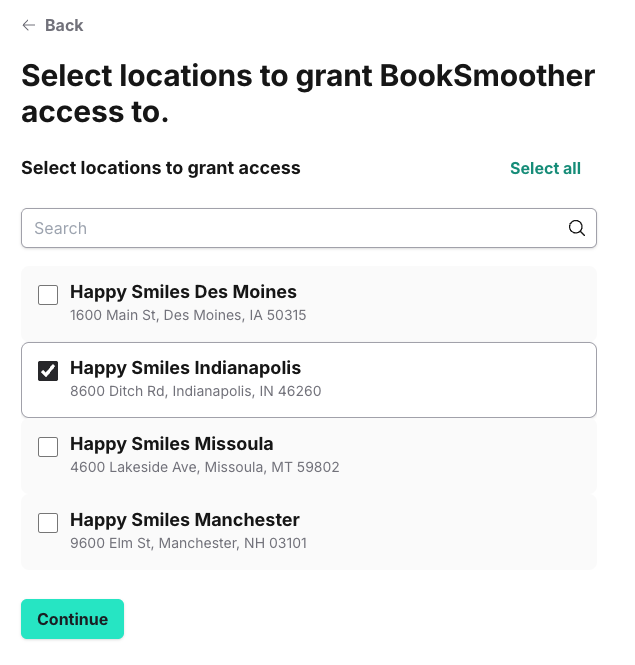
4. The practice will select which location(s) to grant access to, then click Continue.
With that, the setup will be complete! They'll receive an email confirming the setup.
Practices with cloud-based EHRs
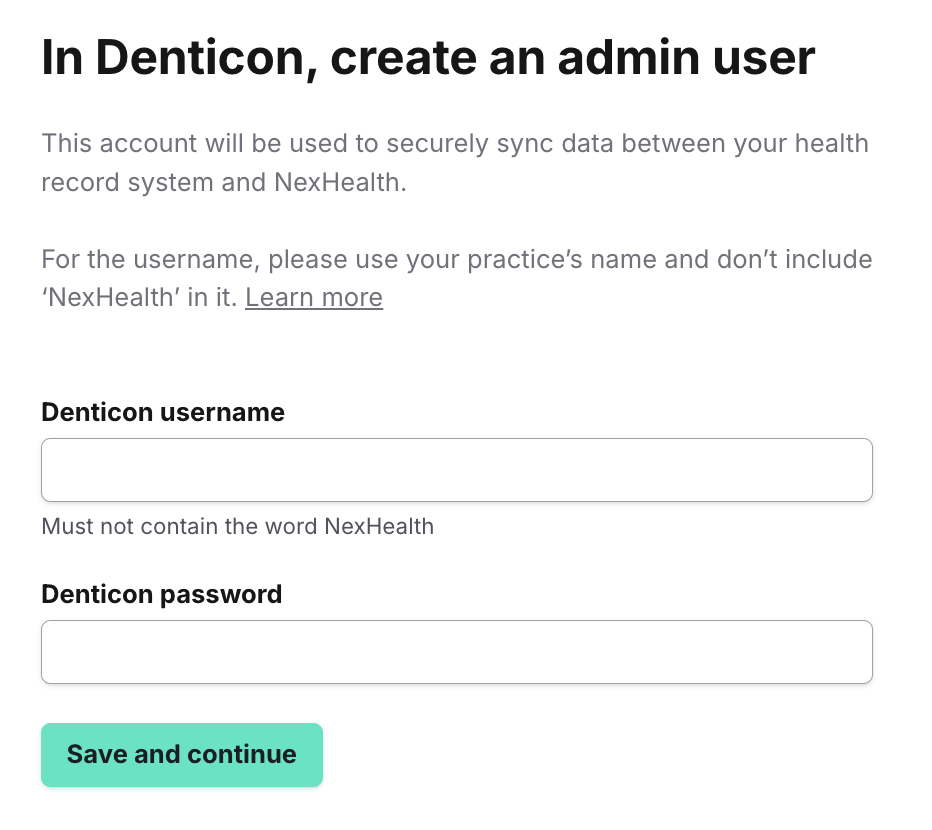
1. The practice will create an admin user that only the Synchronizer will use.
This will vary based on EHR. See more detailed user setup instructions by EHR.
- Denticon Credential Provisioning
- eCW Credential provisioning
- Athena Credential Provisioning
- ModMed Credential Provisioning
- Cloud9 Credential Provisioning
- Dentrix Ascend Credential Provisioning
-
NextGen Office Credential Provisioning
2. The practice will enter admin user credentials in the practice-facing setup UI.
3. The practice should then download the appropriate Chrome extension on all computers using the EHR.
With that, the setup will be complete! They'll receive an email confirming the setup.
EHRs that do not have self-serve setup.
Authorizing new Developers (Practice Steps)
If either you or the practice enter details that match an existing institution, the practice will follow a shorter flow. The practice will receive an email which asks them to grant access to their EHR for your app.
1. The practice will click the link to grant access.
If they only have one location, they're now finished!
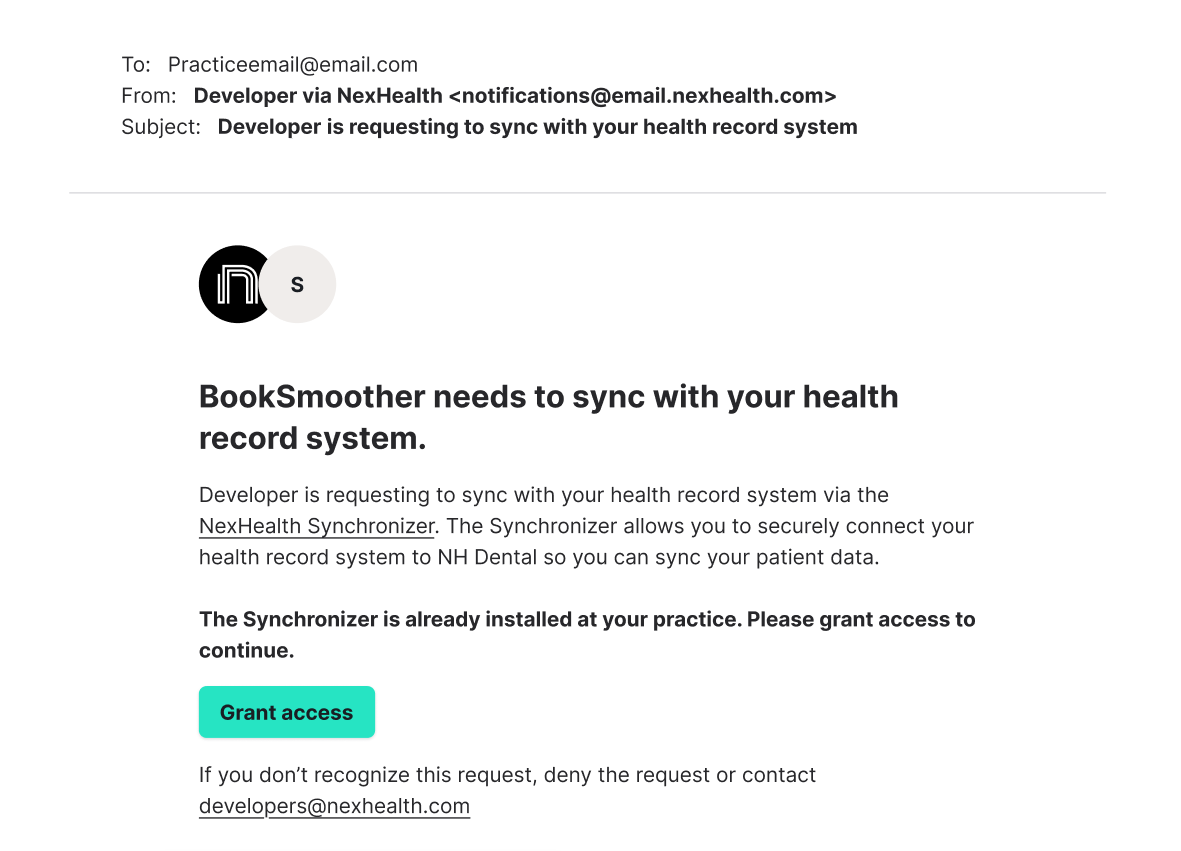
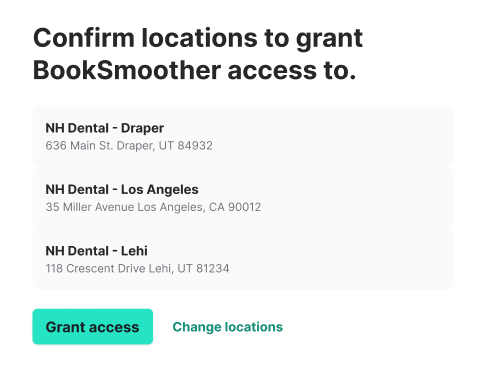
2. Multi-location practices will select which locations to grant access to, then click Grant access.
Then, they'll be done!
Developer Followup
At any time, you'll be able to see status of installations in the Institutions section of your left side bar in the Developer portal.
Updated about 1 month ago