Scheduling Quickstart
This guide will walk you through the process of booking an appointment through the NexHealth API from scratch.
If you complete this entire guide, you will have a better understanding of building scheduling products using the NexHealth API.
This guide is broken up into 2 levels. Work through both levels sequentially. Do not skip levels.
Level 1 - Sandbox Appointment (10 minutes)
In this level, you will get a developer portal account setup and book an appointment in a sandbox environment. This sandbox environment is a seeded Electronic Health Record system approximation and doesn’t connect to a real EHR system.
This is the fastest way to get a basic feel for using our API scheduling appointments.
1.1 - Developer Portal Signup
If you haven’t already, you will need to get setup with a developer account.
You can sign-up for a developer account here: https://developers.nexhealth.com/signup
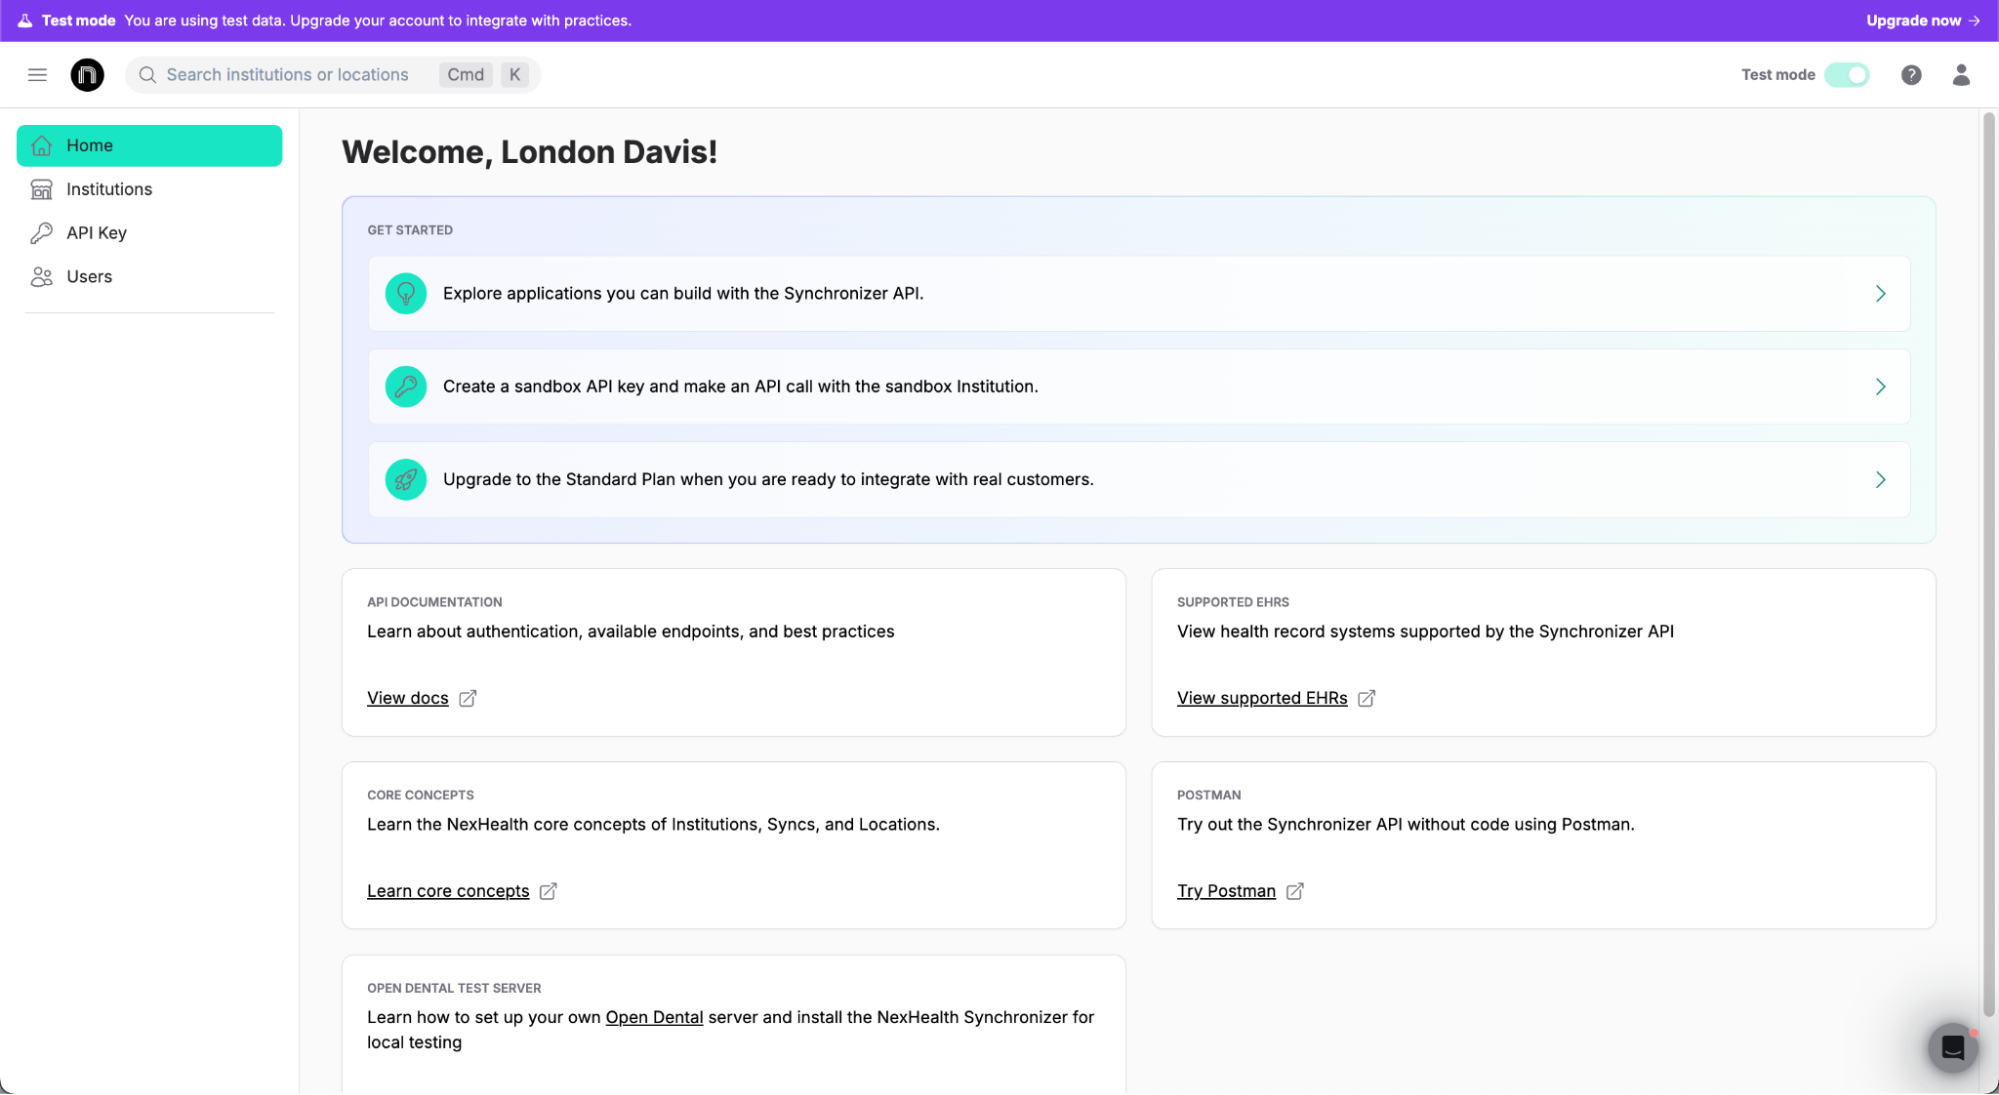
Once you have successfully created a developer account, you will be met with a page that looks like this:
1.2 - Organization
The following items will be required to book this test appointment:
- A patient - the person who is receiving care
- A provider - the person who is providing care
- An operatory - the physical room (or chair) that the appointment will take place in. (Note: not all EHRs have the concept of operatories.)
- A start time - the date and time that an appointment is scheduled to start at
- An end time - the date and time that an appointment is scheduled to end at
- An institution (parent company) and location (practice) - these can be conceptualized as NexHealth specific constructs that we use to identify what medical or dental practice this appointment will be associated with. An institution is a grouping of locations - one or more locations can belong to an institution.
- An API key (or bearer token) - a sequence of characters that identifies and authenticates who you are as a user of the API
The NexHealth Sandbox environment will come pre-populated with all of the information above that we will need to book an appointment; however, we will need to collect all of it in one place before we can make the API call to book the appointment.
In order to keep the process of gathering this information organized, we have created a spreadsheet that we recommend you use to store this data.
In order to make use of the spreadsheet:
- Use the link above to go to the spreadsheets page
- Click File > Make a copy
- Rename the spreadsheet if you would like
- Click the “Make a copy” button
1.3 - Collect the Sandbox API key
Now that we have a developer account setup and we have a workspace to store the data that we need to gather, let’s start by collecting our sandbox API Key.
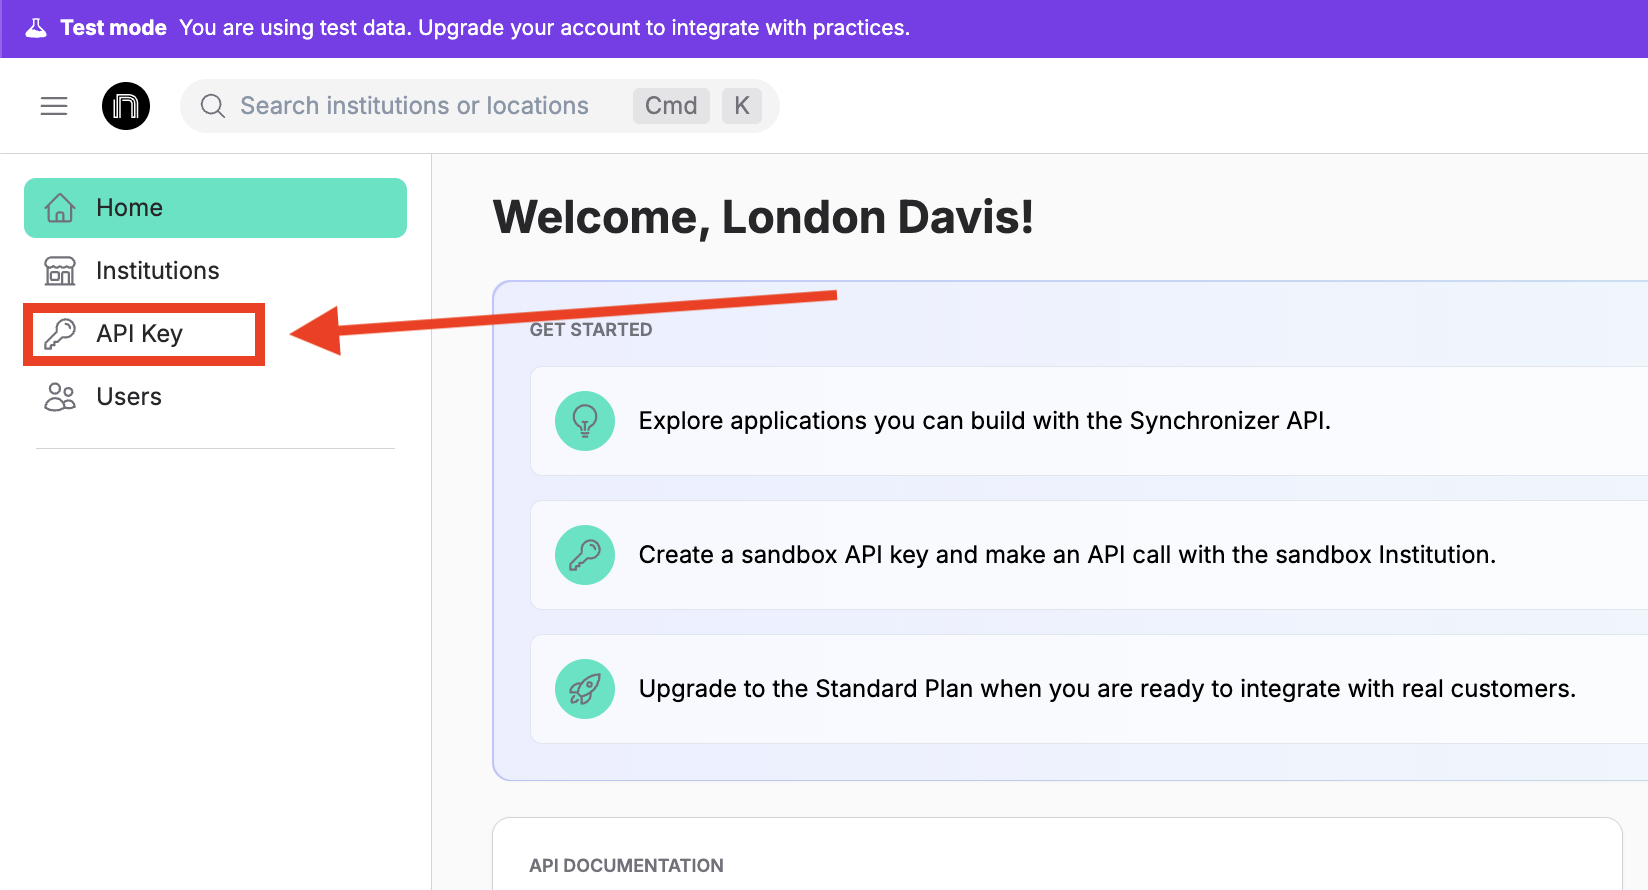
In the developer portal click the “API Key” tab in the navigation panel.
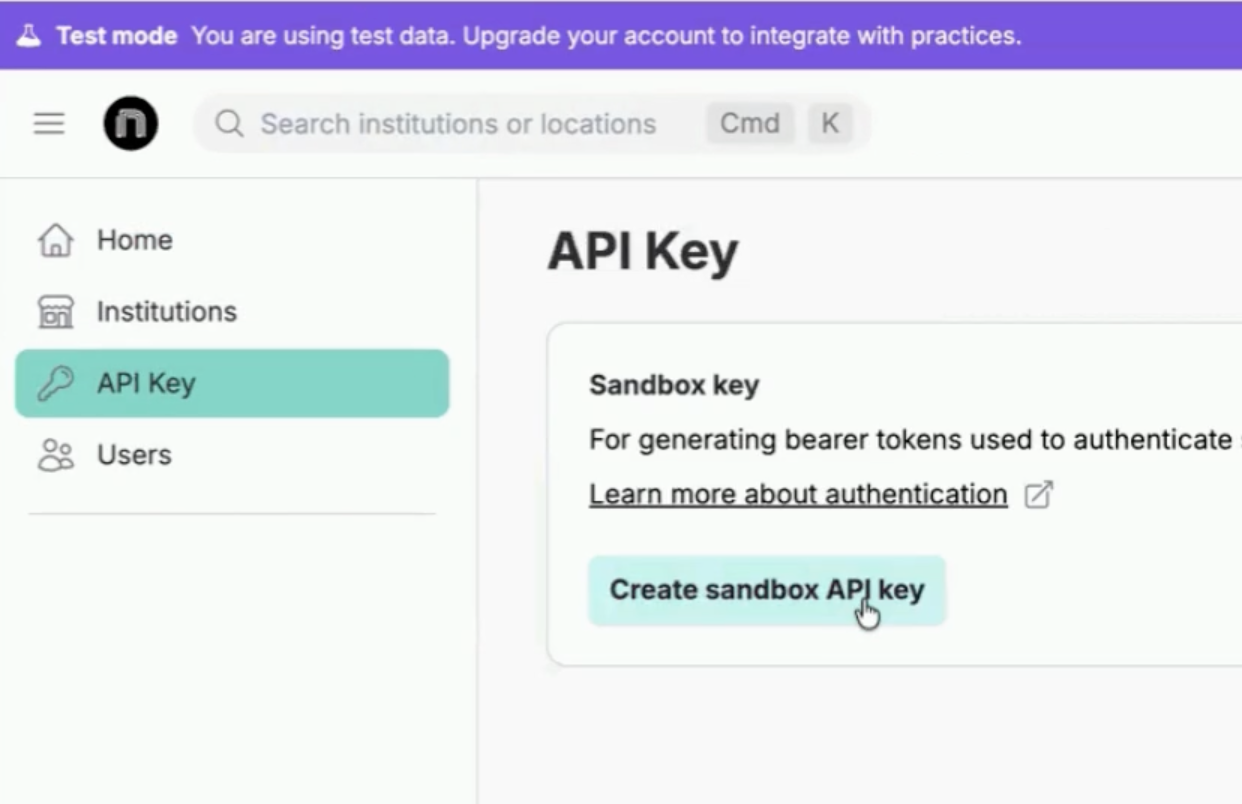
Then click the “Create sandbox API key” button.
In the modal, you will see the API key that has been generated for you.
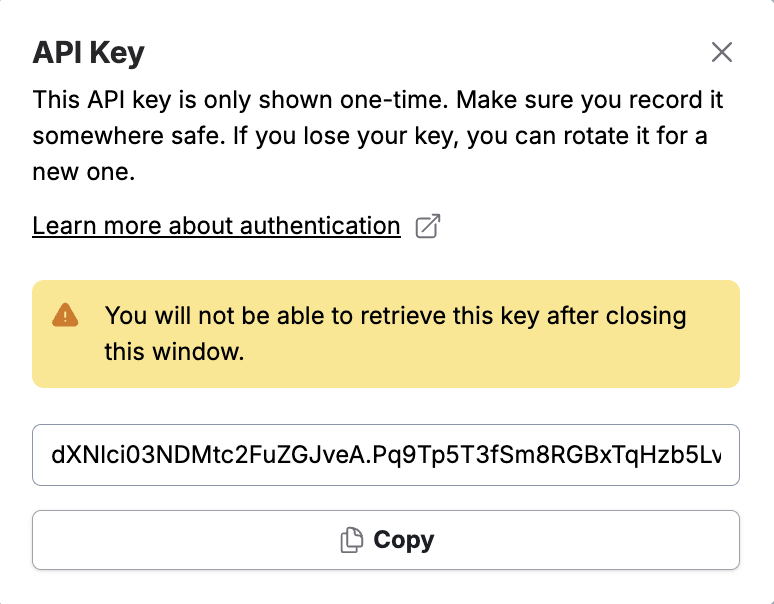
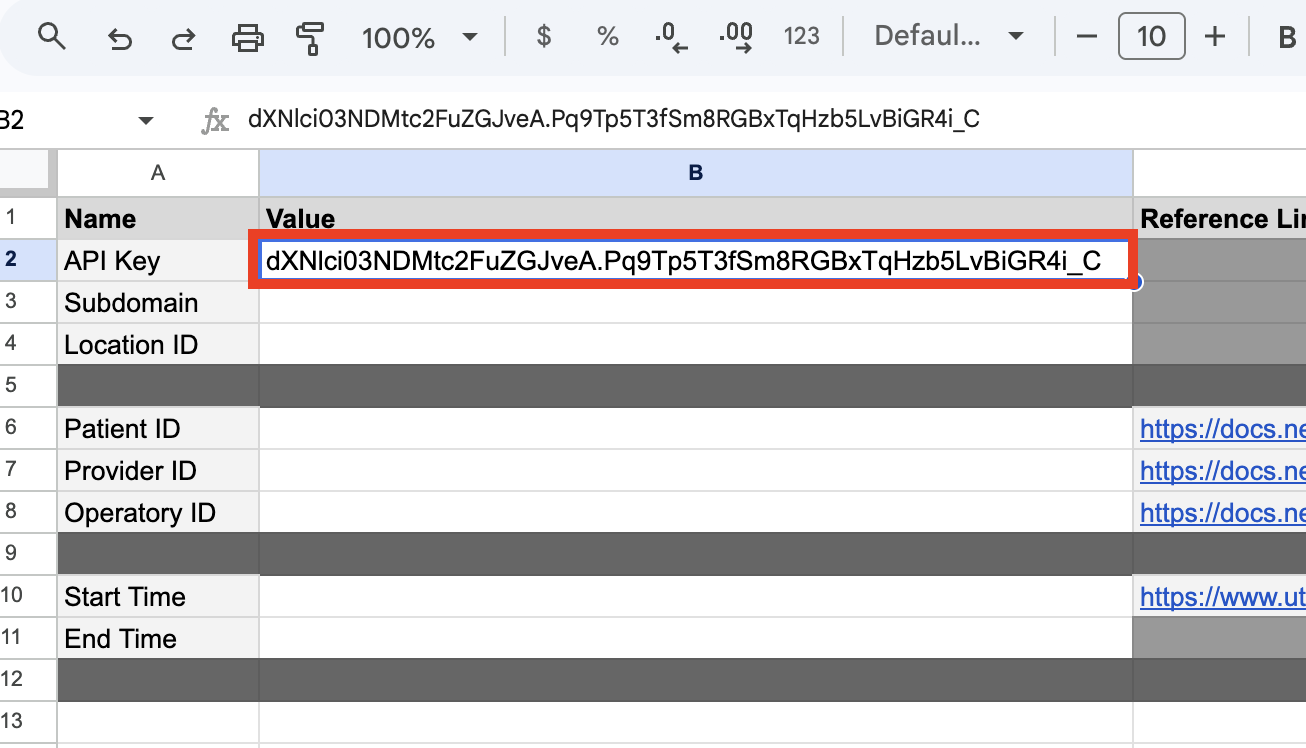
Copy the API key into your clipboard with the Copy button, then paste this key into the associated cell in the spreadsheet you copied earlier.
1.4 - Collect the subdomain and location ID
Next we want to collect the institution (specifically the subdomain value, which is a unique sequence of characters representing the institution) and location (which has an ID number associated with it).
Here’s how to think about institutions and locations:
- An institution is a parent company.
- A location is a specific brick and mortar office that the company has staff operating at.
- A single location practice will have one institution with one location (one to one).
- A multi-location practice will have one institution with many locations (one to many).
For the sandbox institution that is provisioned for you when you sign up for the developer portal, a single location institution is created and provided.
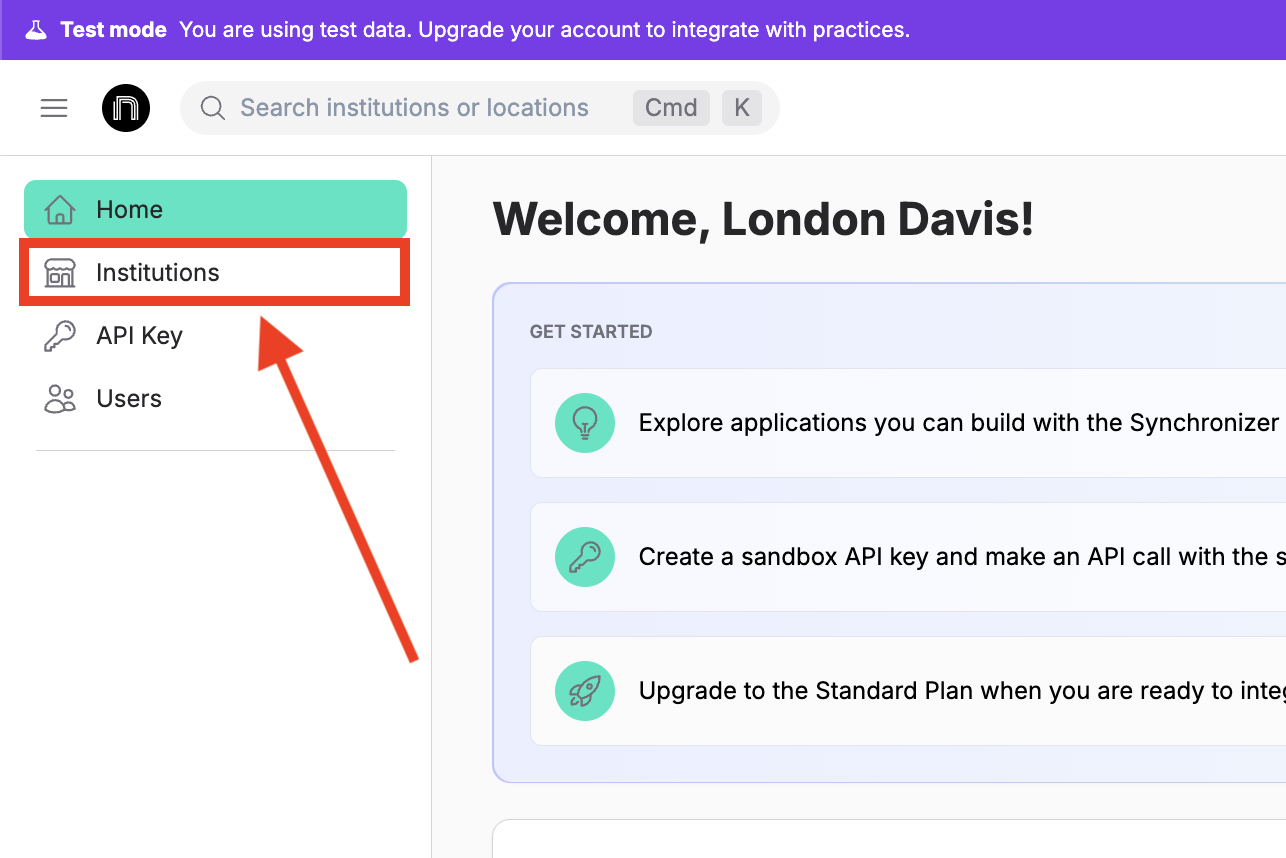
First, we are going to navigate to our sandbox institution by clicking “Institutions” in the Developer Portal.
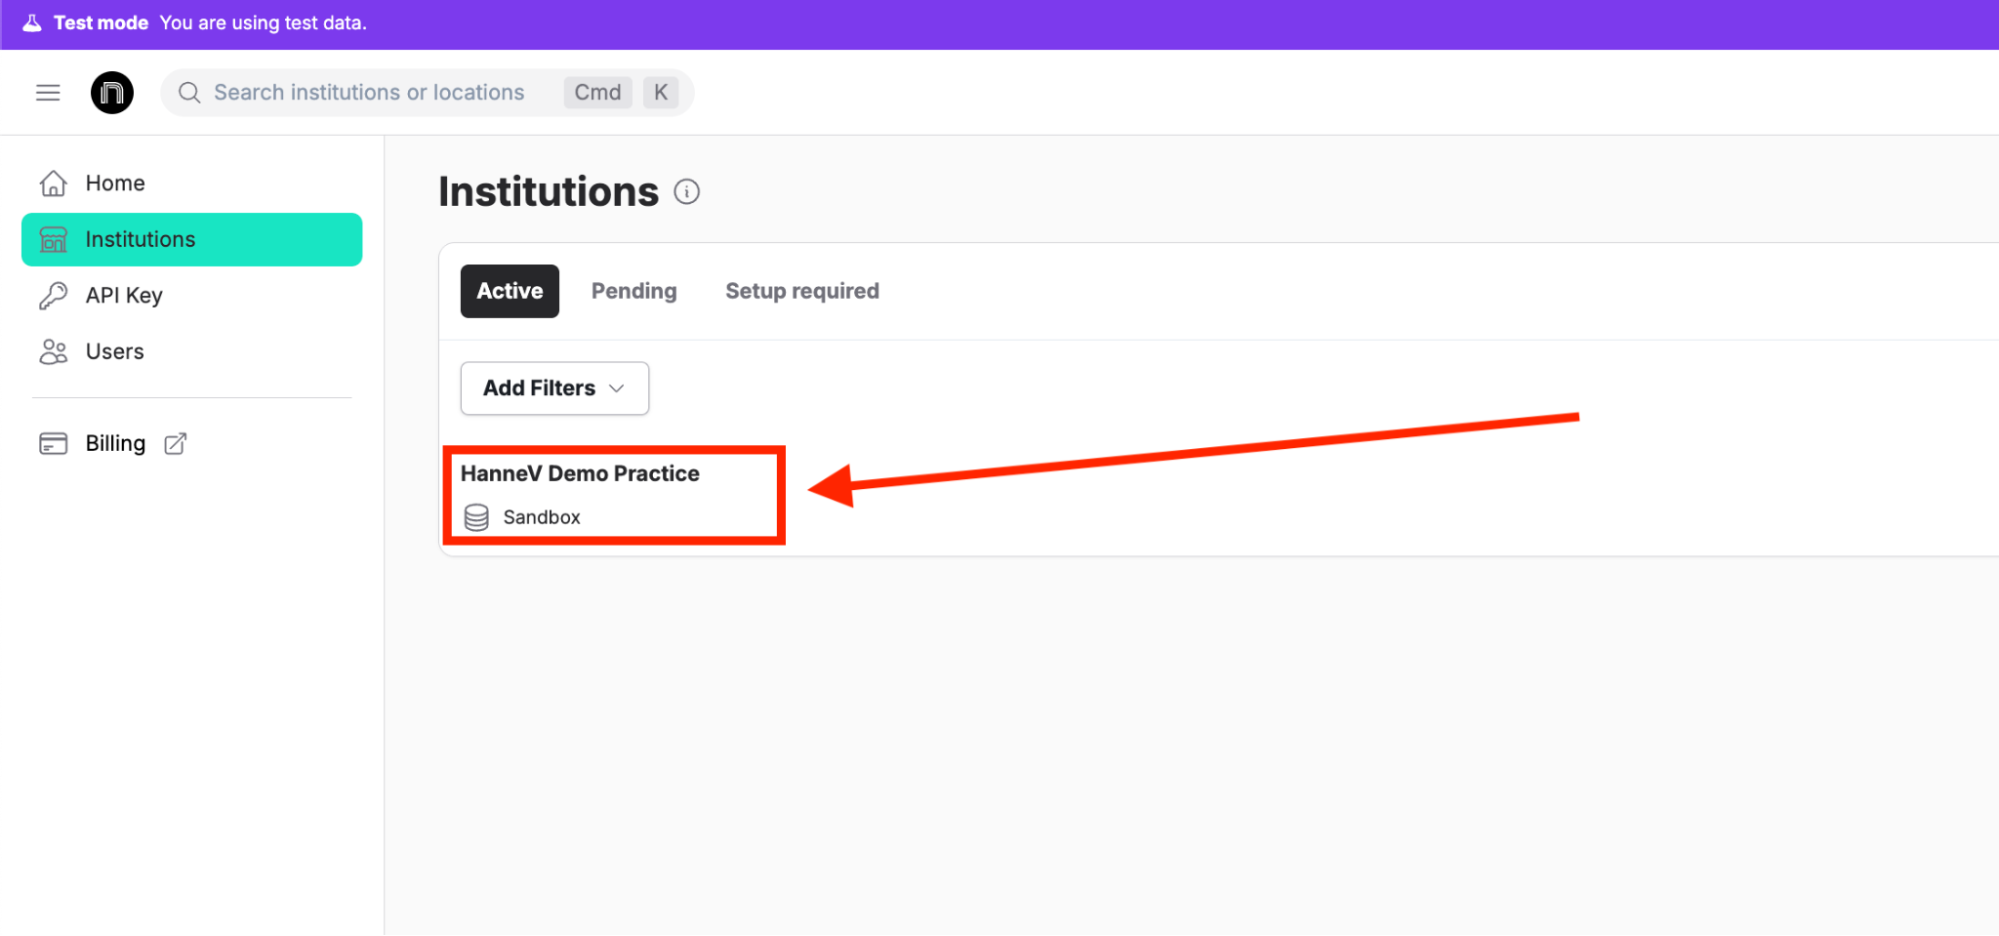
Then click on the name of the generated institution. There will likely be one option available here. Your sandbox institution will be named after the name of your organization used when signing up.
Note: The institution name is in bold.
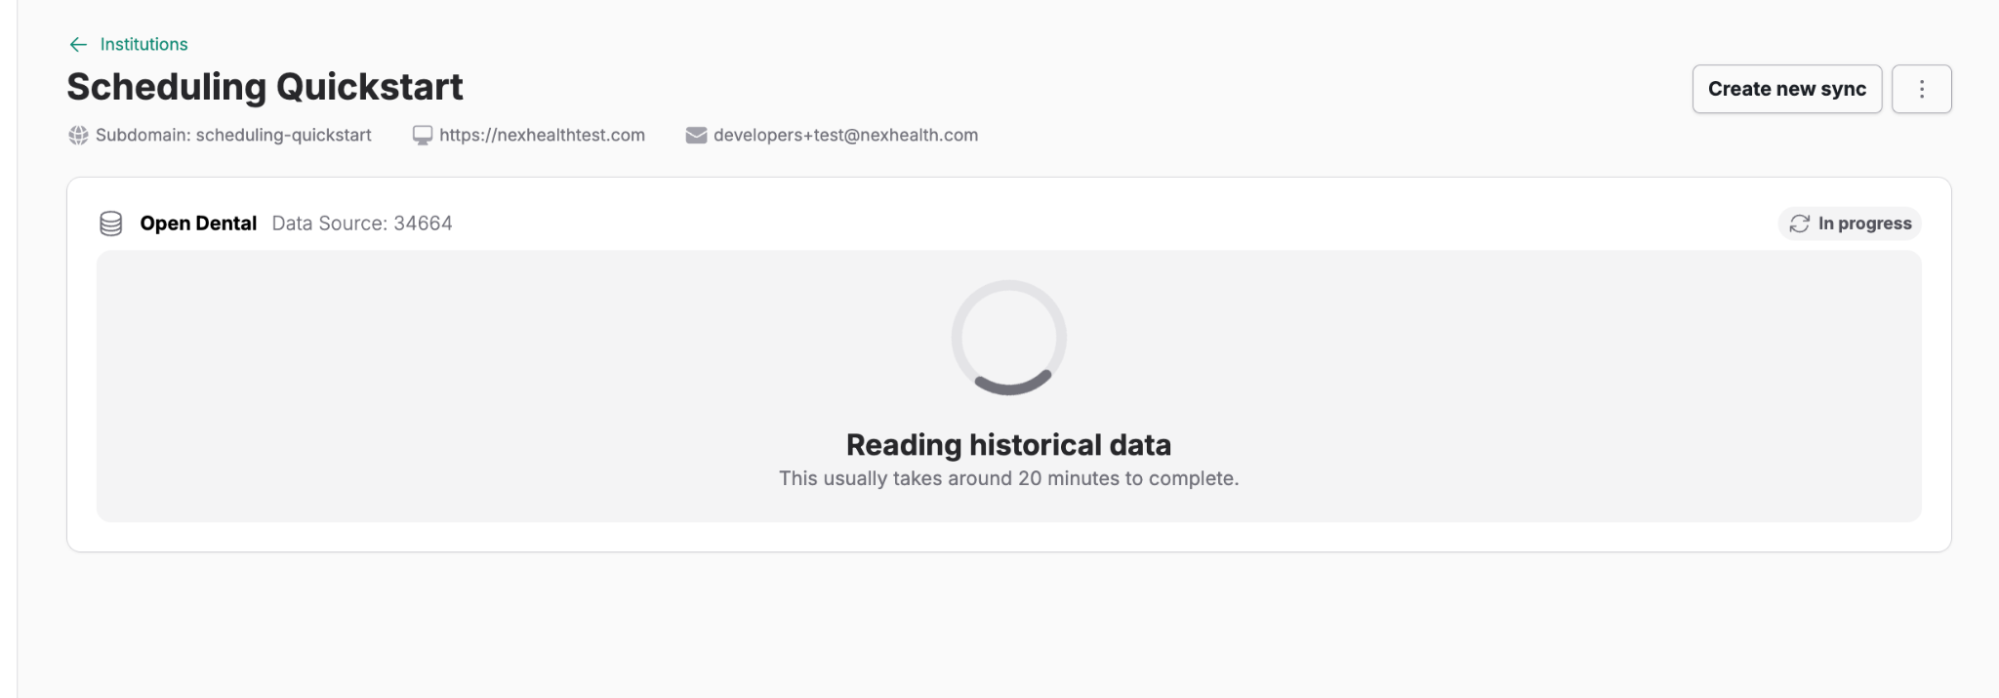
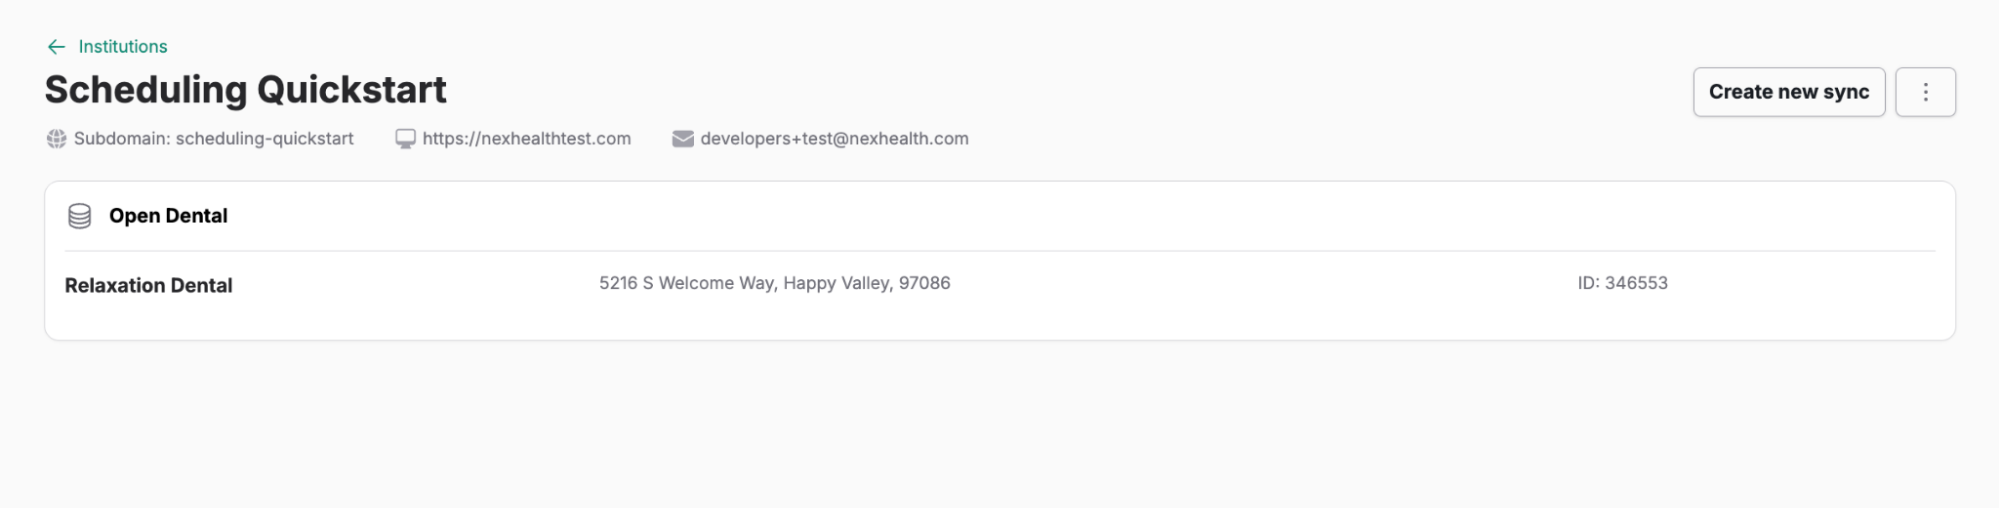
Once you advance to the institutions page, you will see something like this:
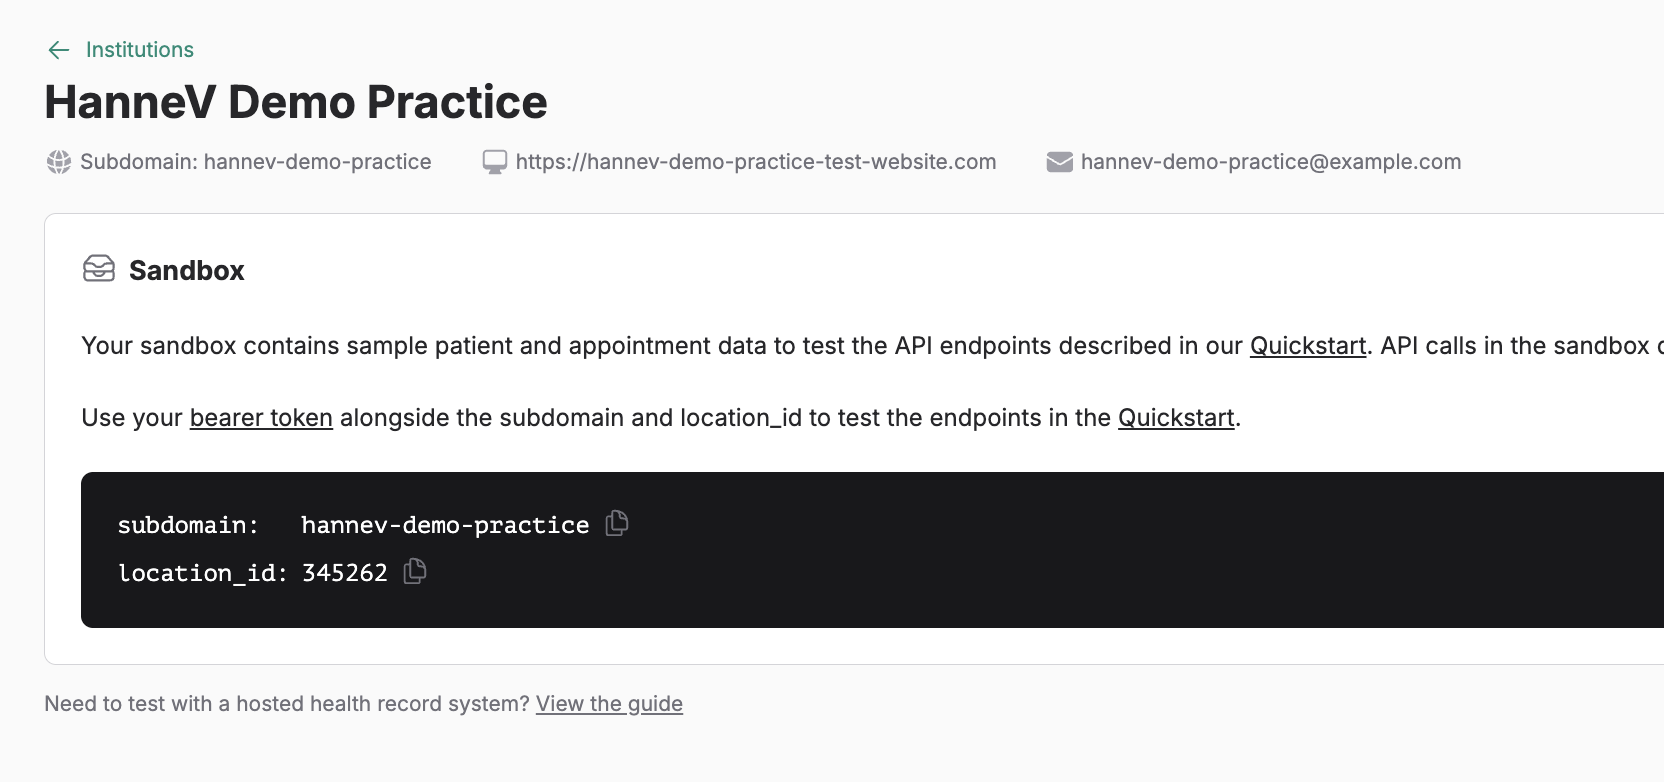
Each institution has a subdomain. A subdomain is a unique sequence of characters that we will use to identify the institution when making calls to the API.
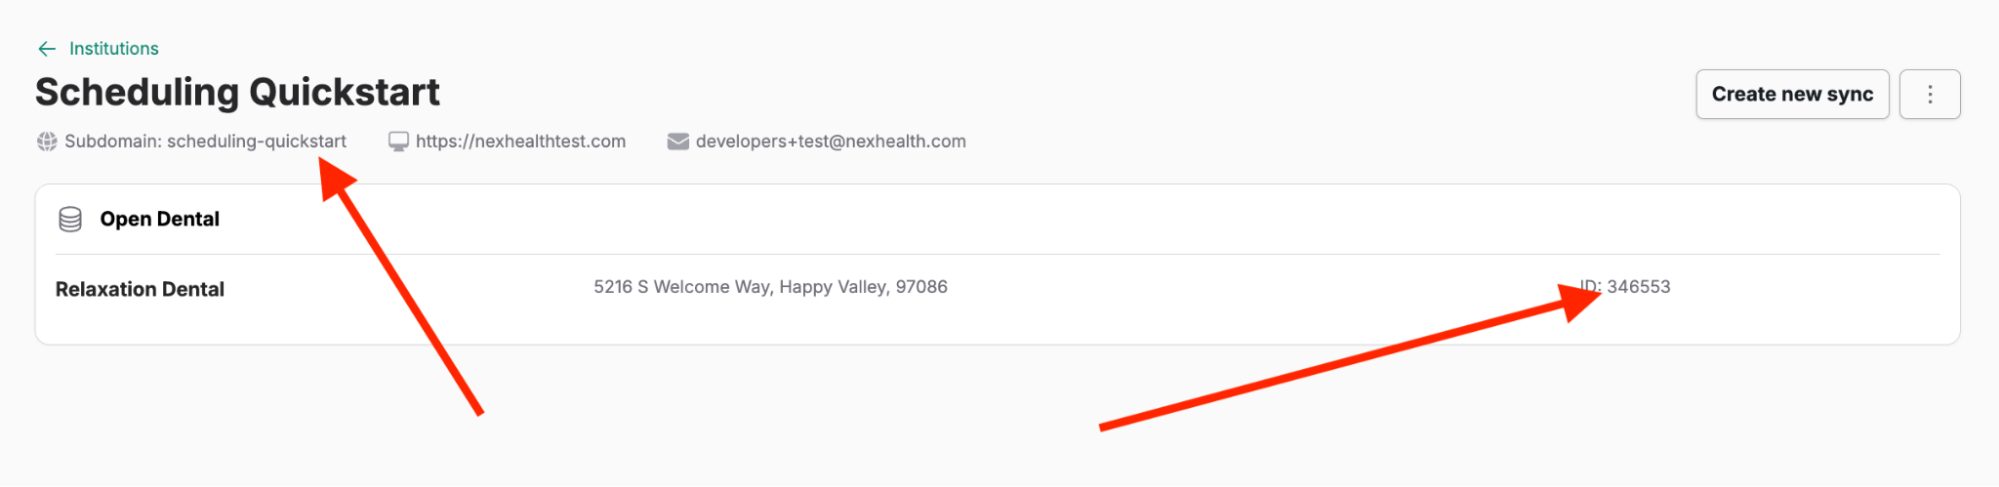
There are two quick ways that you can collect the subdomain on this page:
- Click the subdomains text.
- Click the copy symbol.
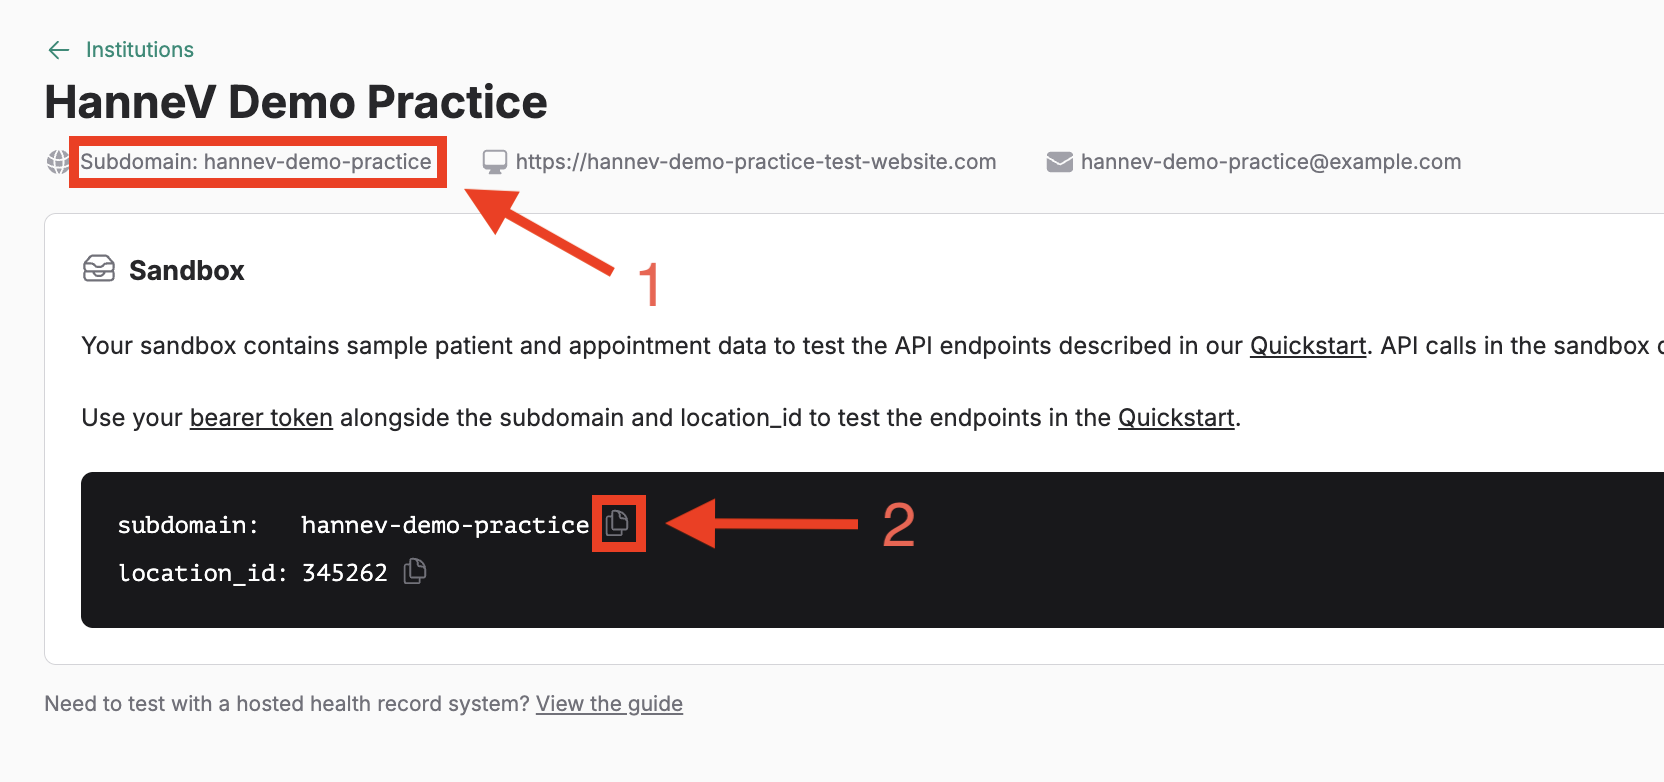
Use one of the options above to copy the subdomain to your clipboard and add it to the corresponding cell on your copy of the Scheduling Quickstart spreadsheet.
After that, we need to grab the location ID associated with this sandbox location. The location id has the same role as the subdomain, except instead of identifying the institution, it identifies the location.
Copy the location ID on this page and add it to the spreadsheet.
1.5 - Collect a patient ID
Now it is time for us to start making API calls! In order to make testing API calls as easy as possible, we will use our documentation pages for our API endpoints. These are designed to allow you to make API calls through the NexHealth API documentation itself.
The first API call that we are going to make is to our /patients endpoint. We are going to collect a list of patients associated with the sandbox institution.
A link to the relevant documentation page has been placed inside of the spreadsheet we prepared for you. Each piece of data that needs to be gathered through the API for booking the appointment will have one such link next to the cell that is meant to hold the collected data.
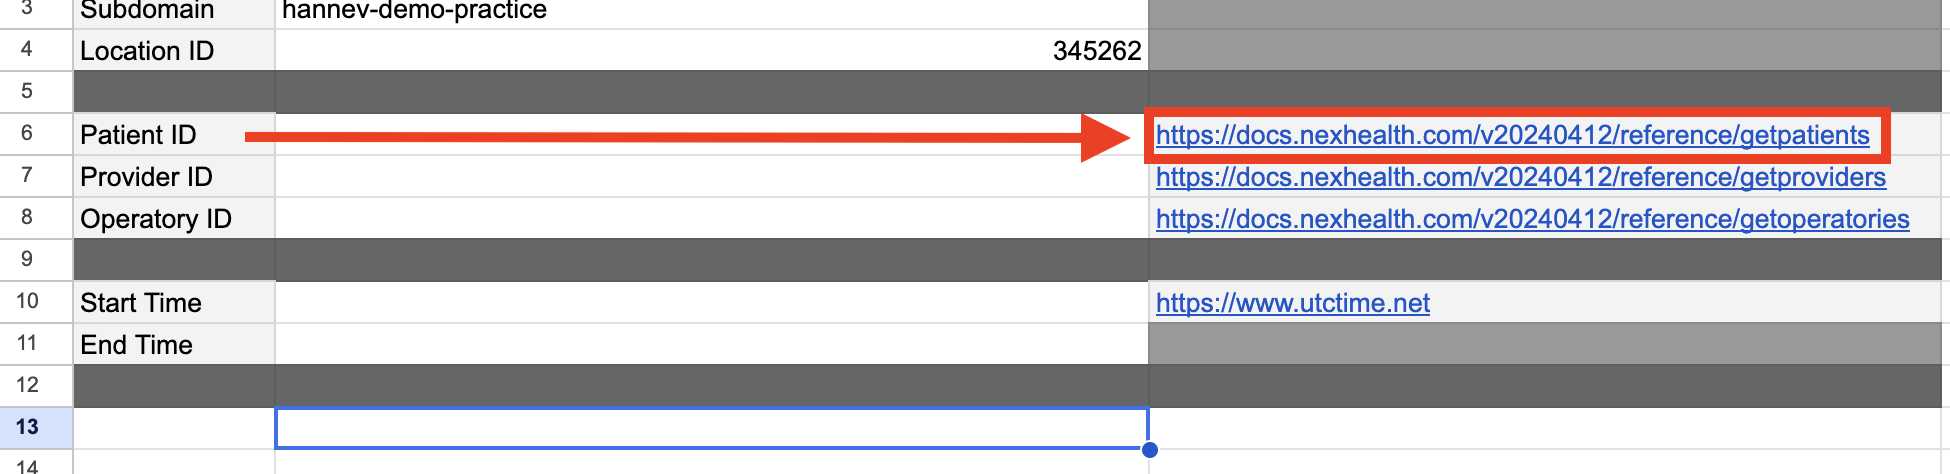
Click the link in the spreadsheet in the Patient ID row. It should take you to the following page:
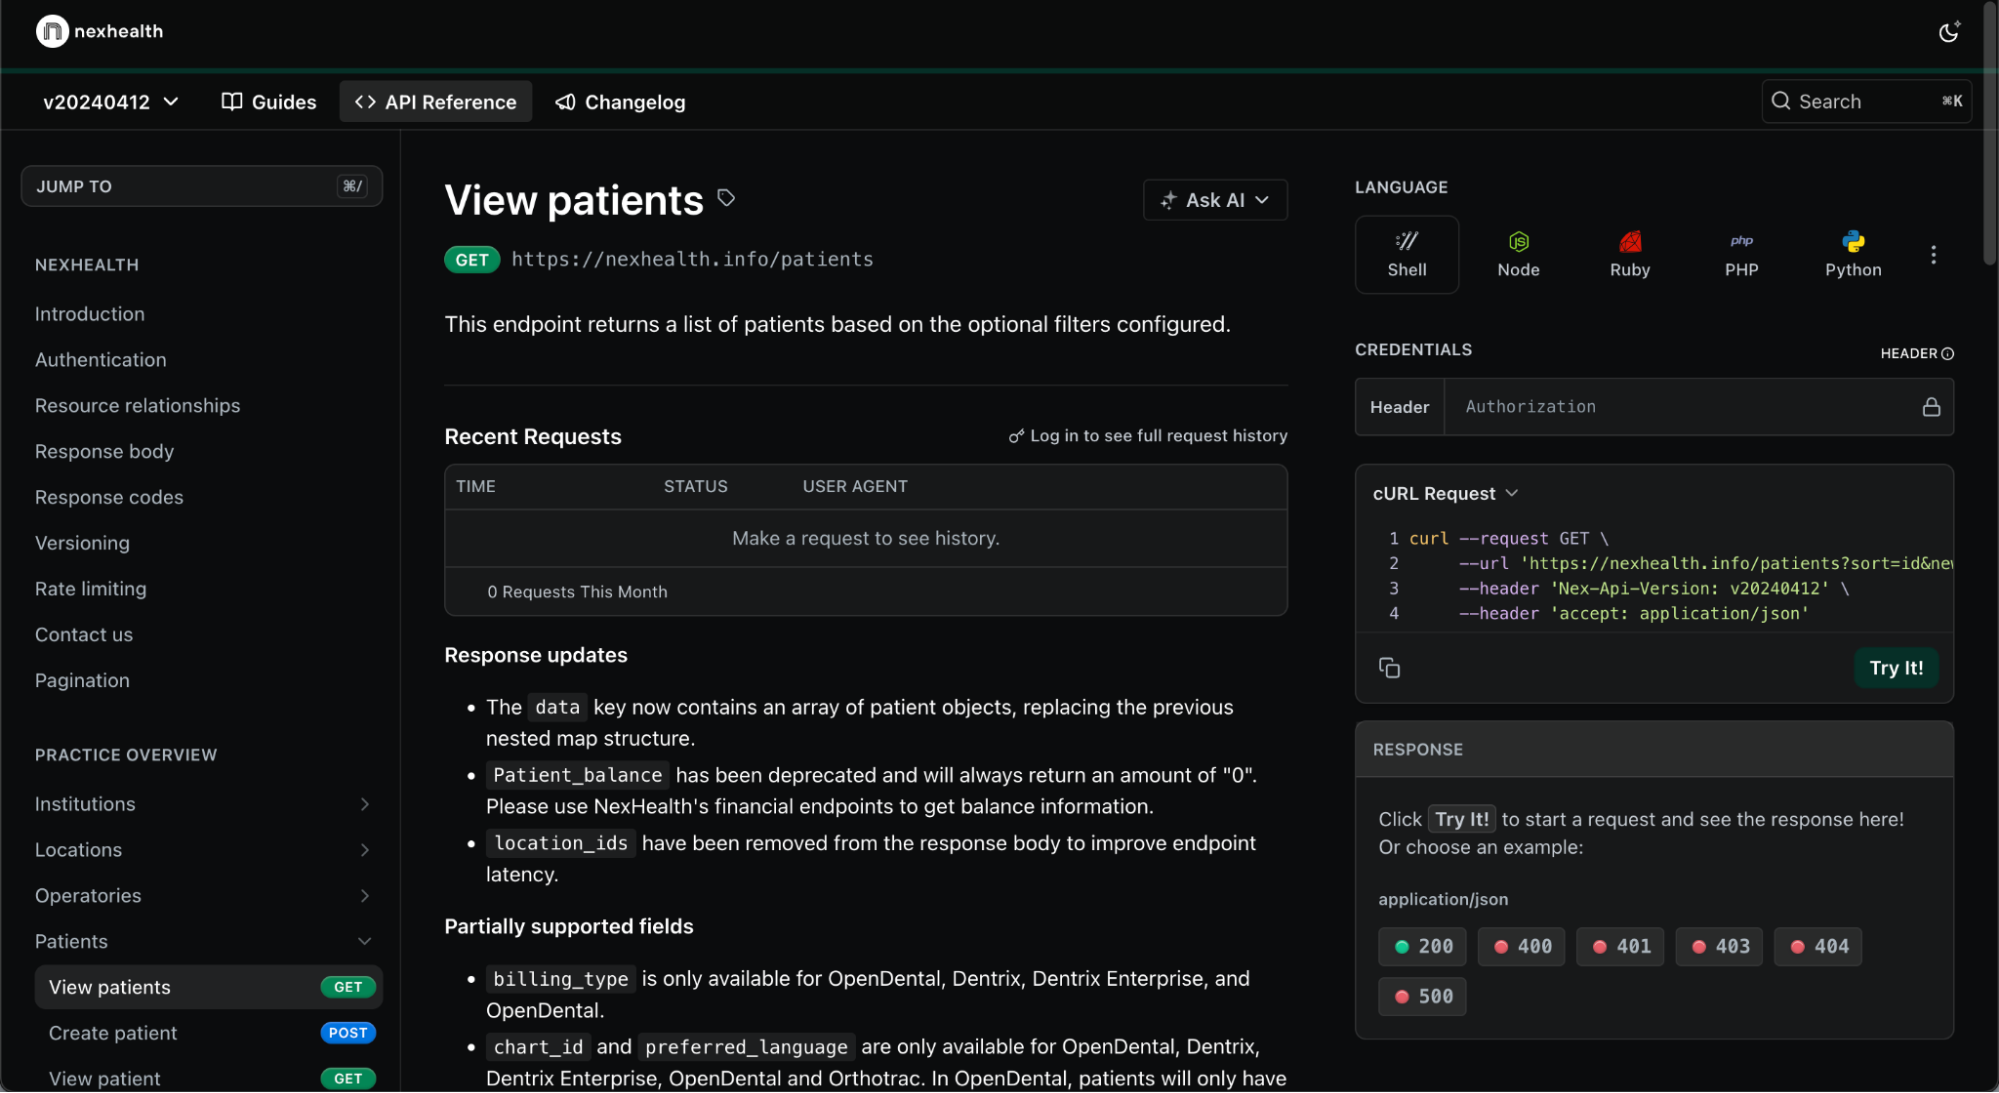
On this page, you will plug in the following information that you have gathered from the spreadsheet:
- API Key
- Subdomain
- Location ID
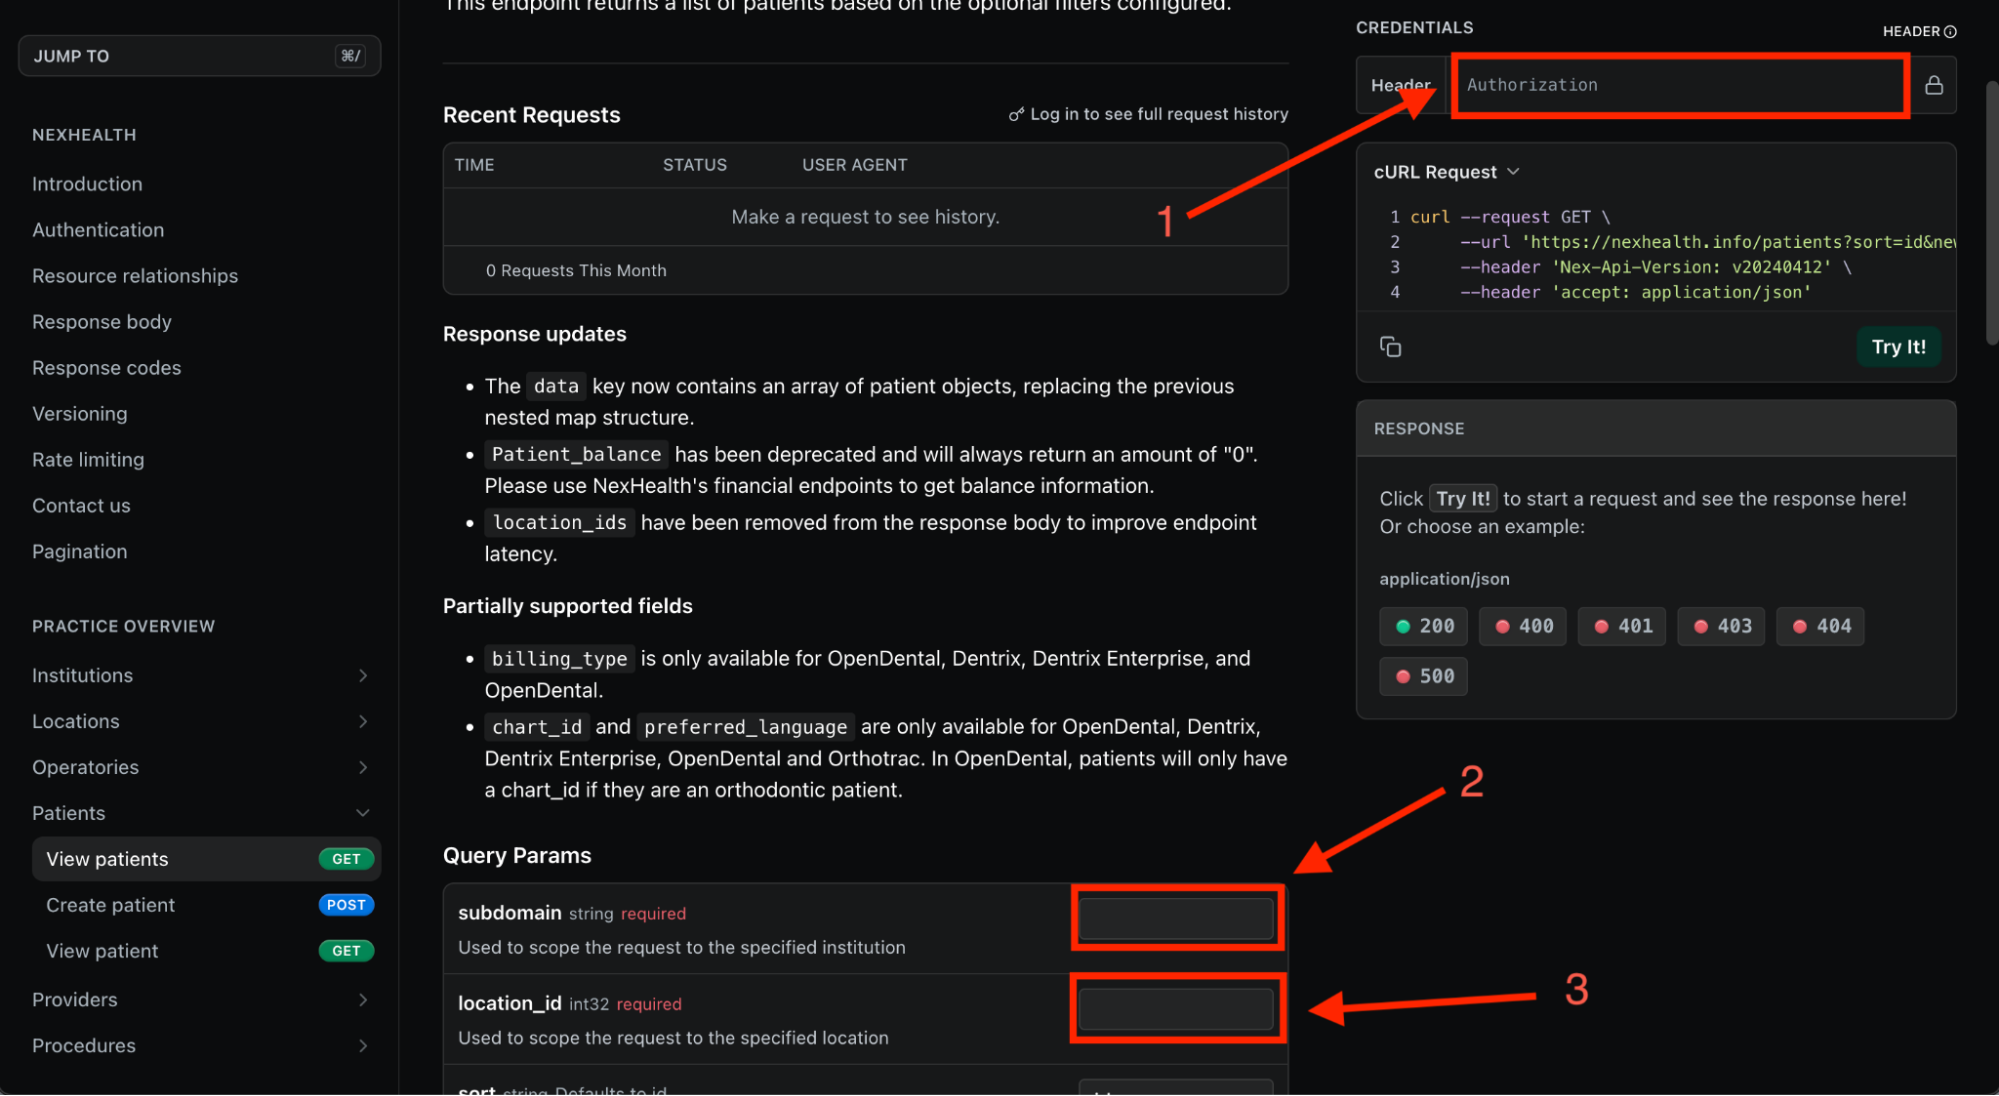
After you have entered the API Key, Subdomain, and Location ID into the relevant fields, click the “Try It!” button.
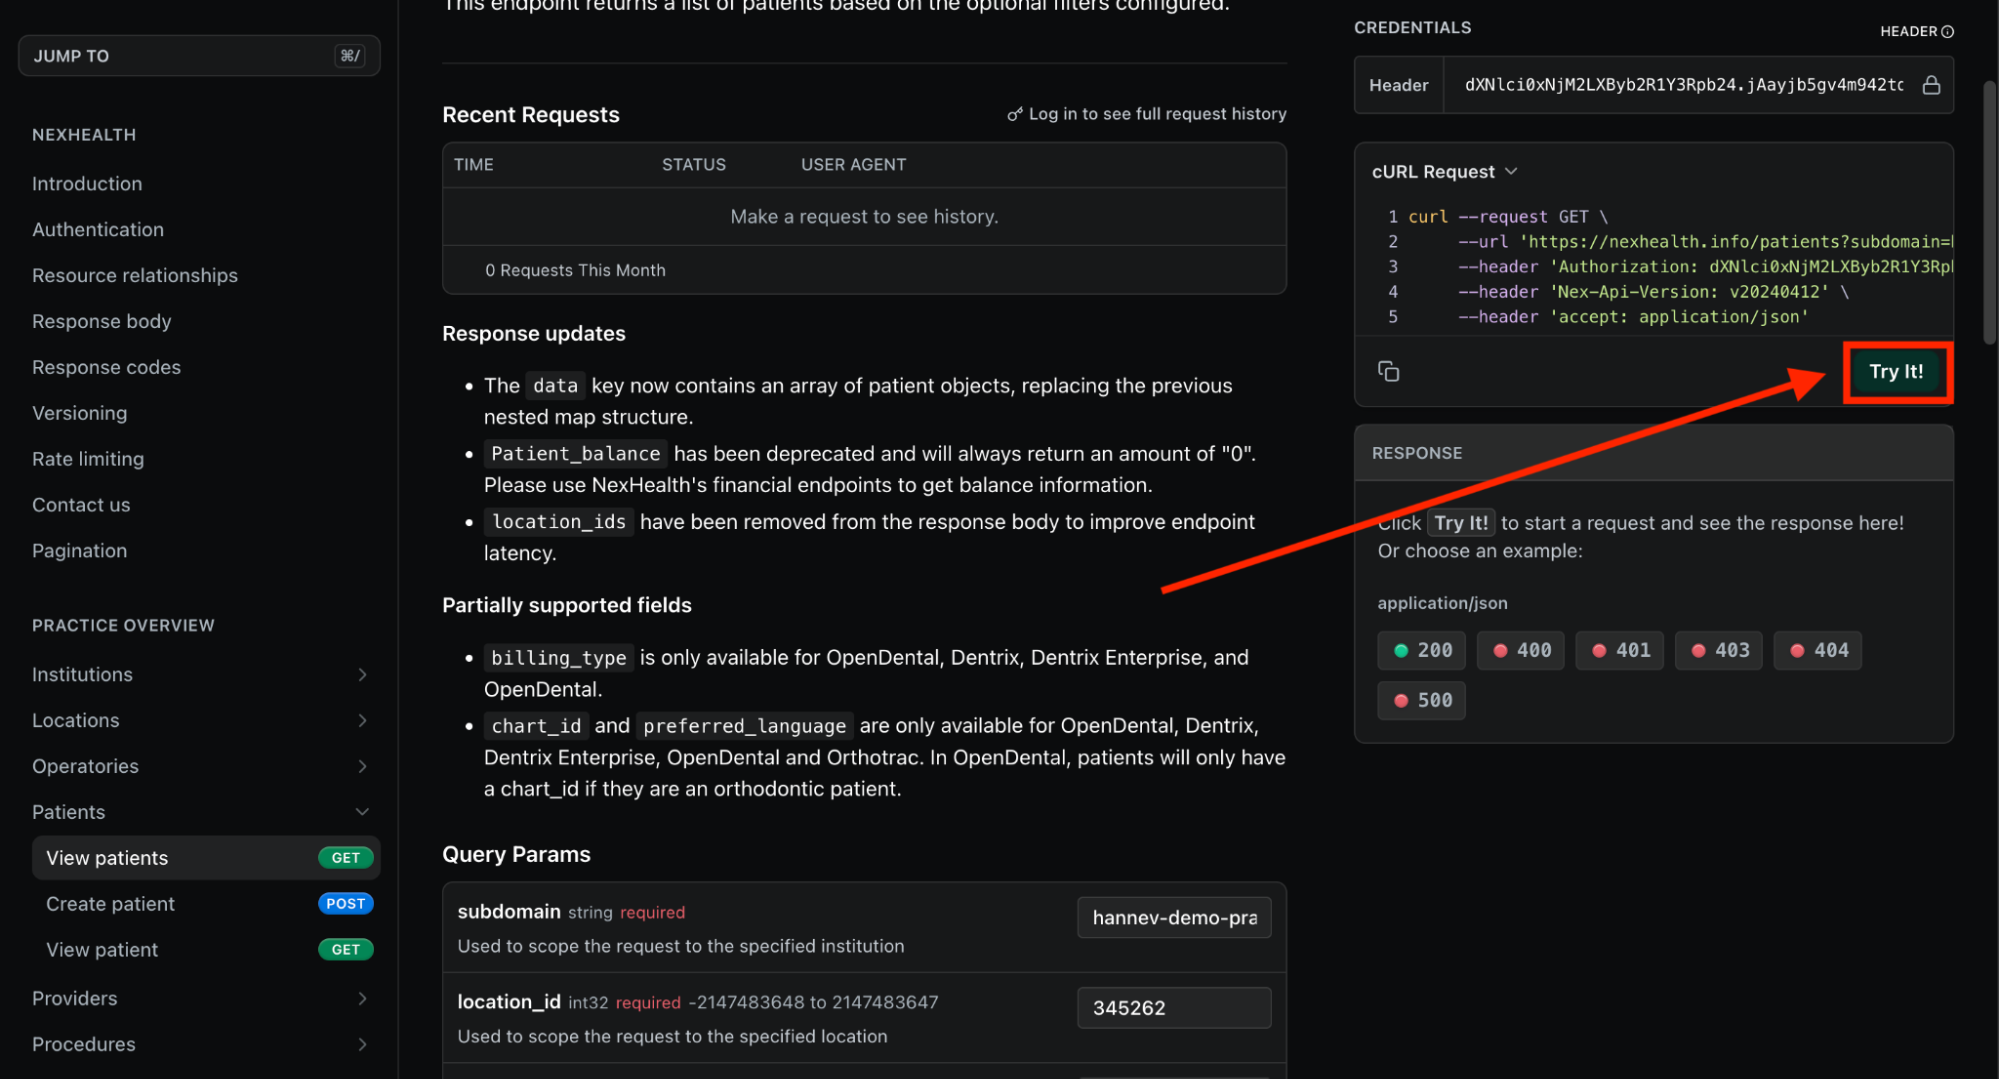
Once you click the “Try It!” button, the webpage will make a NexHealth API call using the provided information, then will display the response from our backend into the “RESPONSE” box under the request box.
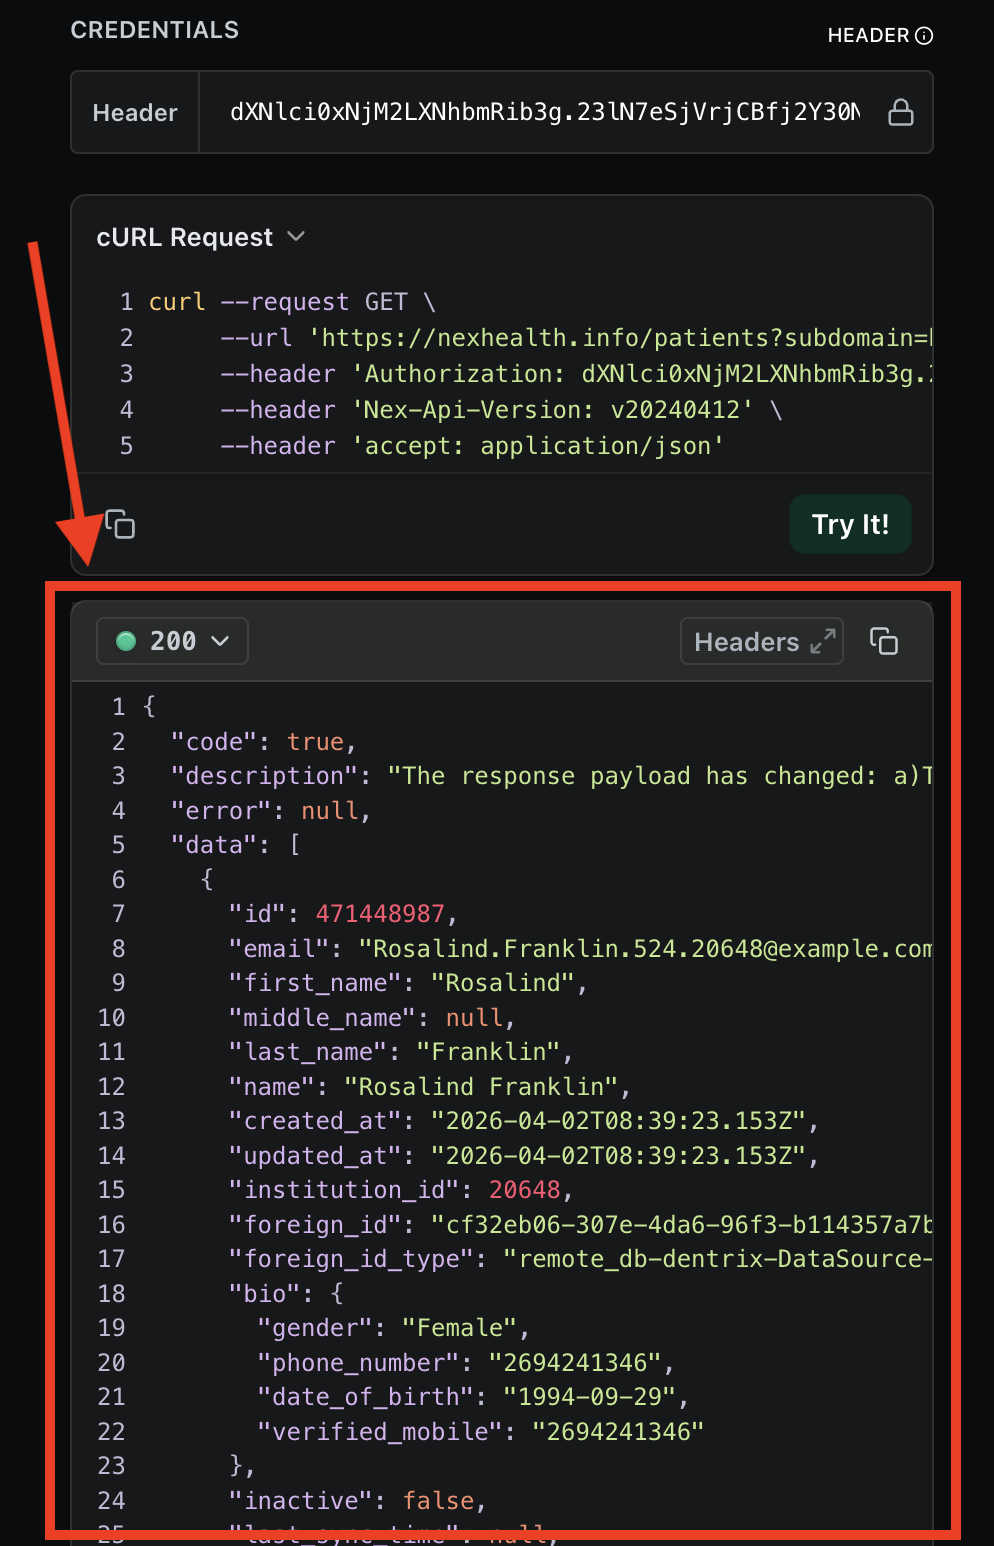
This response object will contain a list of patient objects. In this case, we are just going to grab the ID of the first patient object “Rosalind Franklin”.
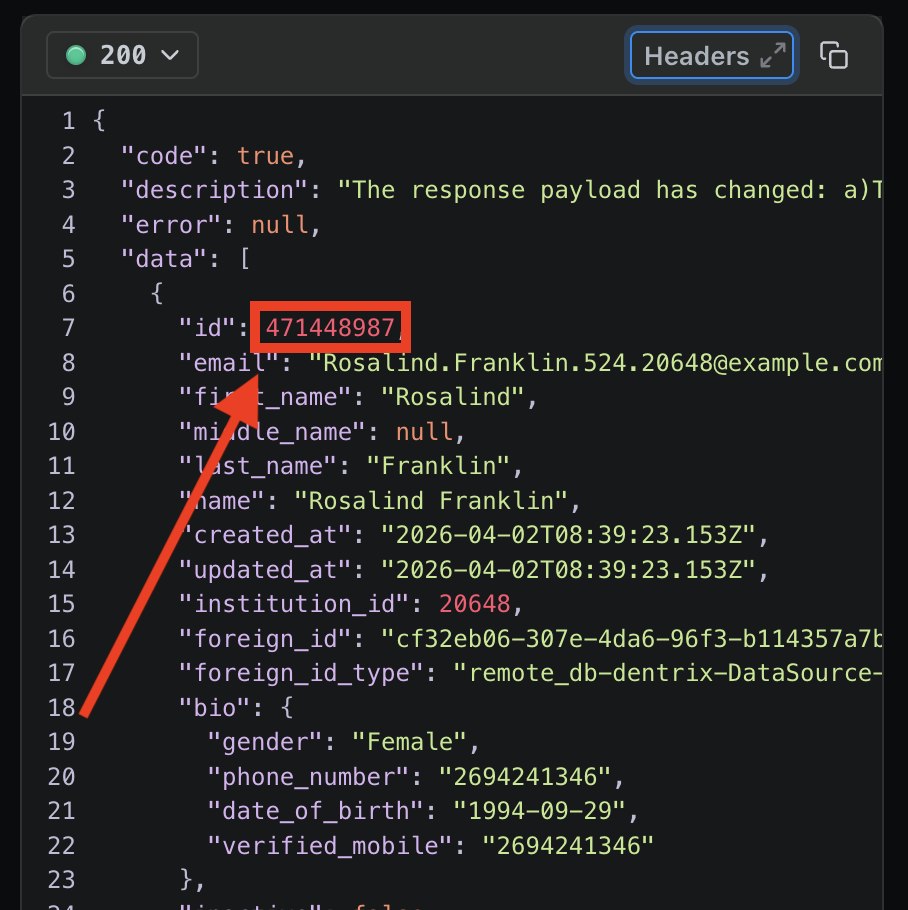
Take the ID from your response and add it to your spreadsheet as the Patient ID. It will look something like this:

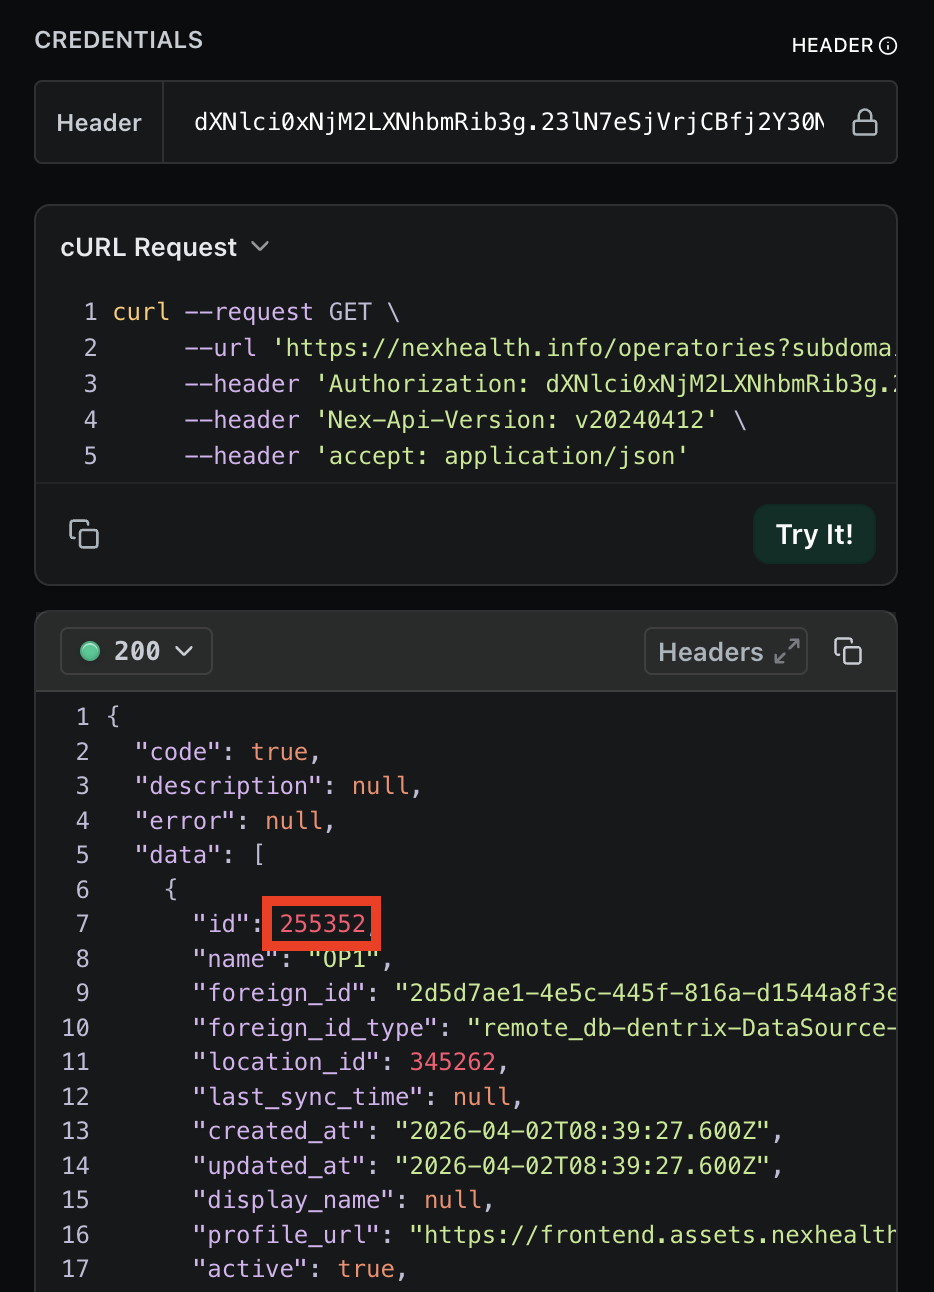
1.6 - Collect an operatory ID
Repeat the steps for collecting a patient ID, except, do them for the Operatory ID row on the spreadsheet.

1.7 - Collect a provider ID
Follow the steps for getting the patient ID and operatory ID, except, do them for the Provider ID row.
Note: This API endpoint has some differences in its required parameters. You will need to add “updated_at” or “-updated_at” to the “sorted” field. Also the location_id field is in a different place.
Here is an example of the sorted field being filled in with “updated_at”:
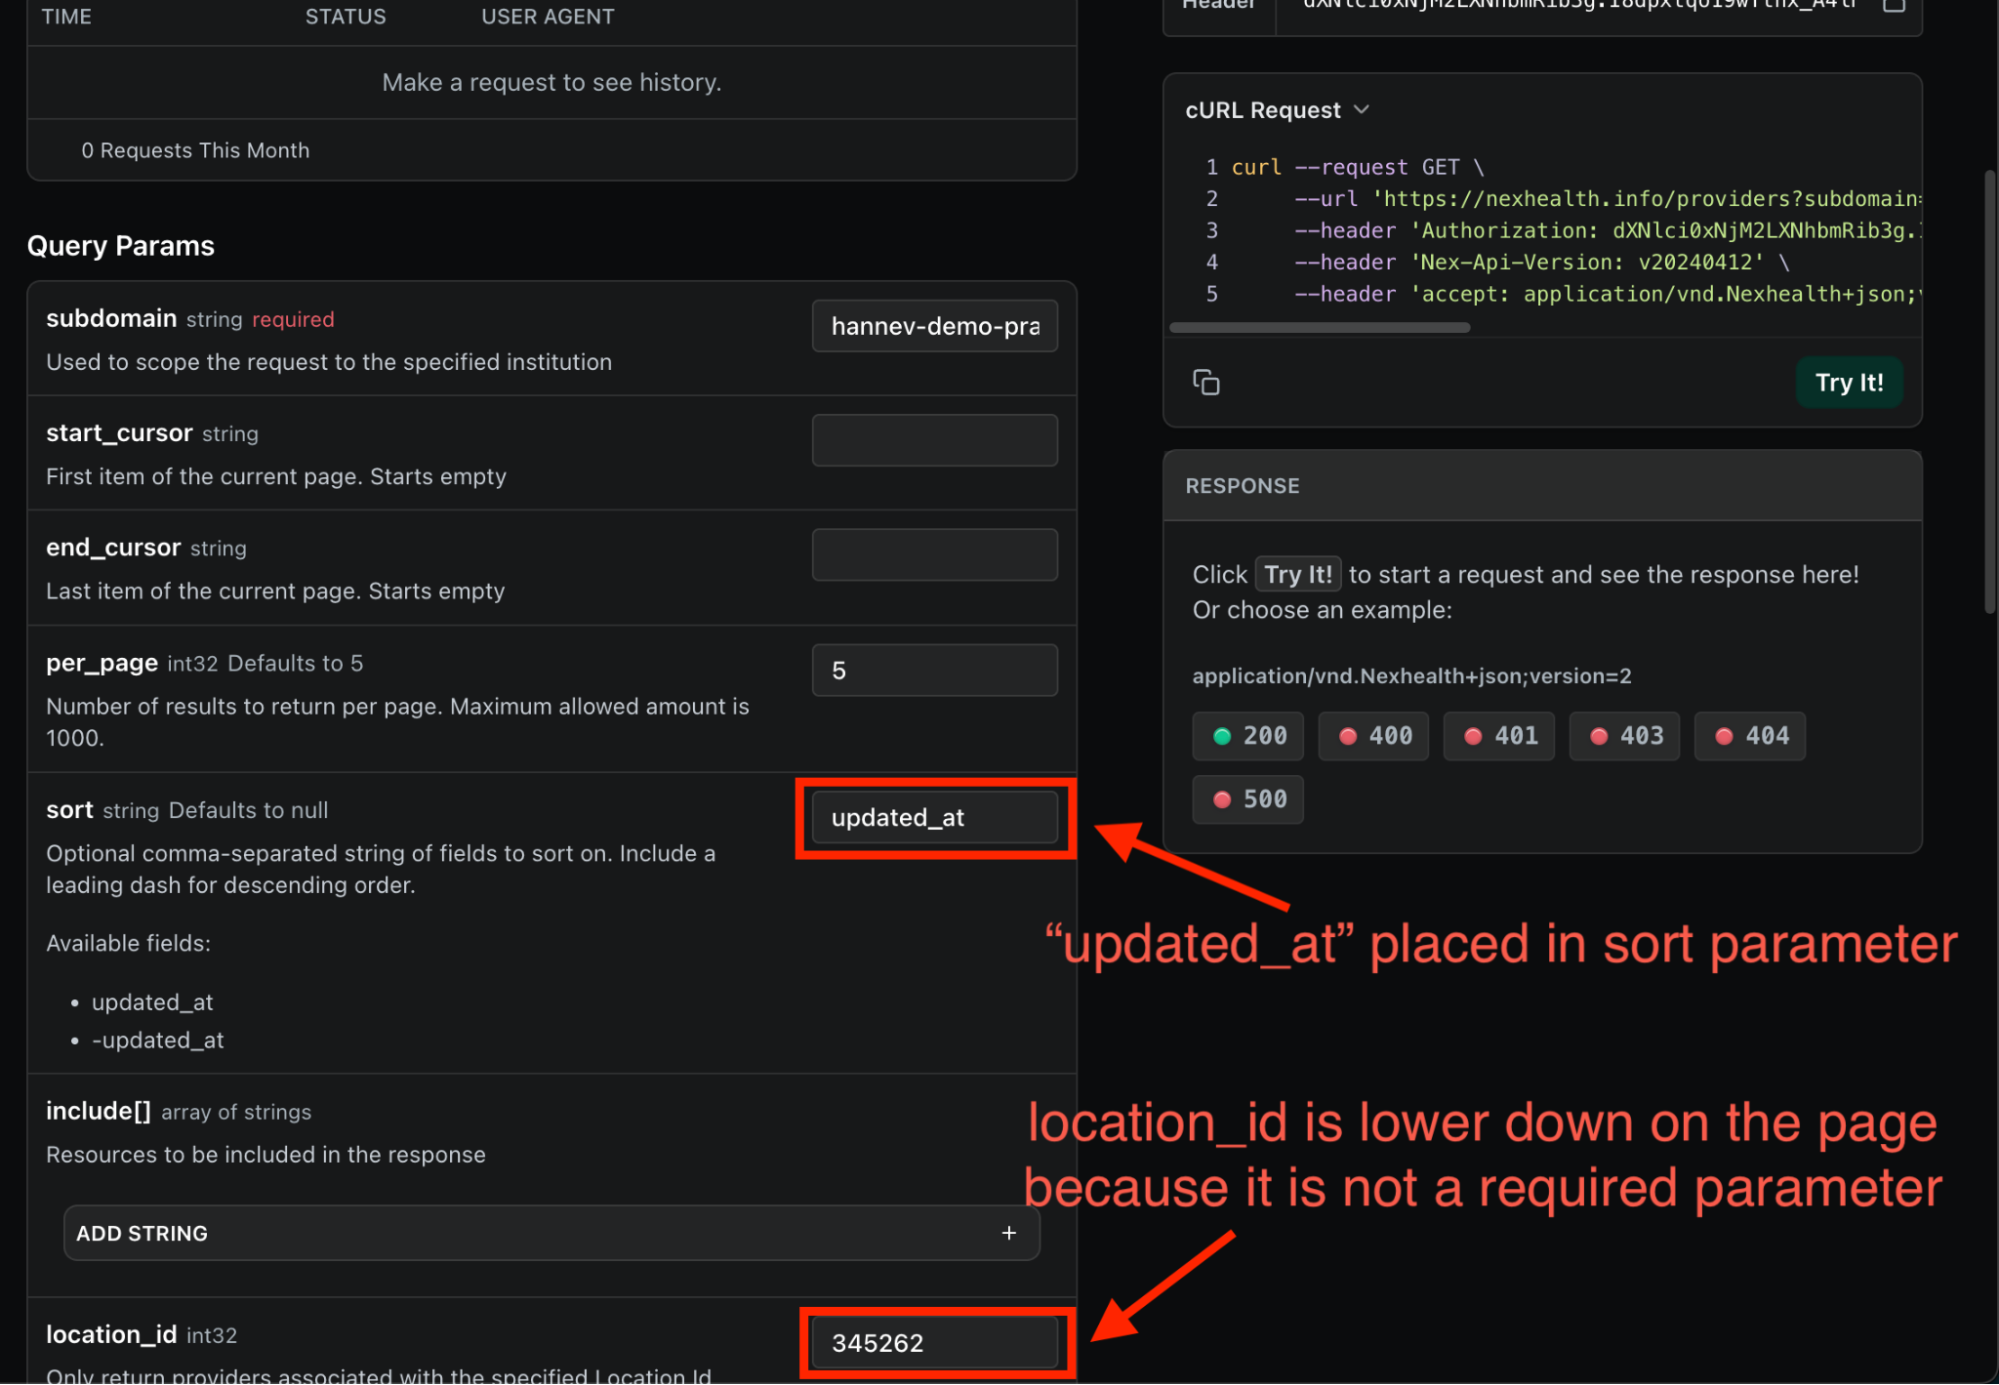
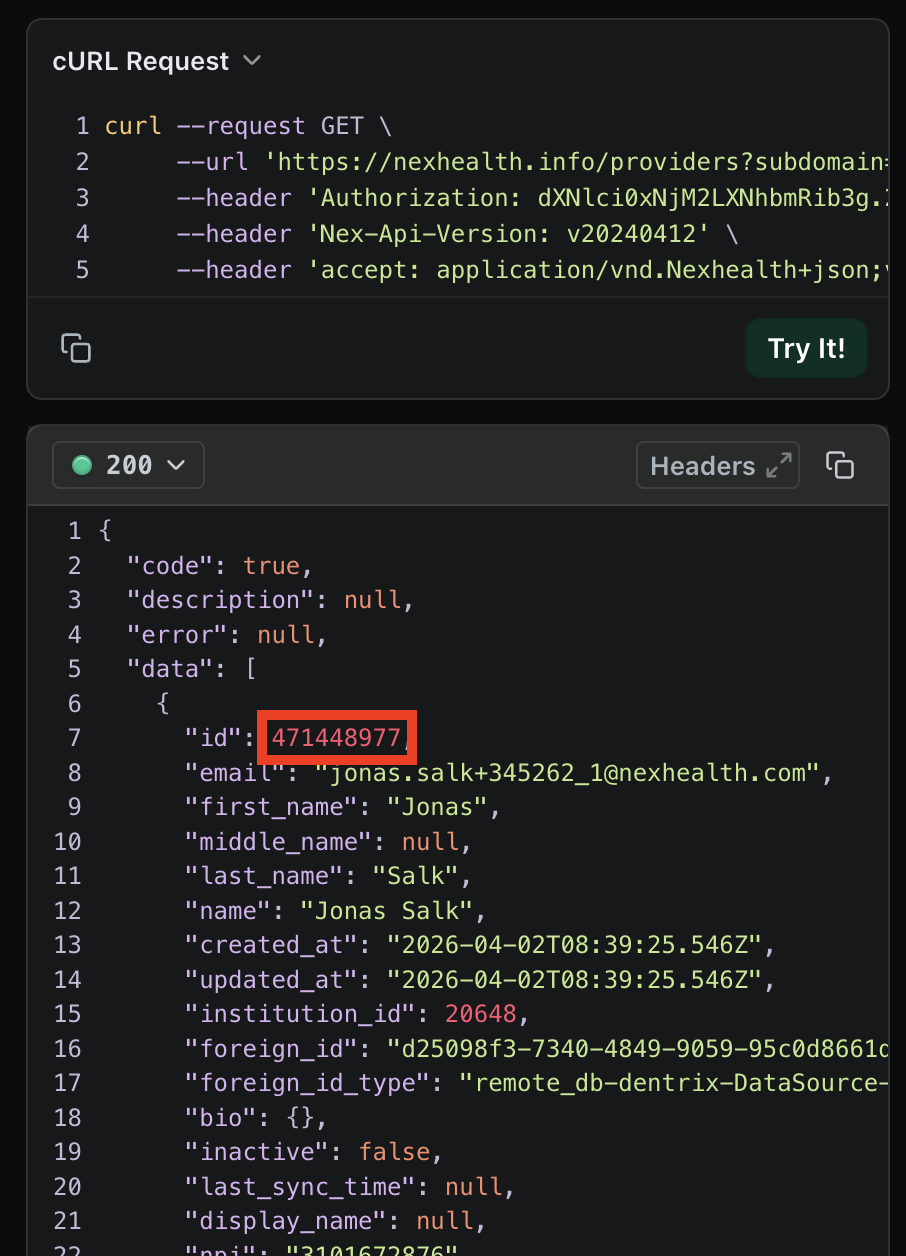
After you click “Try It!” to make the request, we will grab a provider’s ID and add it to the spreadsheet.

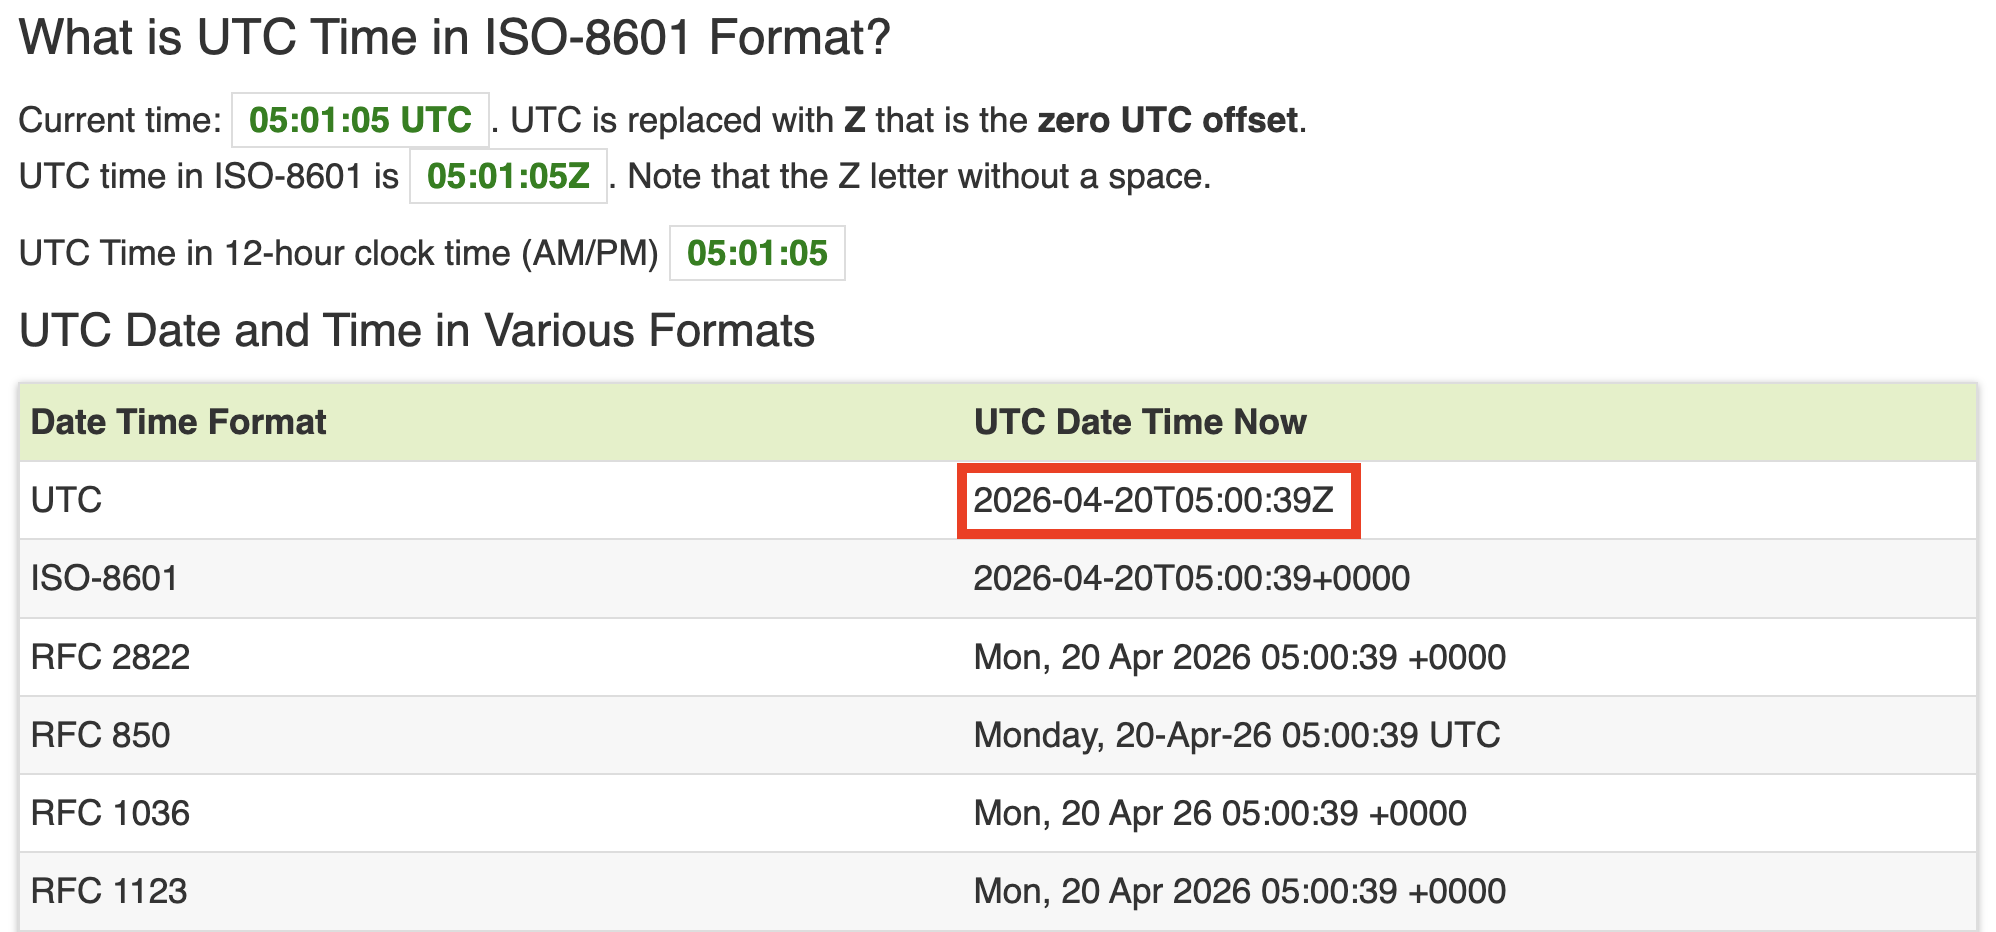
1.8 - Determine a start and end time
Finally, we need to pick a start and end time for the appointment. These times will need to be in the format of UTC strings, so to make this as easy as possible, follow these steps:
-
Go to https://www.utctime.net
-
Scroll down to the table with all of the formats
-
Copy the UTC format value for your current time and copy it into the spreadsheet

-
Increment the day section of the UTC timestamp up by 1 day

-
Copy the start time into the end time, then add 30 minutes

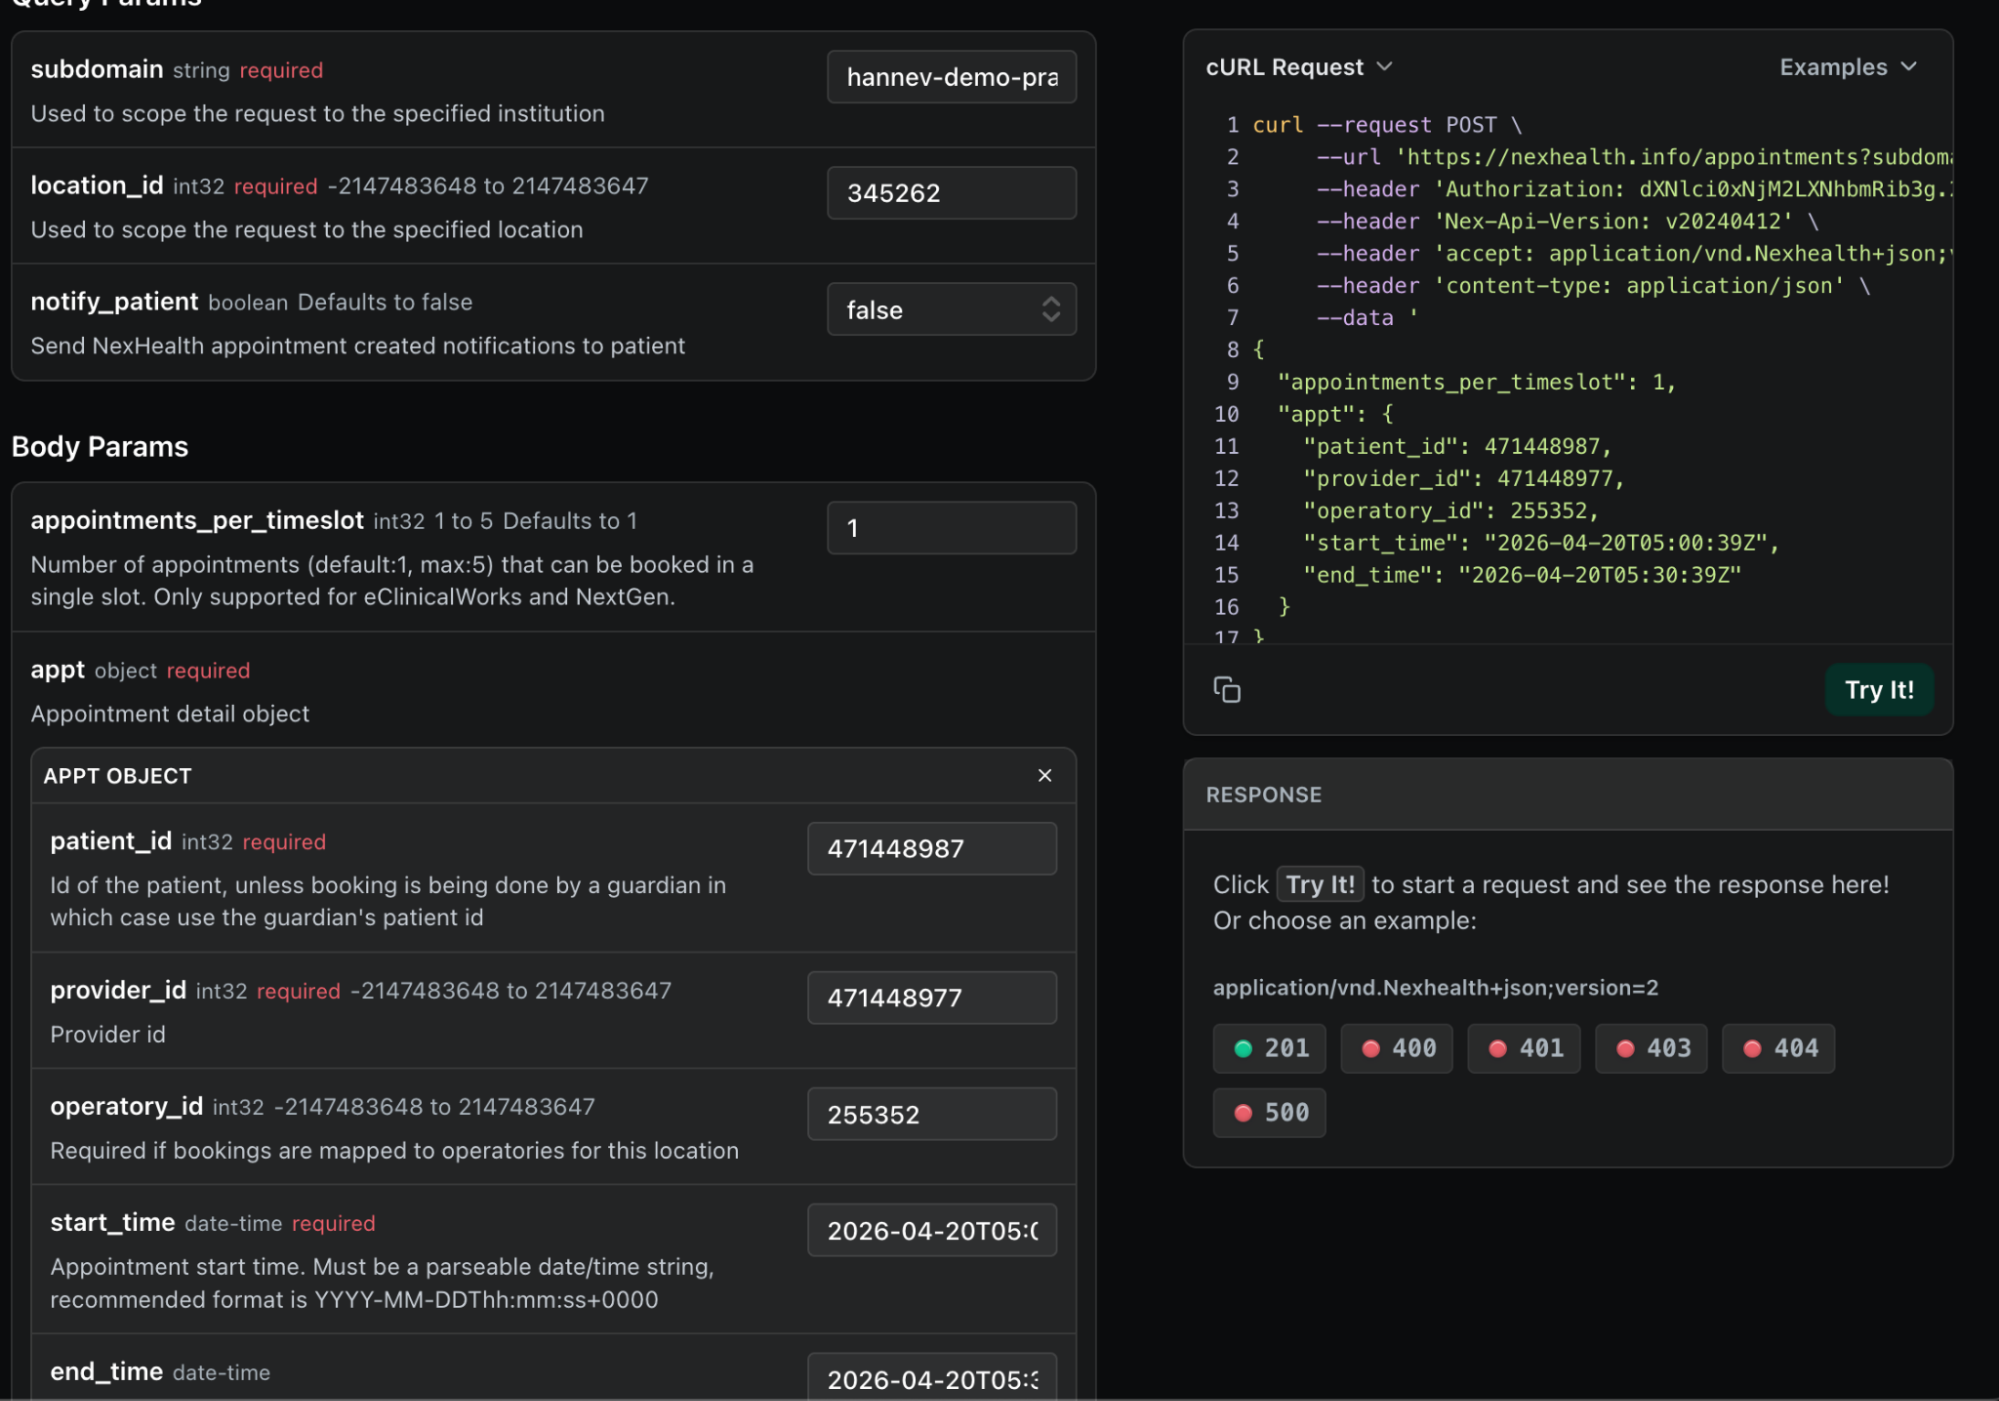
1.9 - Book an appointment
Time to finally book an appointment!
Go to https://docs.nexhealth.com/v20240412/reference/postappointments and use all of the fields that we gathered on the spreadsheet and make the API call through “Try It!” again.
1.10 - View the appointment (Optional)
Let’s confirm that this appointment has been created in the NexHealth backend!
We’ll start by going to the following docs page:
https://docs.nexhealth.com/v20240412/reference/getappointments
From there, we will fill the input fields with the following:
- API Key
- Subdomain
- Location ID
- The literal string “updated_at”
- Our appointments start time
- Our appointments end time
Here are some screenshots showing these being plugged in:
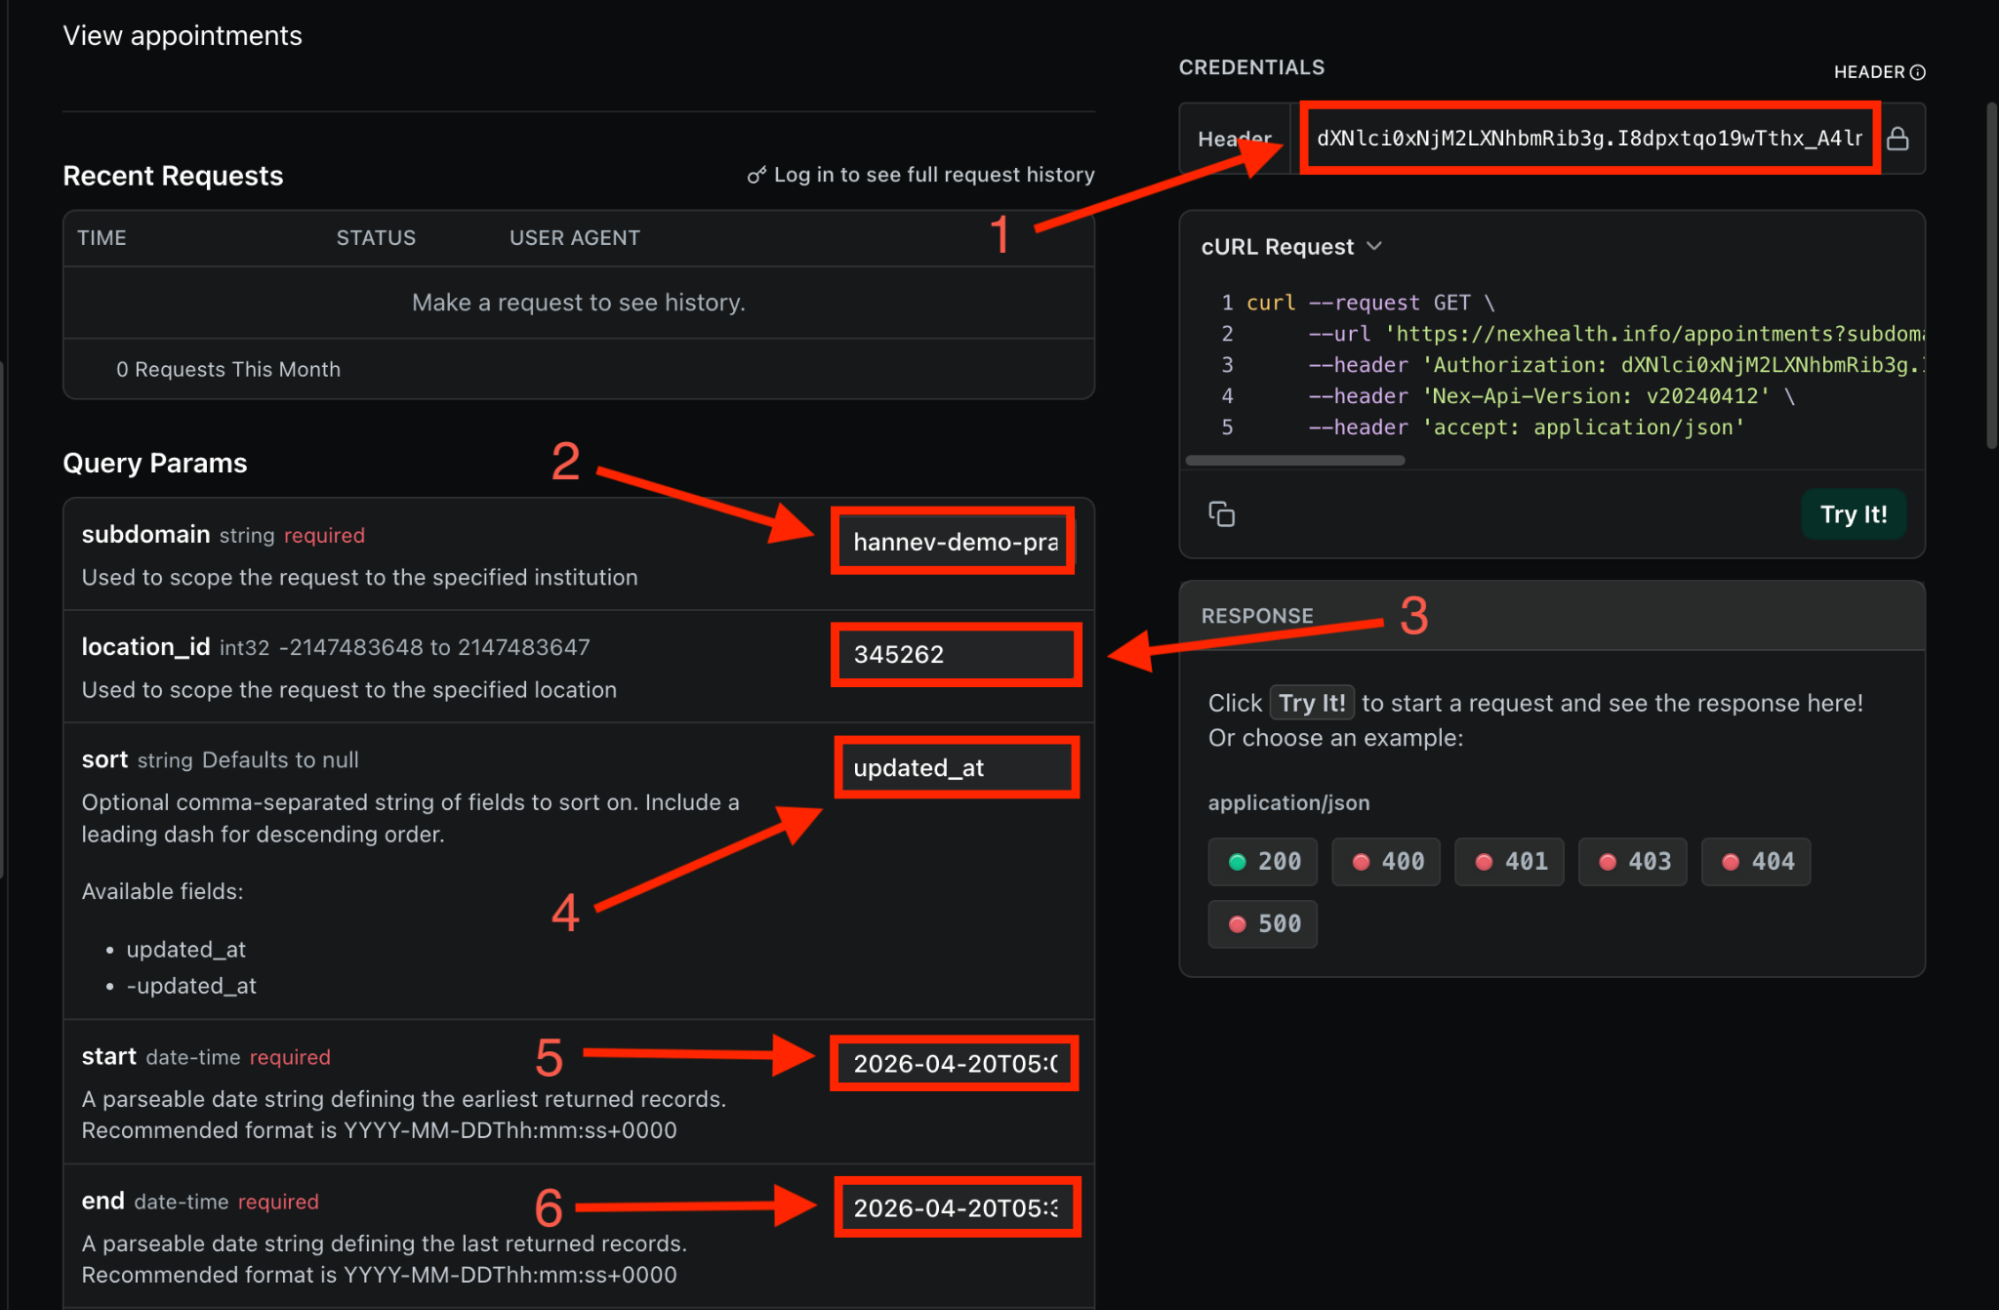
Note: We normally would have the start and end times include a wider period of time (ex: 2026-04-20 to 2026-04-21); however, in this case, we will use the exact same start and end times that we used in the API call to book the appointment. This is primarily for convenience.
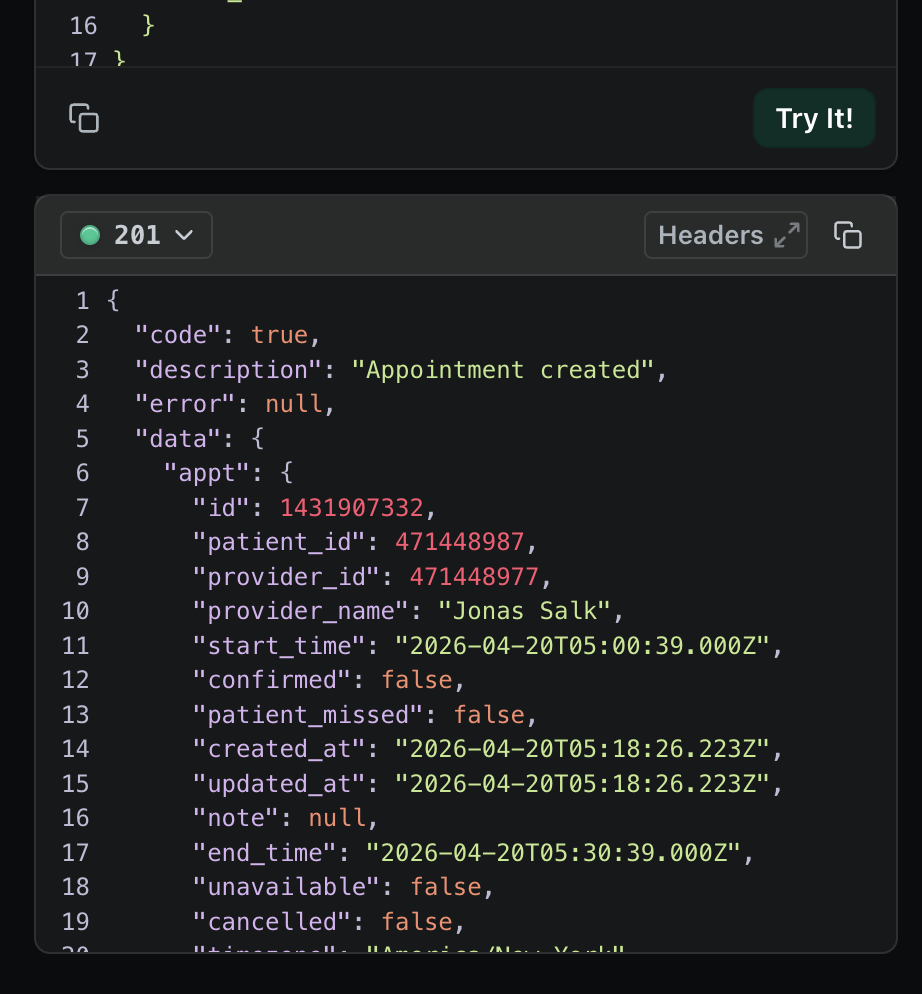
Once you have plugged all of the field’s data in, go ahead and click the “Try It!” button again. This will return the appointment object that we just created in step 9.
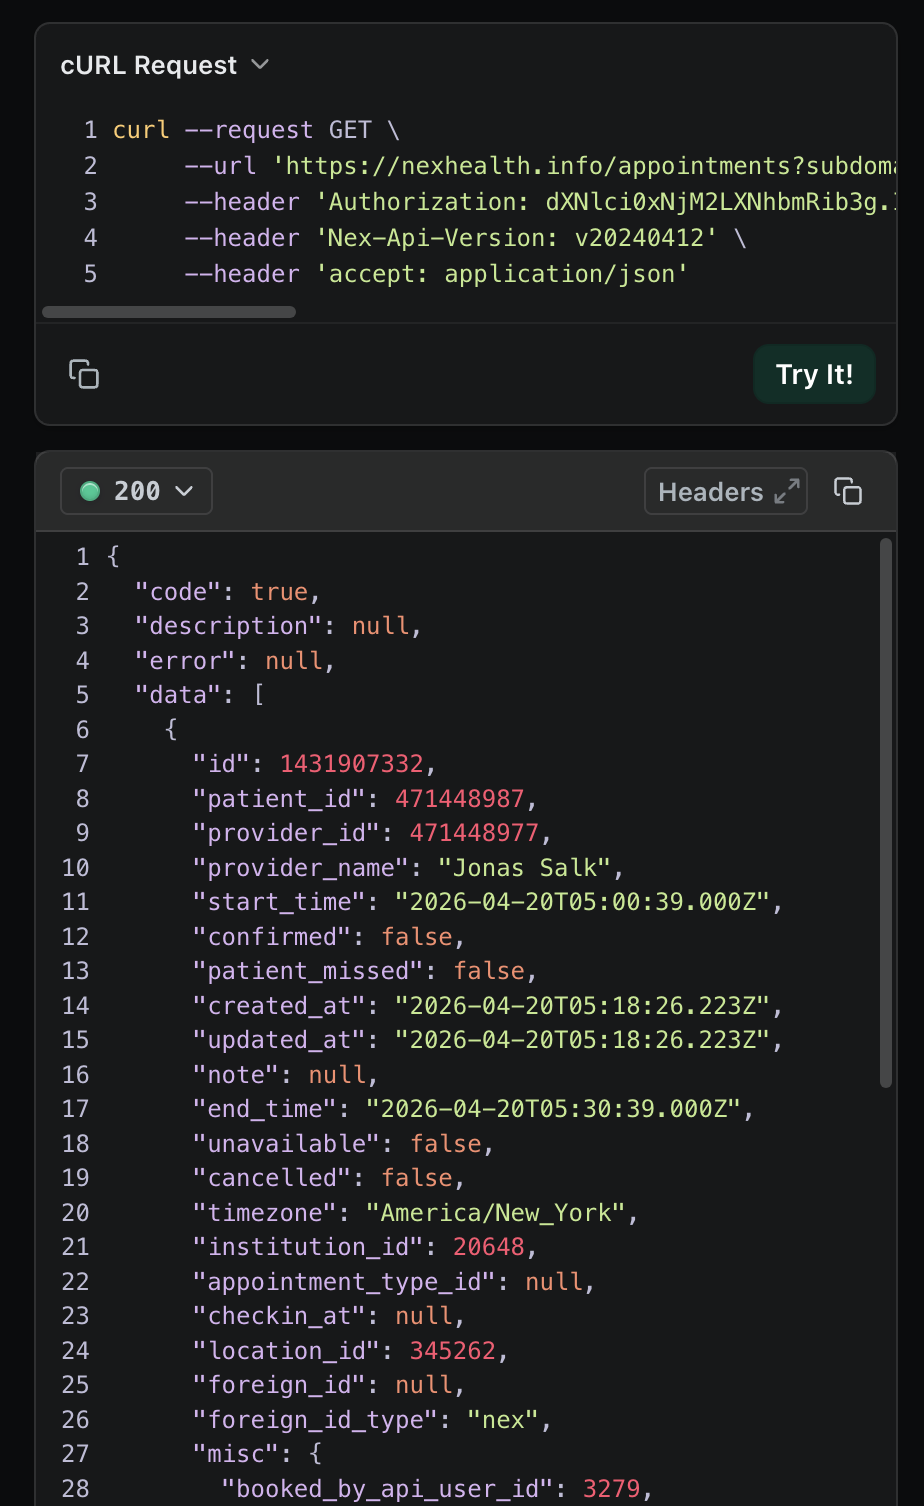
You have now successfully created an appointment through the API and confirmed its presence in the NexHealth backend!
Level 2 - First Production Appointment (30 minutes)
Level 1 is designed to give you a feel for booking an appointment through the NexHealth API; however, that appointment wasn’t inserted into a real EHR.
In this level, we will mimic a production environment and book an appointment into an actual practice management system using production API calls.
Note: For the most part, only the beginning steps for this level are different from the last one, so most of this section will focus on the parts that are different.
Prerequisites
Production Account
Walk through the following steps to upgrade your NexHealth account to be a production account (note that this will require a credit card):
- Visit this webpage.
- Click the "Upgrade now" button.
- Enter your payment information, then click the "Subscribe" button.
- On the new page, click the "Get started" button.
This will take us back to the developer portal in production mode. You will now be able to switch between development and production modes through clicking the "Test mode" toggle at the top right of the page.
Open Dental Instance
The Electronic Health Record system Open Dental has a free demo version available that we will use to simulate a real production EHR. This will allow us to go through the entire end to end process of setting up a connection to the EHR, creating an appointment through the NexHealth API, and verifying that the appointment has been inserted into the EHR successfully.
For Mac Users
On-prem EHRs (locally hosted) like Open Dental only run on Windows machines, so as part of this installation process, we recommend installing Parallels in order to simulate a Windows environment for this guide.
- Download an installer for the trial version of Parallels from this page.
- Run the Parallels installer and click “Install Parallels Desktop”.
- Once that has completed, run the Parallels Desktop application.
- Walk through the Parallels setup process and give Parallels any permissions that it asks for.
Once the Parallels setup process has been completed, you will see a Windows 11 version of your desktop environment.
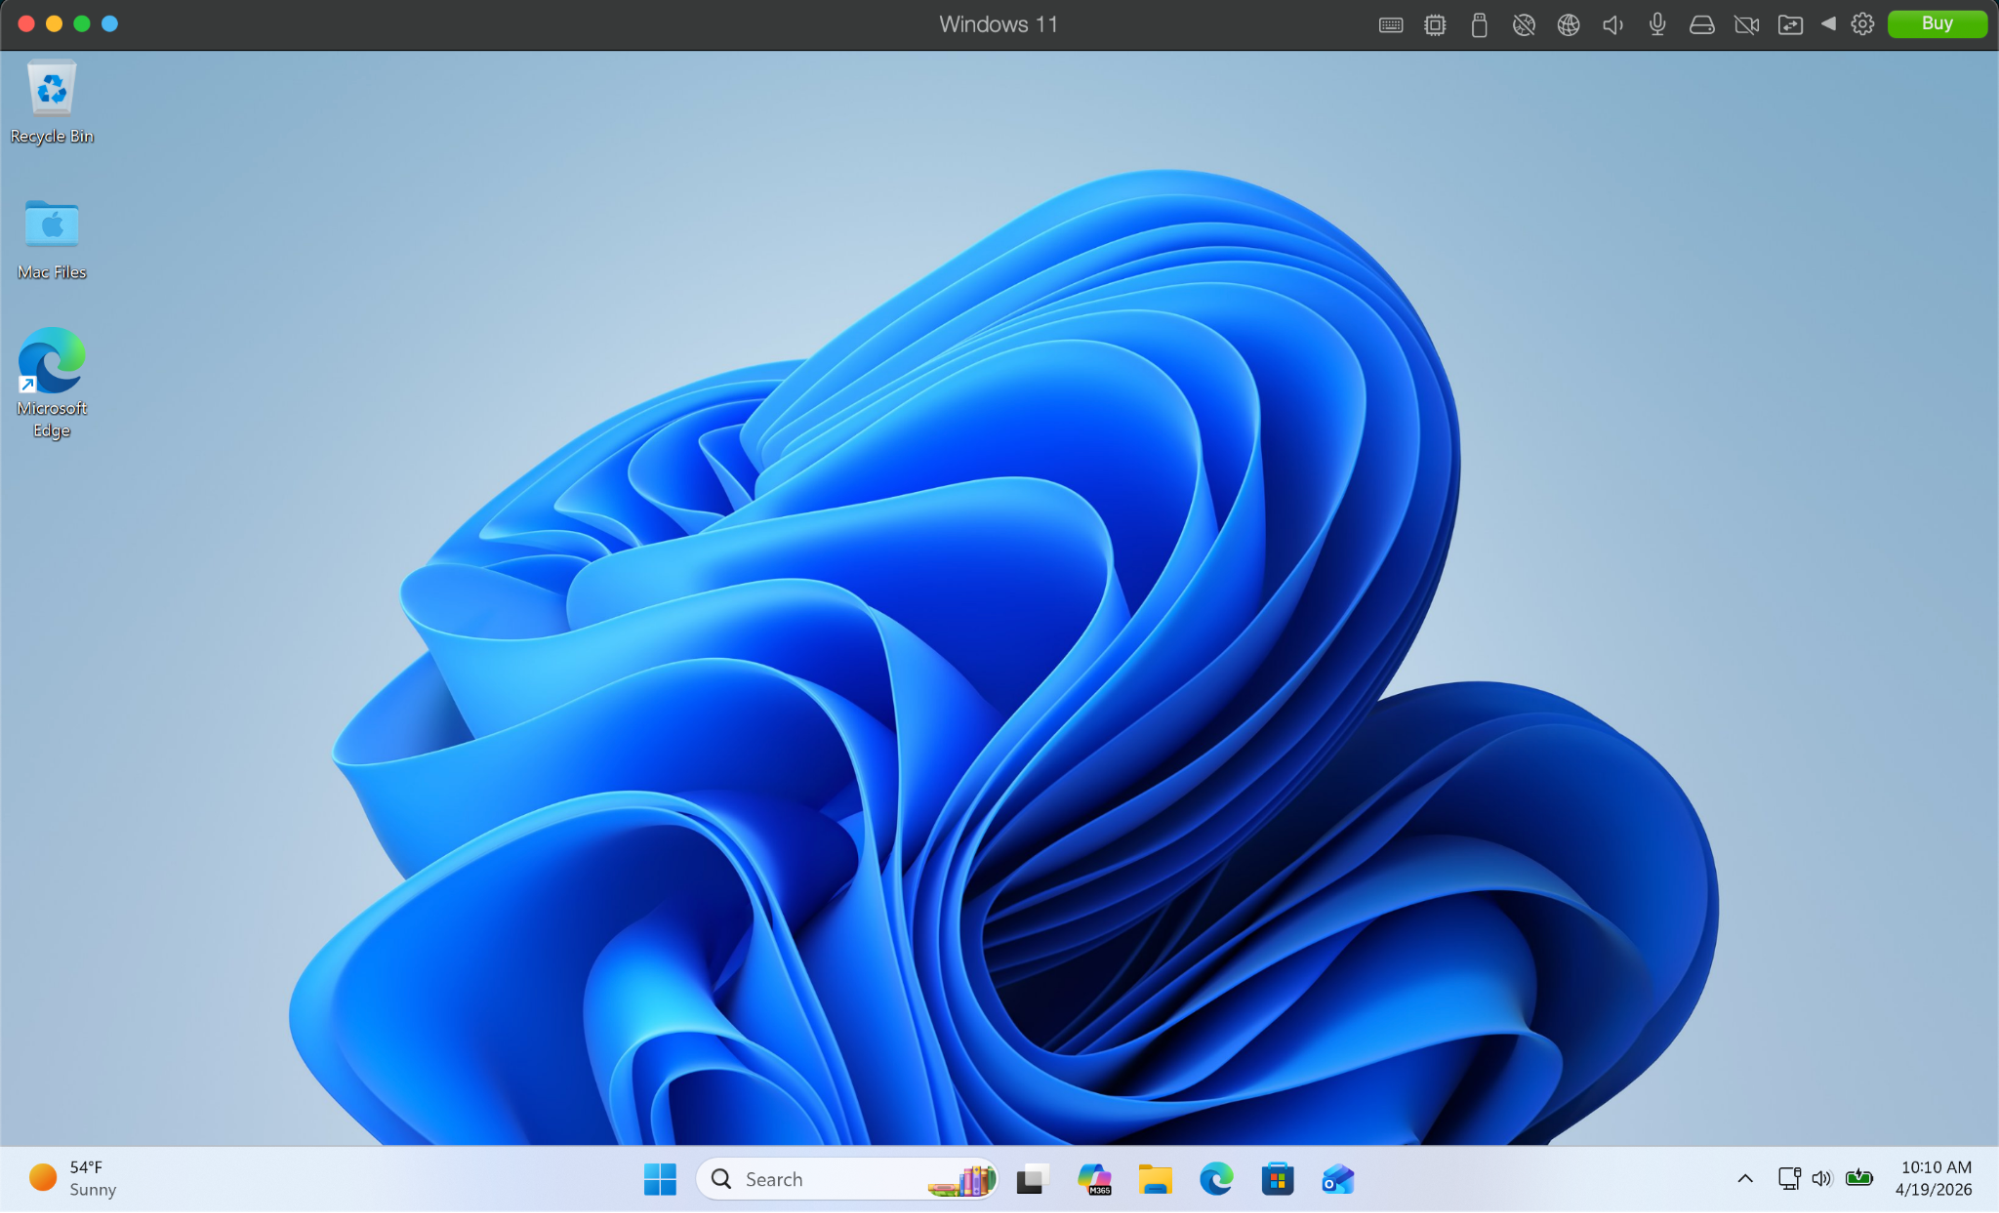
It is inside this Windows environment that the Open Dental installation will be performed, and we are almost finished getting it set up.
Because it is a virtual environment, it is missing a dependency that we expect real-world Windows instances would have. Our synchronizer will need this dependency later on, so we will install it now:
- In the Parallels Windows environment, open Microsoft Edge and walk through whatever steps it requires to get to allow you to perform web searches.
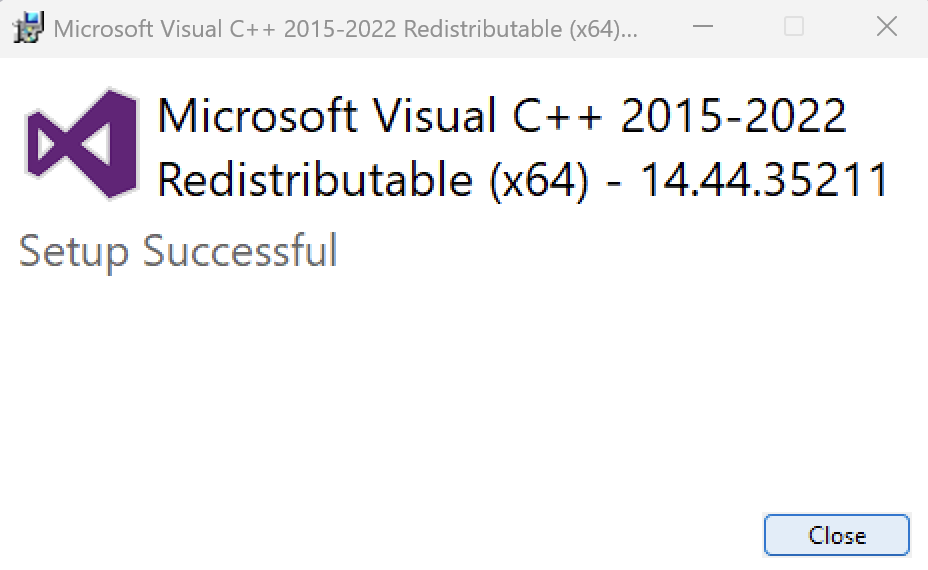
- Search the URL: https://aka.ms/vs/17/release/vc_redist.x64.exe
- Run the downloaded installer, and walk through each of its steps. Once it has completed, click the “Close” button.
Now the Parallels Windows environment should be fully set up and good to go!
In a Windows environment, perform the following steps to install Open Dental:
- Download to Open Dental installer using the link: https://opendental.com/TrialDownload-25-3-48.exe
- Run the installer.
- Give the installer any requested permissions.
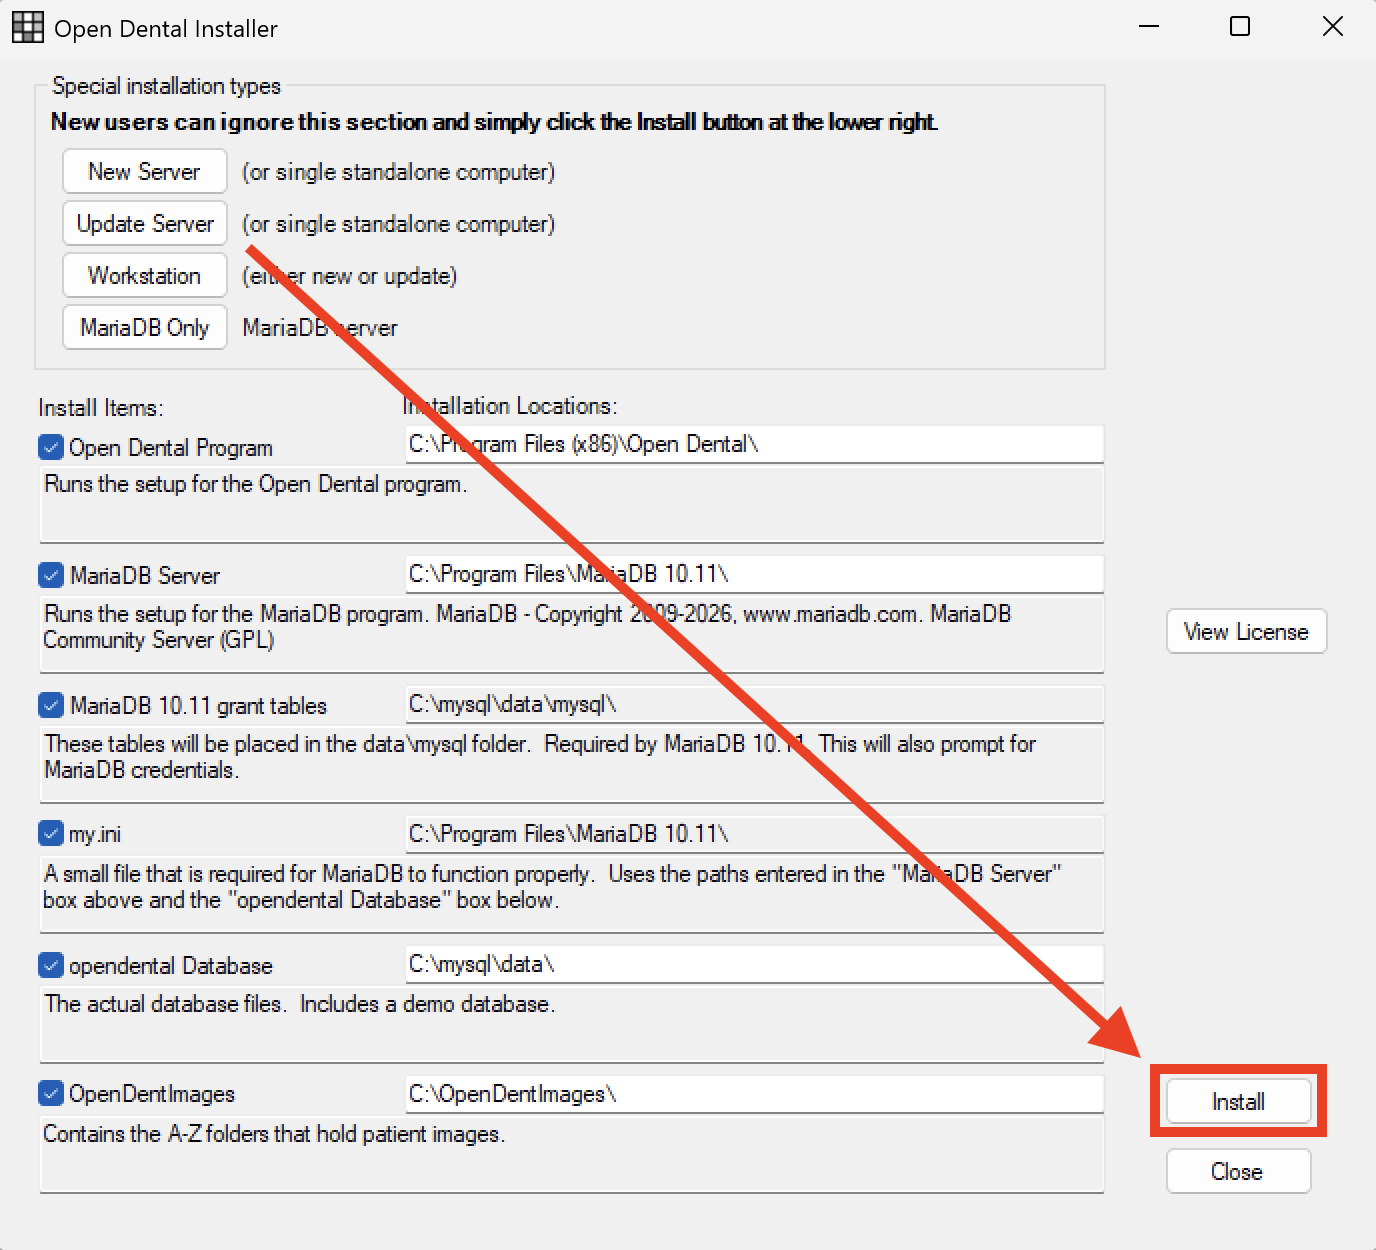
- Once you get to the page below, ignore all of the configuration settings and click the Install button.
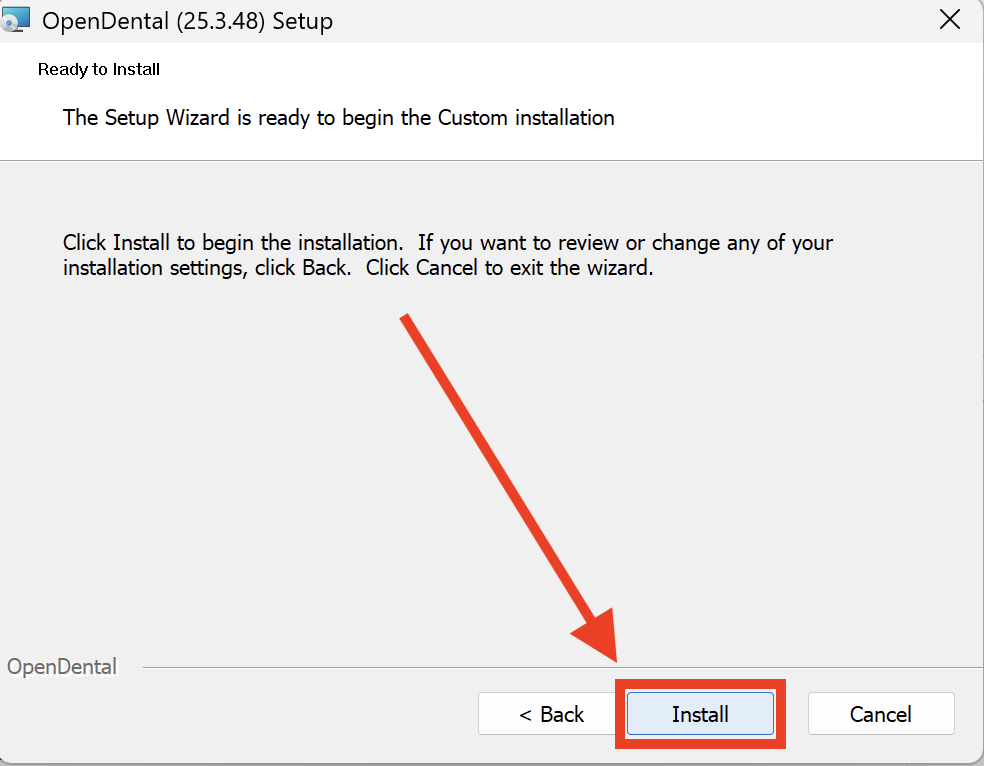
- On the popup, click “Next” through the setup wizard until you get to this page, then click “Install”.
- Click the “Finish” button.
- Once you get the “MySQL Credentials” pop-up, enter a password of your choice, then click “OK”. (NOTE: You will need the password later)
- Click “OK” again.
- Exit out of the original Open Dental Installer window.
- In the Windows search bar, search “Open Dental”, then click “Run as administrator”.

- Click “Yes”.
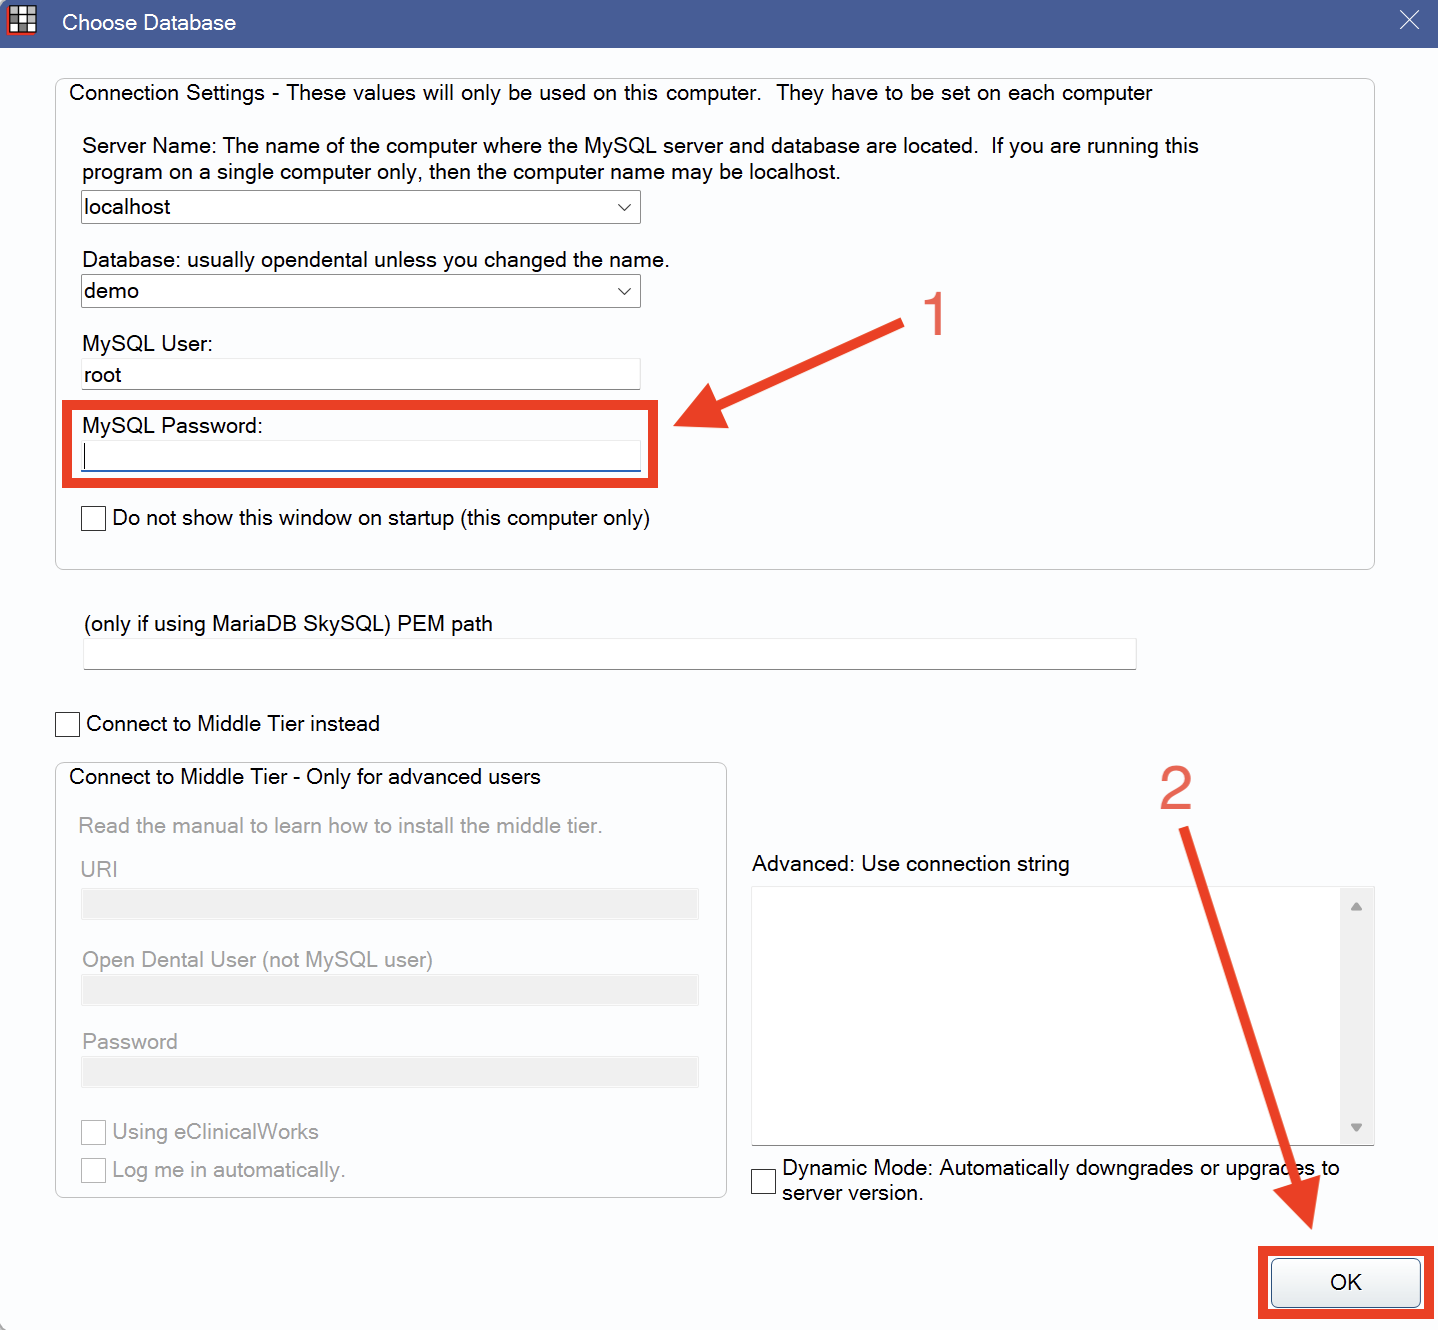
- Enter the DB password you created earlier, then click “OK”.
At this point, you should have a fully operational Open Dental demo instance that reflects what a real practice would be using.
2.1 - Create a production institution
Switch to production mode in the Developer Portal. This can be done by flipping the “Test mode” toggle at the top right of the page.
Note: If you see a purple banner at the top of the page, you are still in test mode.

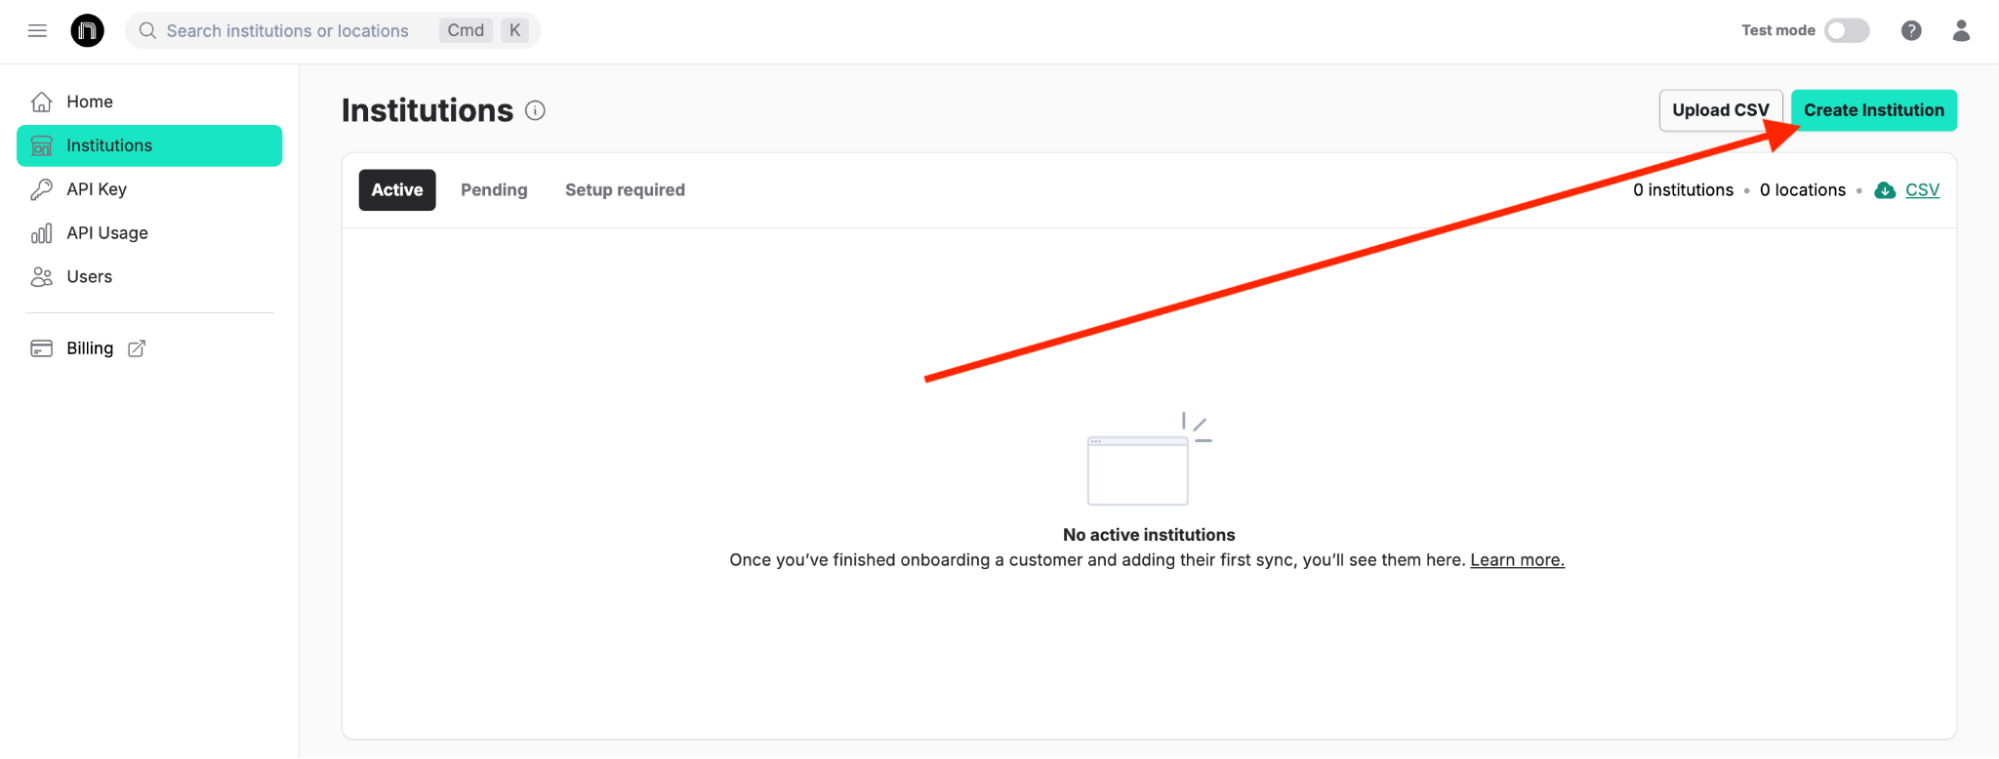
Once you have switched over to production mode, go to the institutions page.
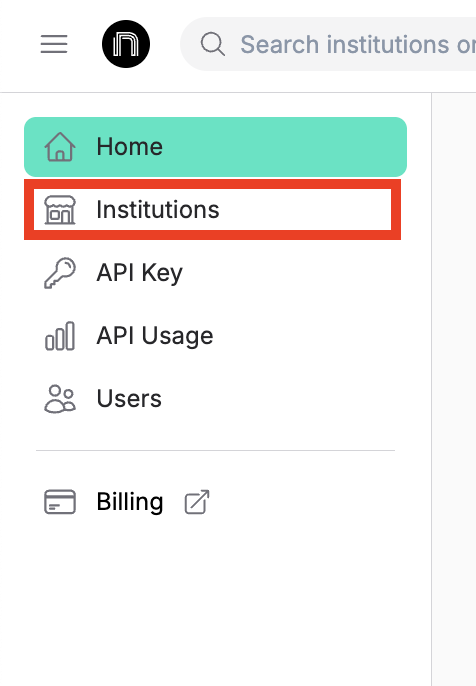
From here, click “Create Institution”.
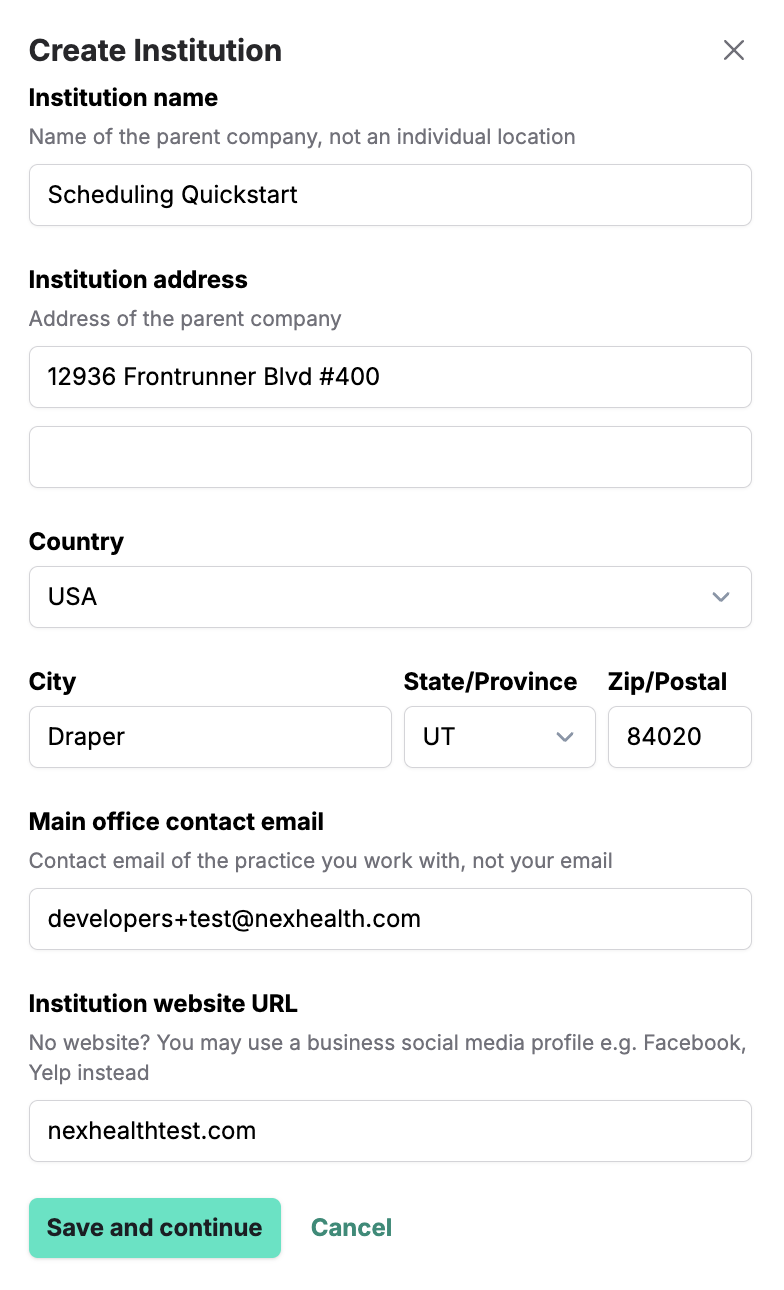
Fill in the information in the modal, then click “Save and continue”.
2.2 - Create an Open Dental datasource
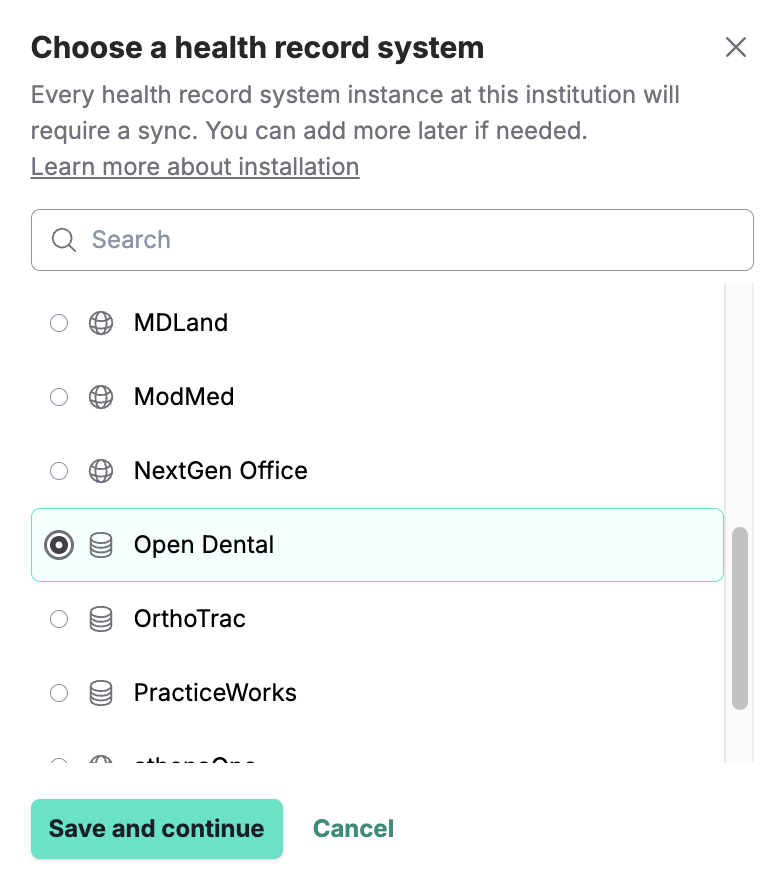
When you get the modal to select the health record system, select the option “Open Dental”, then click “Save and continue”.
At this point, you should be on a page that looks like this:
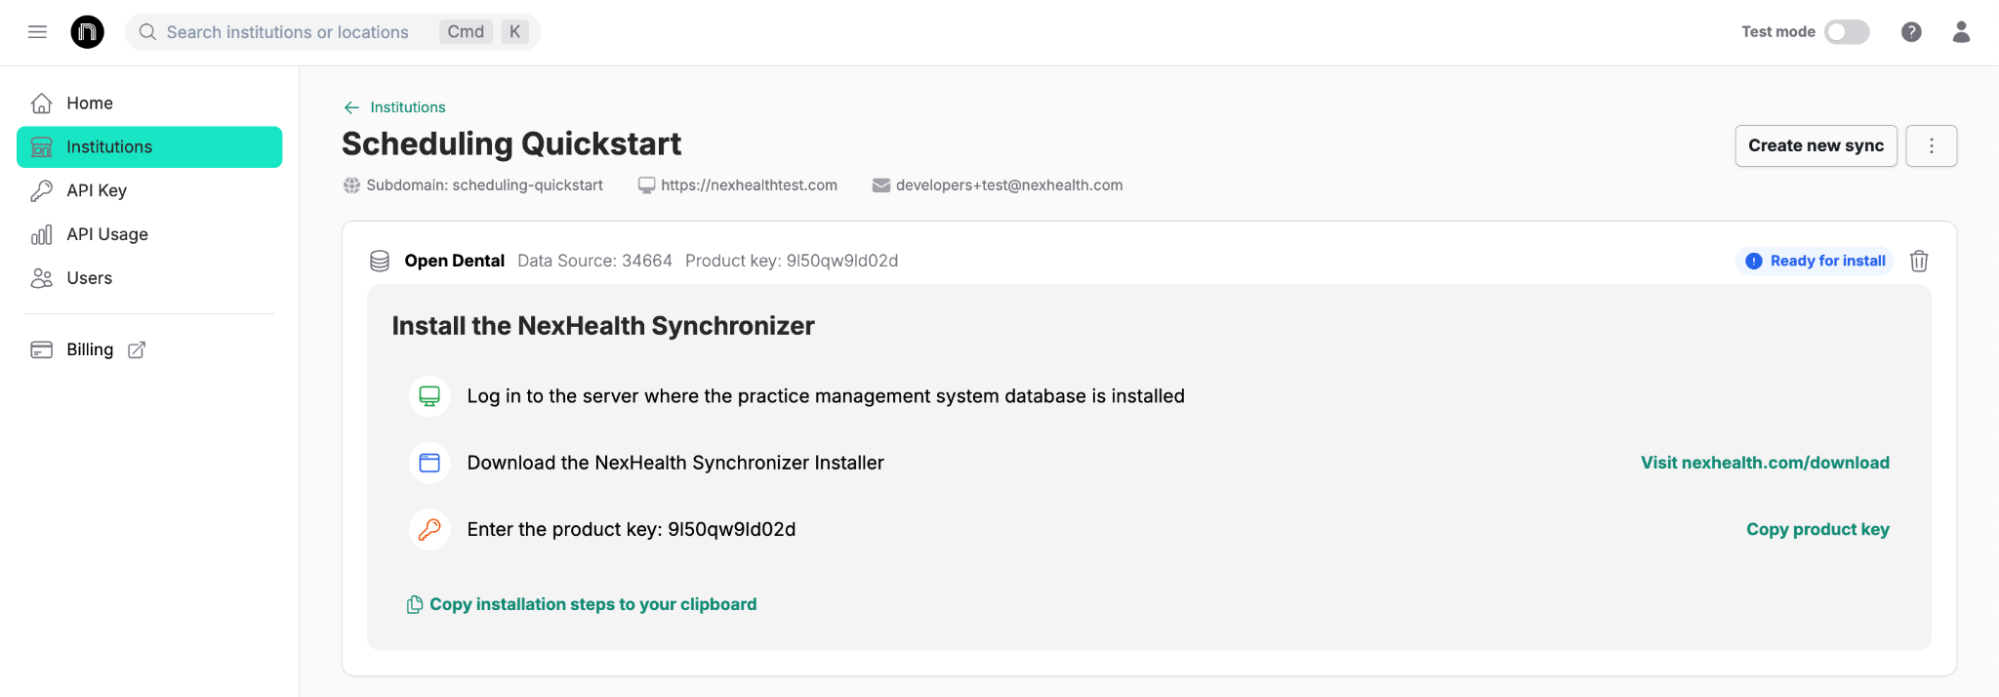
2.3 - Install the NexHealth Synchronizer
Now it is time to install the NexHealth synchronizer on the machine/environment that you’ve installed Open Dental on. This is how you will be able to connect to Open Dental through the NexHealth API.
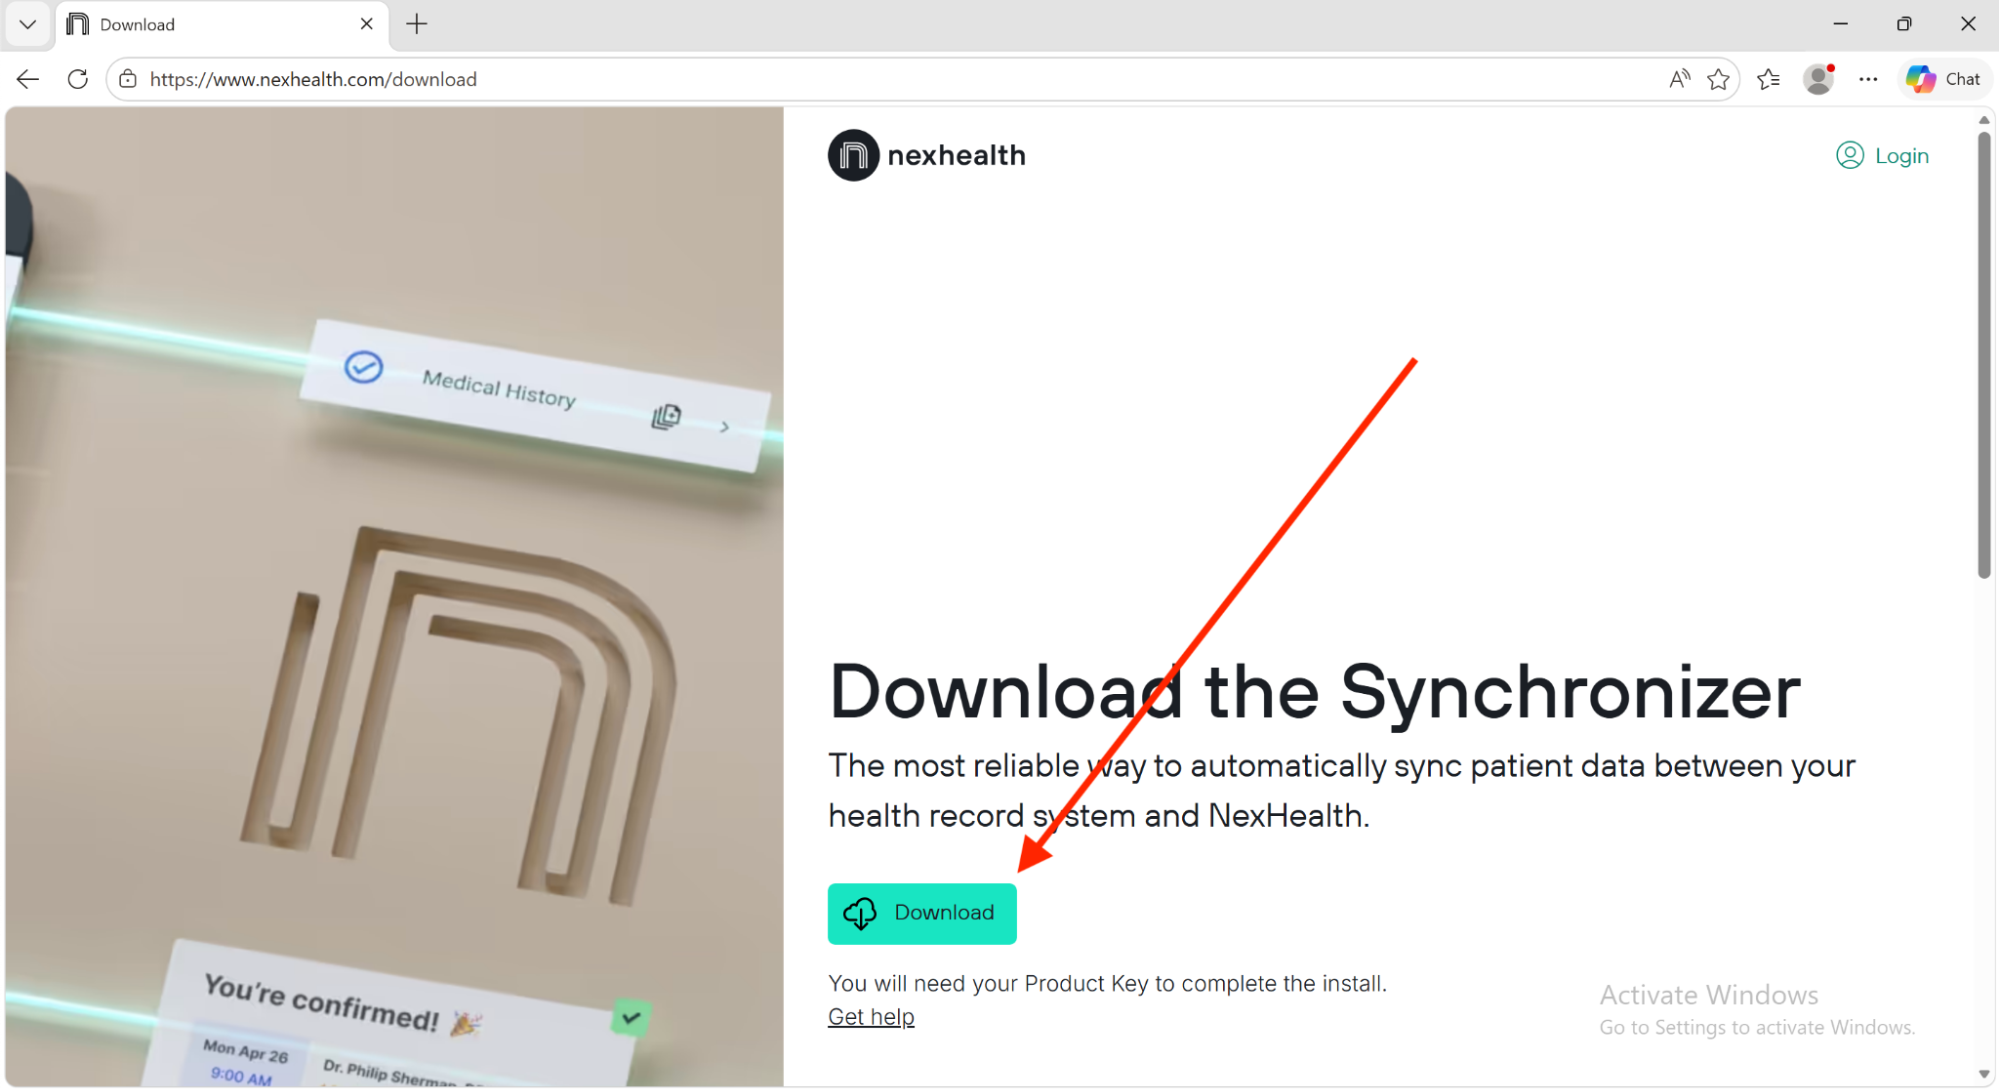
On the Open Dental server machine, visit the following webpage:
https://www.nexhealth.com/download
Next, click the “Download” button.
Once the synchronizer installer has finished downloading, run it as an administrator and give it permission to make changes to the machine.
Once that is complete, you should be met with this screen:
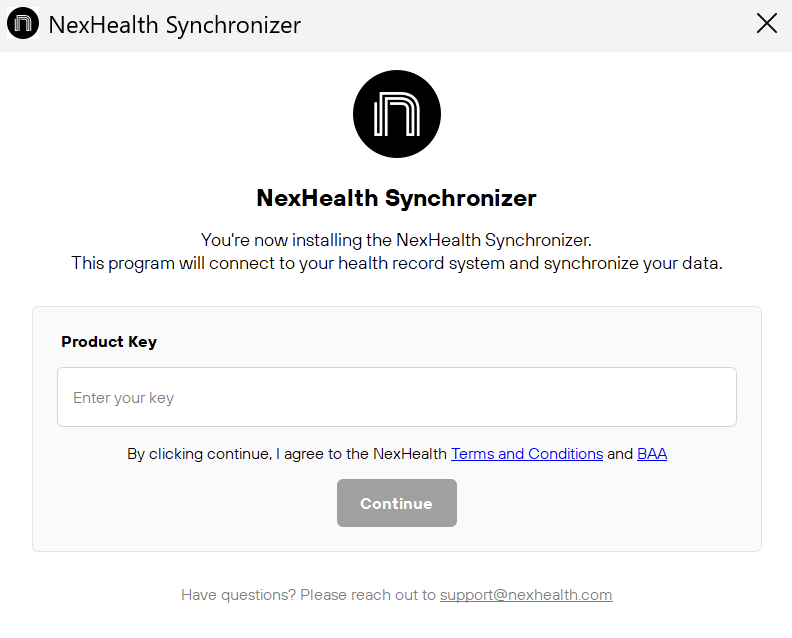
Go back to the developer portal, and grab the product key associated with this install.
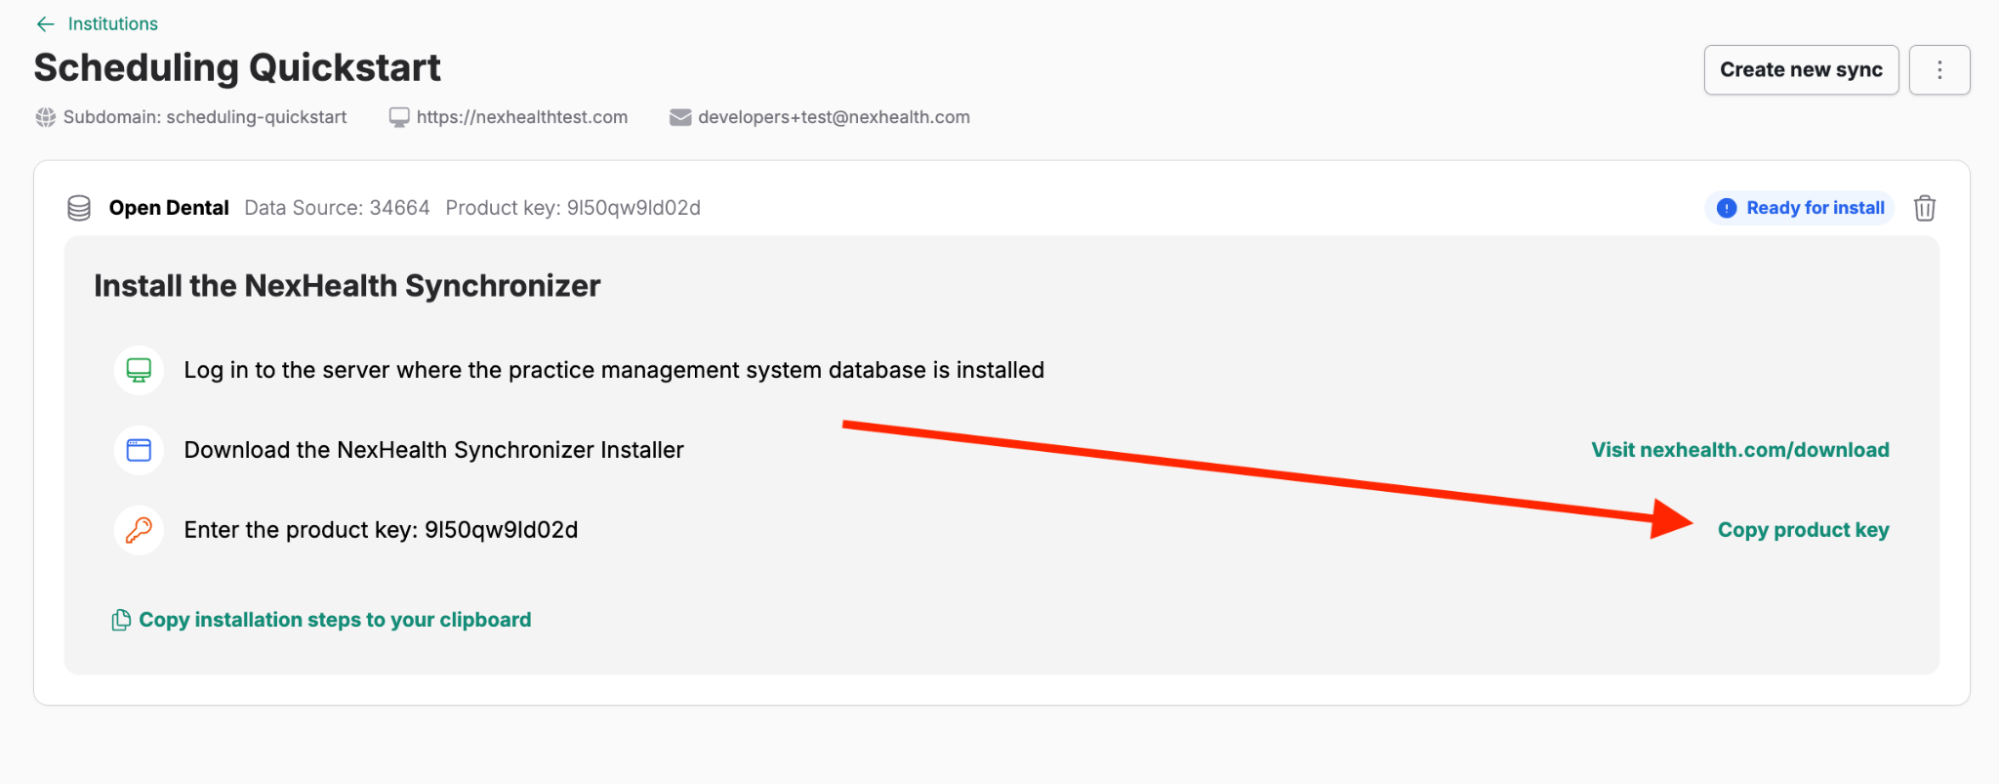
Paste the product key in the synchronizer installer and click continue. You should see the status of the installation change immediately in the developer portal.
Once the installation is fully completed, you will see a page like this:
The synchronizer installation has been completed!
2.4 - Switch to the production tab on the spreadsheet
Go back to the spreadsheet that you copied earlier, and switch to the “Level 2” tab (towards the bottom left of the page).
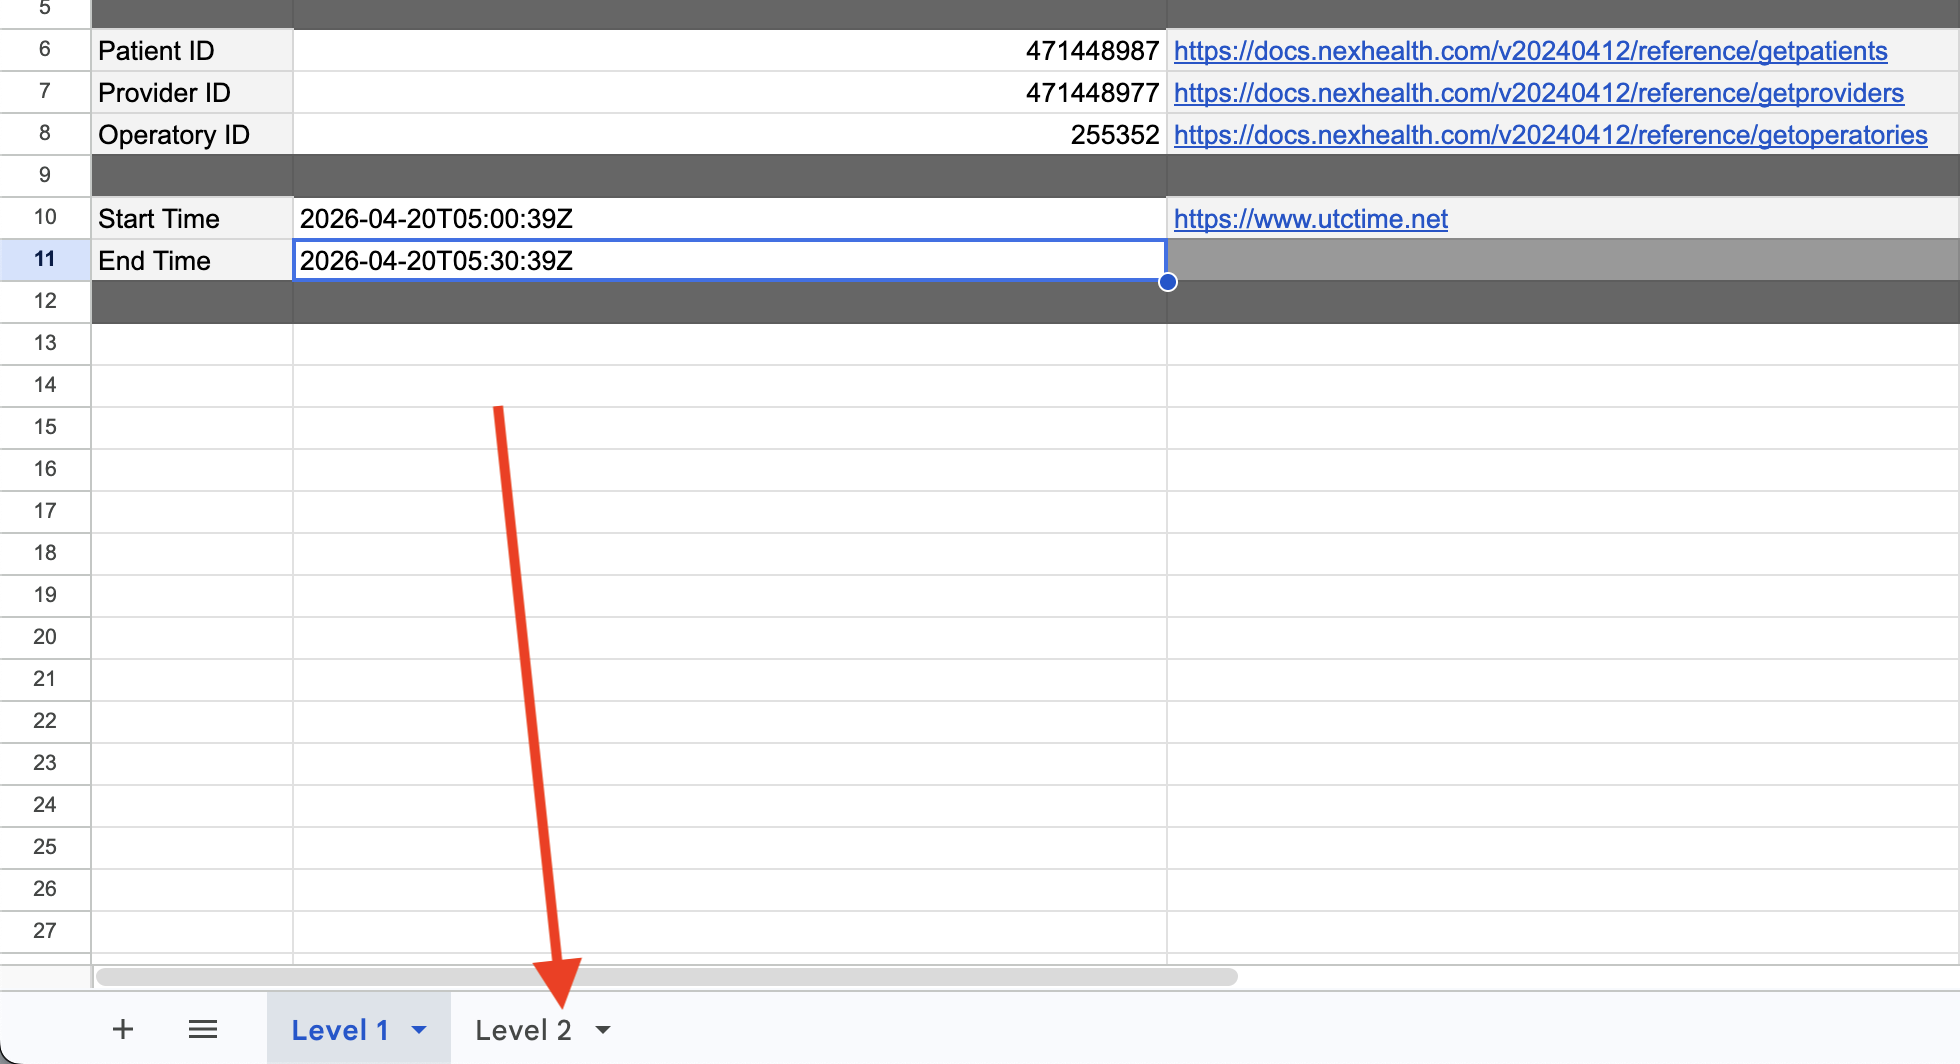
This will give us a clean environment to work in.
2.5 - Collect the production API key
This should be basically identical to the process for getting the sandbox production key. The only difference will be that you will be doing it in production mode.
Place the product key in the spreadsheet.
2.6 - Collect the production subdomain and location ID
Make your way back to the page for the institution that we just installed an Open Dental synchronizer for. Grab the Subdomain and location ID and place them in the spreadsheet.
2.7 - Repeat steps from Level 1
From this point on, you should be able to go back to the instructions from level 1 (starting at instruction 5), and repeat them here, as they are effectively identical.
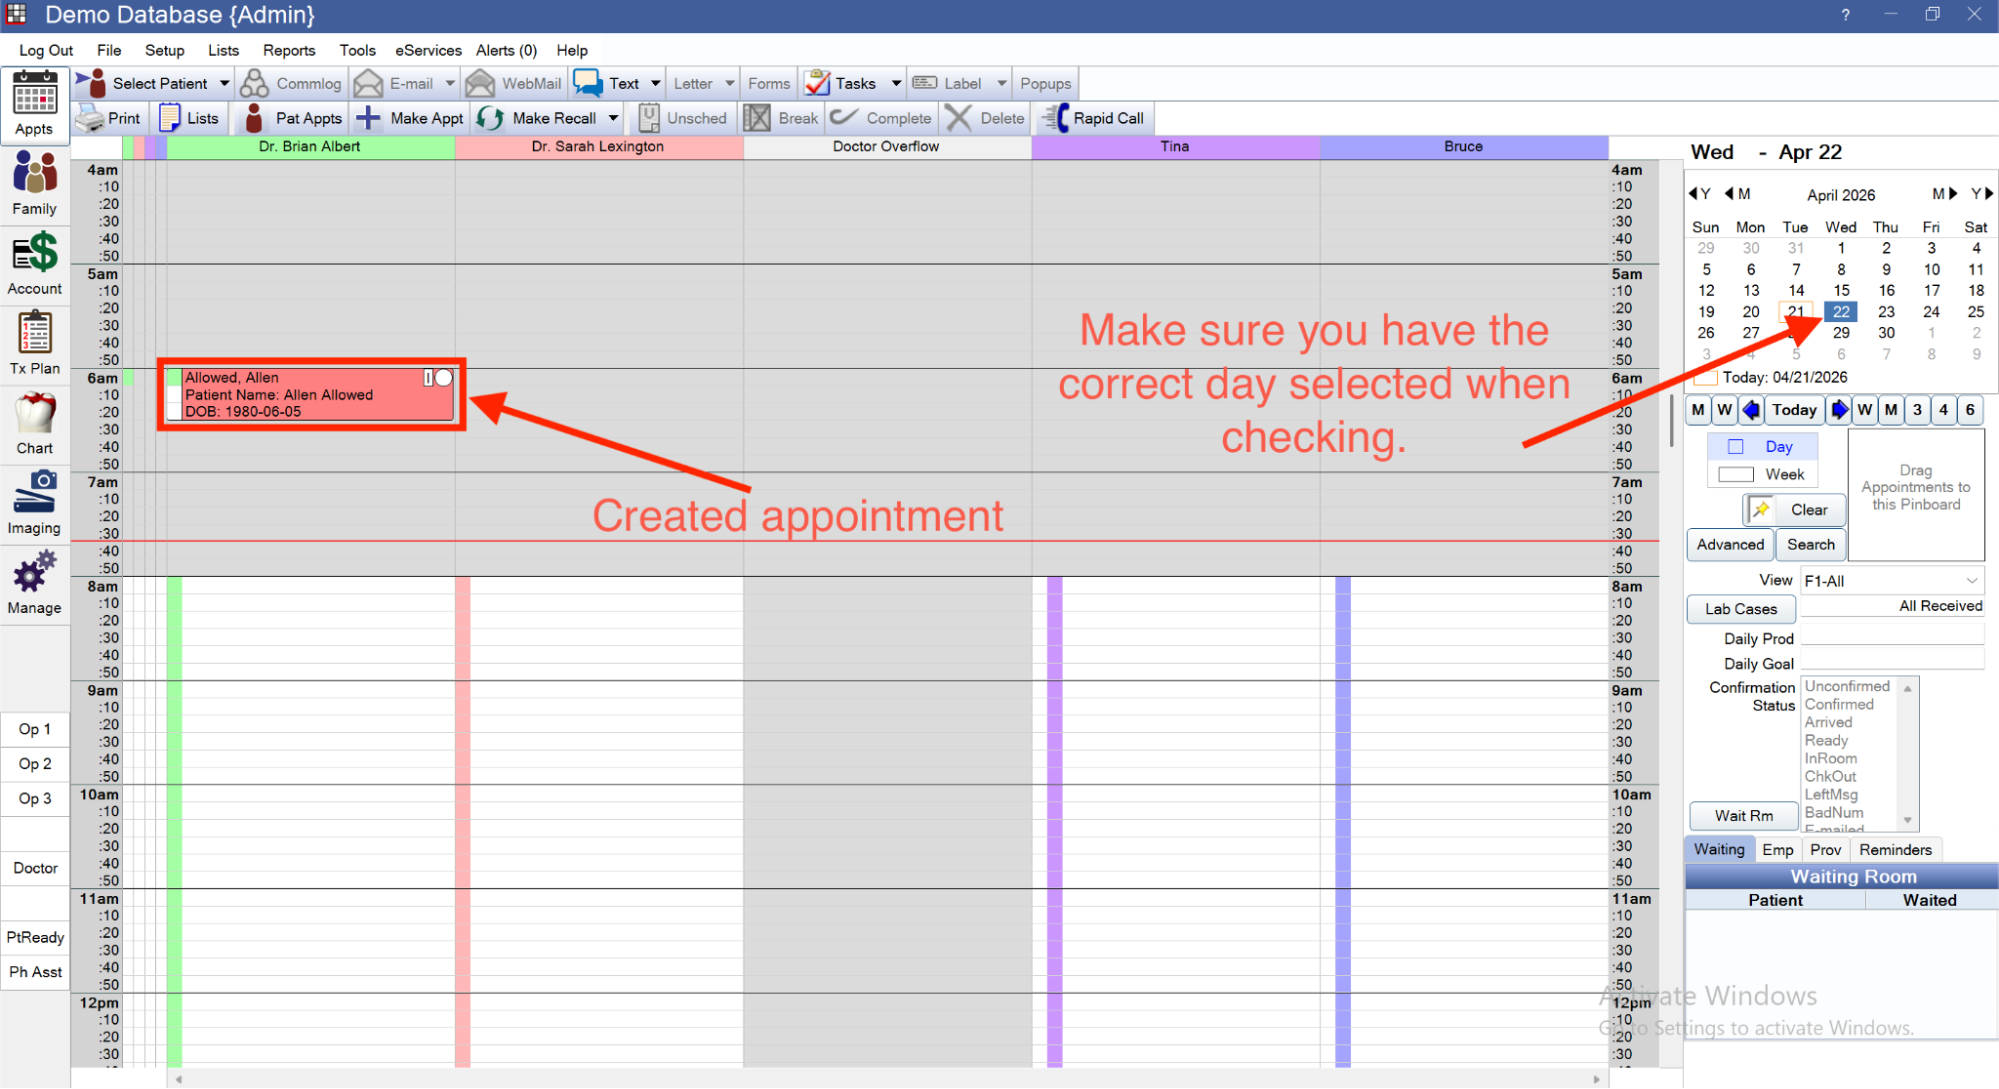
The only thing that is worth noting that is different from this point on is that when you get a test patient, make sure the test patient has both a first and last name (we recommend using the patient “Allen Allowed”).
Once you have completed all of the remaining steps to book an appointment for this location, you should see the appointment appear on the Open Dental schedule (within less than a minute).
Next Steps
Congratulations! If you have made it this far, you have successfully booked your first production appointment into a real EHR through the NexHealth API.
With that being said, there is much more that goes into building a complete and successful scheduling product than just creating appointments.
We recommend checking out our scheduling configuration guide next. That guide teaches you all of the fundamentals of the NexHealth data model as it relates to solving the real world problems that scheduling problems face.